
Tools
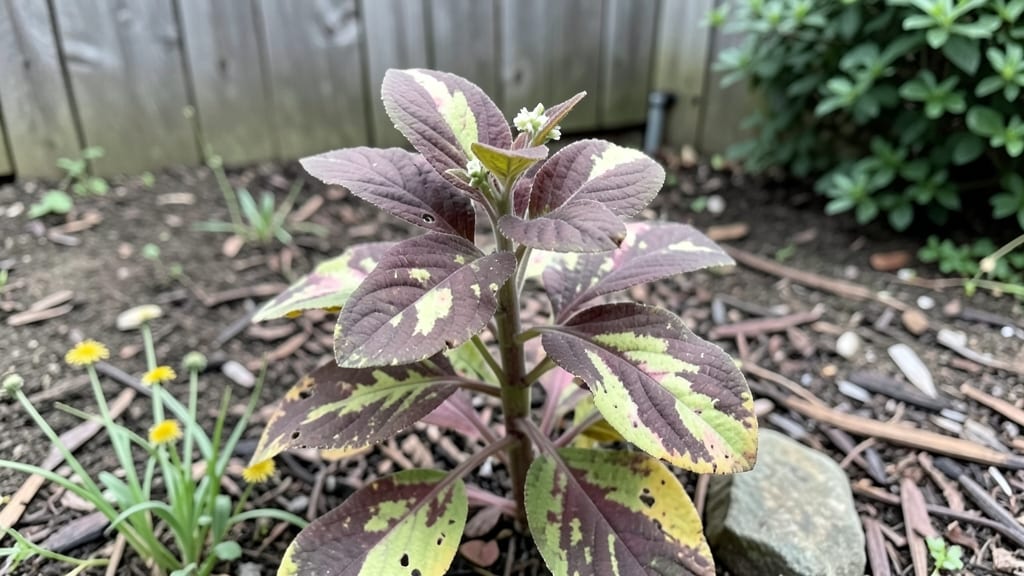
A coleus garden border transforms any yard into a living, ever-changing art piece—no green thumb required. I’ve used them to soften edges between my flower beds and lawn, and the results are shockingly lush without the fuss of annuals. The key?
Picking the right varieties and spacing them like a pro. My favorite mix includes Sunset Glow for fiery oranges, Black Dragon for deep contrast, and Wine & Roses for velvety texture—all thriving in partial shade where other plants would struggle.
You’ll need about 12-18 plants per 10-foot border, spaced 10-12 inches apart for that full, layered look. Coleus handles pruning like a champ—just snip back leggy stems in early summer to encourage bushier growth.
The best part? They’re perennial in zones 10-12, and even in colder climates, you can overwinter them indoors or treat them as annuals for a fresh start each spring.
By midsummer, your border will be a riot of jewel-toned foliage that outshines any flower bed. The contrast of their bold patterns against blooms like impatiens or calibrachoa makes them the unsung hero of seasonal color.
And when fall rolls around, you can extend their life by bringing pots indoors or cutting back to reveal next year’s potential.
Works for cottage gardens, modern minimalist spaces, or even urban balconies—just adjust the mix to your light conditions. Here’s how to make it happen without the overwhelm.
📚 In This Guide
- What you need
- Instructions
- Tips and common mistakes
- Wrapping up and next steps
What you need
- ● Coleus plants: 8–12 mature plants (or 24–36 young seedlings for fuller coverage). Choose varieties with contrasting colors (e.g., ‘Wizard’, ‘Black Dragon’, or ‘Electric Pink’) for visual impact.
- ● Potting soil: 10–15 gallons of high-quality, well-draining potting mix (e.g., Miracle-Gro Moisture Control or a peat-perlite blend). Avoid garden soil—it compacts too easily!
- ● Mulch: 2–3 bags of shredded bark, pine straw, or cocoa hulls (2–3 cubic feet) to retain moisture and suppress weeds.
- ● Slow-release fertilizer: 1–2 lbs of 10-10-10 or organic fertilizer (like Espoma Garden-Tone) to nourish roots over time.
- ○ Garden border edging (optional but recommended): Metal or plastic landscape edging (1–2 rolls, 6–8 inches tall) to keep coleus roots contained.
- ● OR natural stones (e.g., river rocks or flagstone) for a rustic look.
- ● Garden trowel: 1 medium-sized trowel for planting and soil amendments.
- ● Hand pruners: 1 pair for trimming leggy stems or shaping plants.
- ● Garden gloves: 1 pair to protect hands from soil and thorns (some coleus varieties have prickly leaves!).
- ● Watering can or hose with a gentle spray nozzle: For deep but even watering (avoid overhead sprinklers to prevent fungal issues).
- ● Measuring tape: 1 to mark spacing (plant coleus 8–12 inches apart for a dense border).
- ○ Garden kneeler/pad (optional): For comfort during planting.
- ● A sunny to partially shaded garden border (coleus thrives in 4–6 hours of morning sun; avoid harsh afternoon rays in hot climates).
- ● A well-drained area (coleus roots rot easily in soggy soil). Amend heavy clay soil with compost or sand.
- ● Access to water: Coleus wilt quickly—plan to water every 2–3 days (daily in extreme heat).
- ● Time commitment: Low-maintenance but requires initial setup (planting, mulching) and occasional pruning (every 4–6 weeks).
Instructions for creating a year-round coleus garden border
Here's how to design and install a striking, low-maintenance coleus border that thrives through all seasons.
Select and Prepare Your Planting Site
Choose a location with partial shade to full sun—coleus handles morning sun beautifully but wilts in intense afternoon rays. The ideal spot receives 4-6 hours of dappled sunlight daily, protecting the vibrant foliage from bleaching. Measure your border area and mark the planting line with stakes and string to ensure straight, clean edges.
Clear the area of weeds and loosen the soil to a depth of 6 inches using a garden fork. Amend the soil with 2-3 inches of compost to improve drainage and fertility. Coleus roots prefer well-draining soil, so avoid heavy clay without amendment. If your soil is particularly dense, mix in 1 part perlite to 3 parts soil to prevent root rot.
Choose and Plant Coleus Varieties for Layered Color
Select 4-6 coleus varieties with contrasting colors and growth habits to create visual depth. For a lush border, include 2-3 upright varieties (like 'Black Dragon' or 'Wizard Purple') as vertical accents, 2-3 bushy types (such as 'Pinky Winky' or 'Solomon Island') for mid-layer texture, and 1 trailing variety (like 'Rainbow Romance') to spill over edges. Space plants 12-18 inches apart, depending on mature size—closer for bushy types, farther for trailing varieties.
Dig holes twice as wide as the root ball but no deeper. Gently remove each plant from its container, loosen the roots if pot-bound, and place it in the hole so the top of the root ball sits level with the surrounding soil. Backfill with native soil, pressing lightly to eliminate air pockets. Water deeply immediately after planting to settle the soil and reduce transplant shock.
Mulch and Establish for Long-Term Vibrancy
Spread 2-3 inches of mulch (such as shredded bark or pine straw) over the soil surface, keeping it 2 inches away from plant stems to prevent rot. Mulch conserves moisture, regulates soil temperature, and suppresses weeds—critical for coleus, which thrives in consistent conditions. Avoid organic mulches like grass clippings, which can mat and smother roots.
Water newly planted coleus once daily for the first week, then taper to every other day once established. Check soil moisture by inserting your finger 1 inch deep—water when it feels dry. Coleus wilt quickly when thirsty, so monitor closely during hot spells. Fertilize lightly with a balanced, water-soluble fertilizer (10-10-10) at half-strength 2 weeks after planting, then repeat monthly during the growing season.
Prune and Maintain for Continuous Bloom
Pinch back the tips of new growth 4-6 weeks after planting to encourage bushier, fuller plants. Use clean, sharp pruners to snip just above a leaf node, and remove any yellow or damaged leaves immediately. Regular pruning prevents leggy growth and keeps the border dense and vibrant. Deadhead spent flowers (if any) to redirect energy into foliage production.
In late fall, before temperatures drop below 40°F, cut back plants by one-third to remove leggy growth and prepare for winter. Move tender varieties to a bright, cool indoor space (like a sunroom) if you live in a frost-prone zone. Coleus can overwinter indoors with 8-10 hours of light daily—rotate pots weekly to prevent lopsided growth. Resume outdoor planting in spring once nighttime temperatures stay above 50°F.
Refresh and Expand the Border Seasonally
Every 2-3 years, divide overcrowded coleus plants in early spring to rejuvenate growth. Dig up clumps, separate sections with 2-3 stems each, and replant along the border or share with fellow gardeners. This keeps your display vibrant and prevents decline from overcrowding. Replace any gaps with new varieties to refresh the color palette—coleus plants often outgrow their welcome in just a few seasons.
To extend the border’s lifespan, rotate out 20-30% of plants annually with fresh starts from nurseries. This introduces new colors and prevents disease buildup in the soil. In late winter, prune back all plants to 6 inches tall, fertilize lightly, and acclimate them to outdoor conditions before replanting. With this approach, your coleus border will remain a low-maintenance, high-impact feature year after year.
Tips & tricks for perfect coleus garden borders
Creating a stunning coleus border requires attention to detail that transforms good into spectacular. Here are the insights I've gathered from years of designing and maintaining these vibrant displays.
Sunlight Strategy: The 4-6 hours of dappled sunlight mentioned in Step 1 is non-negotiable for maintaining those vibrant foliage colors. I recommend installing temporary shade cloth (50% shade) during the hottest afternoon hours if your location receives intense midday sun. This prevents color fading while still allowing sufficient light for growth. Monitor your plants' color over the first two weeks—if leaves start losing their intensity, that's your cue to adjust shade coverage.
Soil Preparation Secret: When amending your soil with 2-3 inches of compost as specified in Step 1, I add a handful of worm castings to the mix. The microbial activity in worm castings enhances root development and nutrient uptake, giving your coleus plants a stronger foundation. This extra step makes a noticeable difference in plant vigor, especially during the establishment phase. For heavy clay soils, I also incorporate 1 part perlite to 3 parts soil as directed, but I go the extra mile by adding a handful of coarse sand to improve drainage further.
Plant Spacing Precision: While the instructions suggest spacing plants 12-18 inches apart in Step 2, I've found that precise spacing depends on your specific varieties. For bushy types like 'Pinky Winky', I space them at the closer end (12 inches) to create that lush, dense look. However, for more upright varieties like 'Black Dragon', I give them 16-18 inches of space to allow their vertical growth to truly shine without crowding. This careful spacing creates that professional, layered appearance you see in garden centers.
Winter Transition Timeline: The instructions mention moving tender varieties indoors before temperatures drop below 40°F in Step 4, but timing is everything. I start the indoor transition process when nighttime temperatures consistently fall below 50°F. This gradual approach helps plants acclimate to lower light conditions. Once indoors, I maintain the 8-10 hours of light requirement by supplementing with a grow light if natural light is insufficient. This careful transition ensures your coleus maintains its vigor through the winter months.
Pro Tips for Coleus Garden Border
- Creating a stunning coleus border requires attention to detail that transforms good into spectacular.
- Sunlight Strategy: The 4-6 hours of dappled sunlight mentioned in Step 1 is non-negotiable for maintaining those vibrant foliage colors.
- Soil Preparation Secret: When amending your soil with 2-3 inches of compost as specified in Step 1, I add a handful of worm castings to the mix.
Frequently asked questions
Can coleus survive winter in a garden border?
Most coleus varieties are tender perennials and won’t survive frost. In colder climates (below 25°F/-4°C), treat them as annuals or dig up pots and overwinter indoors. In milder zones, mulch heavily and provide winter protection with frost cloth. Pro tip: Choose cold-hardy varieties like Coleus blumei ‘Winter Rose’ for extended seasonal interest!
When is the best time to plant coleus in a border?
Plant coleus after the last frost when soil temperatures reach at least 60°F (15°C). For most regions, this means late spring (May-June). If starting from seeds, sow indoors 8-10 weeks before the last frost. Pro tip: Space plants 12-18 inches apart to allow airflow and prevent disease.
How often should I water coleus in a border?
Coleus thrives with consistent moisture—water deeply 1-2 times per week, depending on your climate. Let the top inch of soil dry out between waterings to avoid root rot. Mulching (2-3 inches) retains moisture and reduces evaporation. Pro tip: Early morning watering prevents fungal issues and keeps foliage vibrant.
What are some low-maintenance alternatives to coleus for garden borders?
If coleus seems too fussy, try these hardy alternatives:
- Heuchera (Coral Bells) – Drought-tolerant with stunning foliage.
- Liriope (Monkey Grass) – Grass-like texture, great for edges.
- Sedum (Stonecrop) – Succulent, thrives in heat and poor soil.
- Ferns (e.g., Dryopteris) – Lush, evergreen options for shade.
Why are my coleus leaves turning yellow or brown?
Yellowing leaves often signal overwatering or poor drainage. Brown edges? It’s usually underwatering or too much sun. Check for pests like spider mites (tiny webs on undersides) or aphids. Fix it: Adjust watering, improve airflow, and treat pests with neem oil. Pro tip: Prune damaged leaves to encourage new growth.
How can I keep coleus looking neat in a border?
Regular pruning (every 4-6 weeks) encourages bushier growth. Pinch back leggy stems to maintain shape. For a tidy edge, trim with sharp shears or a hedge trimmer. Pro tip: Deadhead spent flowers to redirect energy to foliage!
Wrapping up and next steps
Transforming your garden border with coleus is a rewarding way to add year-round color and texture with minimal effort! 🌿 Whether you’re a seasoned gardener or just starting, these versatile plants deliver bold hues and lush foliage that brighten any space.
Now that you’re armed with the right tips—from soil prep to winter care—take the plunge and create your dream border!
Ready to get started? Sketch your design, gather your supplies, and plant with confidence. Your garden’s next masterpiece is just a shovel’s toss away! 🌸