
Tools
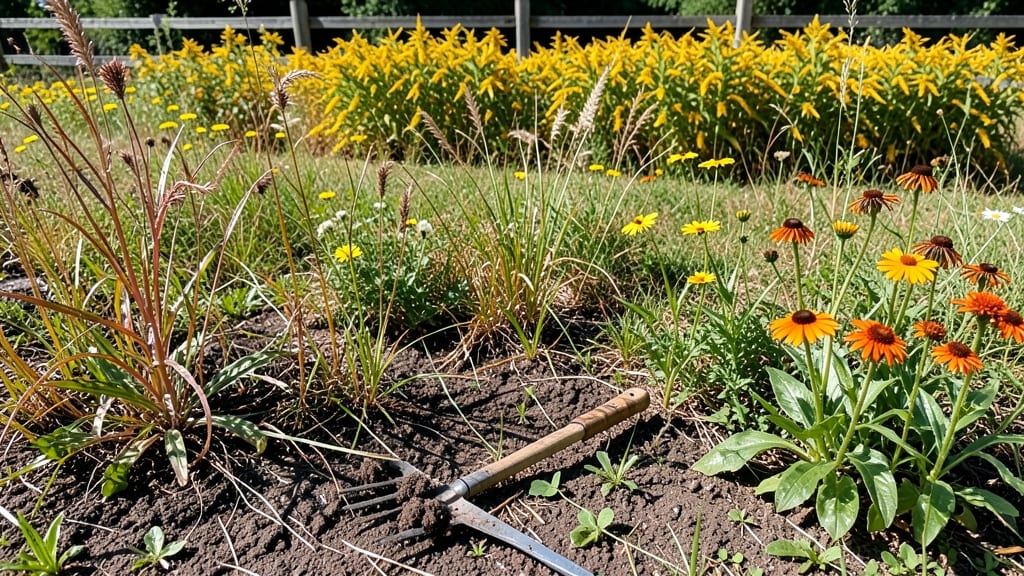
Willy nilly gardening isn't about rigid rows or perfect symmetry—it's where the garden grows with you, not for some Pinterest-perfect plan. 🌿 I stumbled onto this approach after killing my third structured herb garden in a row, and honestly, the freedom feels like a breath of fresh air.
The rules? There are none—just let plants mingle naturally, fill gaps as you notice them, and watch your space evolve into something uniquely yours.
You don’t need fancy tools or a master plan—just a few basics: some containers or open ground, a mix of sun-loving and shade-tolerant plants, and a willingness to let things unfold.
Succulents, ornamental grasses, and self-seeding annuals like cosmos or bachelor’s buttons thrive in this style because they’re happy to spread and fill in. Even my black thumb can’t kill these—once planted, they just keep going.
The payoff? A garden that feels alive, not like a chore. No more stressing over dead zones or weeding between perfect lines—just lush layers that change with the seasons.
One year you’ll have a drift of purple salvia, the next a tangle of climbing roses and clematis, all growing exactly where they please. It’s the kind of garden that makes neighbors stop and ask, “How’d you do that?”
Works in small pots on a balcony or sprawling across a backyard—just start where you are. The only rule is to enjoy the process, not the product. Let’s make your garden as unpredictable as it is beautiful.
📚 In This Guide
- What you need
- Instructions
- Tips and common mistakes
- Wrapping up and next steps
What you need
- ● Containers: Mix of sizes (small pots for herbs, medium for veggies, large bins for shrubs or trees). Aim for at least 5–10 containers with drainage holes.
- ● Potting Soil: High-quality, well-draining mix (e.g., Miracle-Gro Potting Mix or organic blends). 1–2 bags per project depending on container sizes.
- ● Seeds/Seedlings: Fast-growing, low-maintenance picks like sunflowers, nasturtiums, cherry tomatoes, or succulents. 5–15 plants for variety.
- ● Fertilizer: Slow-release granules (e.g., Osmocote) or liquid feed (e.g., fish emulsion) for nutrient boosts.
- ● Watering Can or Hose: With a gentle spray nozzle for precision.
- ● Pruners: Sharp bypass pruners for trimming and shaping.
- ● Garden Gloves: A pair to protect your hands from thorns or soil.
- ● Mulch: Shredded bark or straw to retain moisture and suppress weeds.
- ● Decorative stones or pebbles for a whimsical touch.
- ● Paint or chalk to label plants (creative flair!).
- ● Vertical planters or trellises for climbing plants.
- ● Solar-powered lights for evening ambiance.
- ● Unusual containers (old boots, teacups, or pallets) for eclectic charm.
Instructions for creating your Willy Nilly garden
This is your chance to let creativity bloom—literally! With a few simple steps, you'll craft a garden that feels alive with texture, color, and movement.
🌱 Step 1: Choose Your Base Layer
Start with a foundation that works year-round. I like to use a mix of perennials that return every season, like hostas or sedum, because they need minimal care. These plants create a lush, evergreen base that other elements can play off. For a 4-person garden, I typically plant 6-8 perennials spaced 12-18 inches apart—enough to fill the space without overcrowding.
Dig holes just deep enough to accommodate the root balls, then gently press the soil around them to remove air pockets. Water deeply right after planting to help the roots settle. Here’s the thing—don’t stress about perfect spacing. Willy Nilly gardens thrive on a little chaos, so let the plants guide you.
🌿 Step 2: Add Mid-Height Plants for Drama
Now it’s time to bring in the stars of the show: ornamental grasses, shrubs, or flowering perennials like coneflowers or black-eyed Susans. These plants add height and movement, which is what makes Willy Nilly gardens so dynamic. For your 4-person garden, aim for 4-6 mid-height plants, placing them 18-24 inches apart to create a natural, layered look.
Dig holes slightly wider than the root balls to encourage outward growth. Mix in a handful of compost (if you have it) to give these plants a nutrient boost. Water them in well, but don’t overdo it—these plants are tough and can handle a little neglect. The key here is to let them grow freely; prune only if they start to look too crowded or leggy.
✂️ Step 3: Top It Off With Whimsical Accents
This is where the fun begins! Add unexpected elements like colorful annuals, whimsical garden art, or even repurposed household items (think old teacups or vintage tools). For a 4-person garden, I like to sprinkle in 8-10 annuals like marigolds, impatiens, or sweet alyssum for pops of color. These plants are easy to swap out seasonally, so you can keep the garden feeling fresh and lively.
Place these accents thoughtfully but not too rigidly. Let some spill over edges or lean against rocks—this is Willy Nilly gardening, after all! If you’re using containers, group them in odd numbers (like 3 or 5) for a natural, organic feel. Water lightly after planting, but don’t worry if a few leaves wilt at first. These plants are resilient and will bounce back.
💧 Step 4: Mulch and Maintain with Minimal Effort
Spread a 2-3 inch layer of mulch over the soil to suppress weeds, retain moisture, and keep the garden looking tidy. I use shredded bark or straw because they break down slowly and won’t smother the plants. This step is non-negotiable—mulch is the secret to low-maintenance gardening. It also adds a polished finish while keeping the soil cool and moist.
Water deeply once a week, or more often if your area is particularly hot or dry. Check the soil with your finger—if the top 1-2 inches feel dry, it’s time to water. Avoid overhead watering if possible; instead, water at the base of the plants to keep foliage dry and reduce the risk of fungal diseases. Once established, your Willy Nilly garden will handle drought surprisingly well.
☀️ Step 5: Let It Grow Wild (With Guided Chaos)
Step back and observe. Willy Nilly gardens are all about letting nature take its course while gently guiding the process. Prune only when necessary—maybe trim back overgrown annuals in late summer or deadhead spent blooms to encourage more flowers. The goal is to create a garden that feels alive and unstructured, so don’t fuss over perfection.
Every few months, take a walk around your garden and notice what’s thriving and what’s not. Swap out underperformers for new plants, or move them to a different spot if they’re struggling. This garden is yours to experiment with, so have fun with it! The more you let it evolve naturally, the more magical it becomes.
Tips & tricks for perfect Willy Nilly gardening
Here's what nobody tells you about creating a garden that feels alive and effortless!
Layering Like a Pro: In Step 1, when planting your 6-8 perennials for that lush base, consider their mature sizes—not just their current ones. Hostas might stay compact, but sedum can spread aggressively. I like to place taller perennials toward the back and shorter ones toward the front, even if it feels slightly unbalanced at first. This creates that magical layered look Willy Nilly gardens are famous for!
Compost Hack: Don't have compost? No problem! In Step 2, you can substitute a handful of well-aged manure or even coffee grounds (from your morning brew!) for that nutrient boost. Just mix it into the bottom of the planting hole—your mid-height plants will love the extra organic matter. The key is to work it into the native soil rather than piling it on top.
Whimsical Accent Strategy: For Step 3, think beyond just plants! I love adding unexpected elements like vintage garden tools, colorful pottery, or even repurposed children's toys. Place these accents where they'll catch the eye—near pathways or seating areas. The goal is to create visual interest without overcrowding. Remember, odd numbers (3 or 5 items) always look more natural than even groupings!
Mulch Magic: That 2-3 inch layer of mulch in Step 4 is your secret weapon for low-maintenance gardening. For extra weed suppression, I like to apply a second layer in early spring. And here's a pro tip: save your coffee grounds from brewing! They make excellent mulch too—they add nitrogen to the soil as they break down. Just don't pile them too thickly or they'll mat down and prevent water from reaching the soil.
Pro Tips for Willy Nilly Gardening
- Here's what nobody tells you about creating a garden that feels alive and effortless!
- Layering Like a Pro: In Step 1, when planting your 6-8 perennials for that lush base, consider their mature sizes—not just their current ones.
- Compost Hack: Don't have compost?
Frequently asked questions
Got questions about Willy Nilly Gardening? You’re not alone!
Here are some of the most common queries—plus quick, no-fuss answers to keep your whimsical layers thriving.
What’s the best time of year to start Willy Nilly Gardening?
You can start anytime—that’s the beauty of it! Cold climates? Begin in early spring. Warm zones? Plant in fall or winter. Just check your local frost dates and layer plants with varying hardiness zones. Pro tip: Use a mini greenhouse for tender plants if you’re unsure!
Is Willy Nilly Gardening expensive?
Not at all! Repurpose containers (buckets, crates, old boots!), raid your recycling bin for trellises, and raid your kitchen for compost. Start small with a single layer or “found” plants from friends or free community plant swaps. Budget hack: Mulch with free yard waste or shredded paper!
How do I keep pests away without harsh chemicals?
Willy Nilly layers hate pests naturally! Mix in pest-repelling plants like marigolds, basil, or chives. Use neem oil or a spray of water + dish soap for stubborn critters. Bonus: Ladybugs and lacewings are your new best friends—invite them with a shallow water dish!
Can I do Willy Nilly Gardening in apartments or small spaces?
Balconies, windowsills, and even hanging pockets work. Use vertical layers (herbs, strawberries, lettuce) or stack containers. Space-saving tip: Try a tower garden or repurpose a ladder for a “living staircase” of edibles!
What if my plants freeze in winter?
No stress! Choose cold-hardy plants (kale, spinach, garlic) for winter layers. Move tender pots to a sheltered spot or wrap them in bubble wrap or old blankets. Winter hack: Use straw or leaves as mulch to insulate roots!
Still stumped?
Drop your question in the comments—we’ve got answers for every layer of your gardening adventure!
Wrapping up and next steps
Willy Nilly Gardening isn’t just about embracing spontaneity—it’s about creating a living, evolving space that thrives on creativity and adaptability. Whether you’re layering textures, mixing heights, or blending unexpected plants, the key is to start small, experiment fearlessly, and let your garden grow into something uniquely you.
Ready to dive in? Grab a few tools, sketch a rough plan (or don’t!), and let your green thumb—no matter how wobbly—guide the way. Your whimsical garden awaits! 🌱✨