
Tools
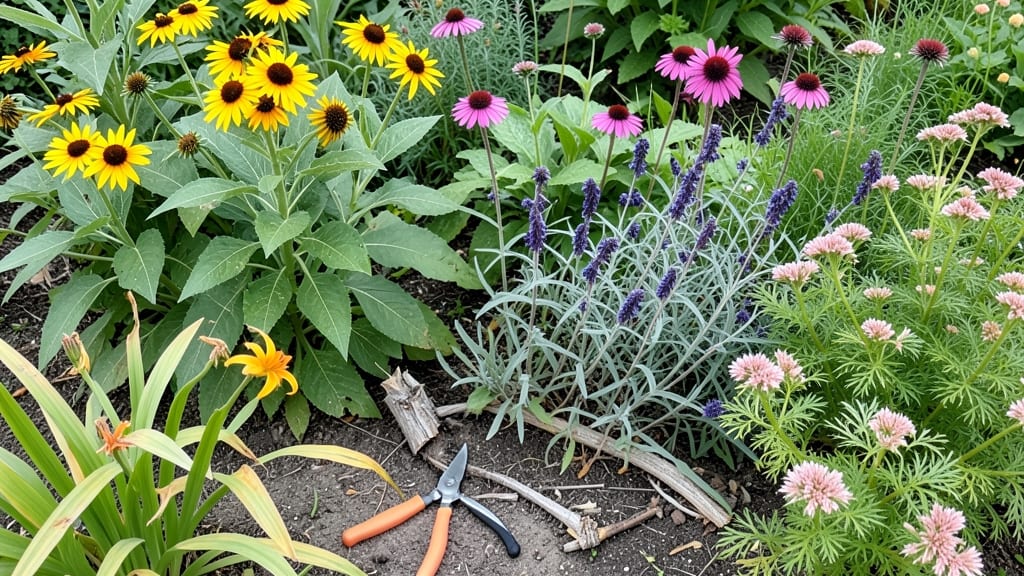
Creating an English garden layout means weaving together layers of plants, paths, and history into something that feels like stepping into a storybook. 🌿 I spent years studying classic designs—from the romantic overgrowth of Sissinghurst to the structured elegance of Kew Gardens—and the secret is in the balance: wild charm meets deliberate planning.
The key isn’t just picking pretty flowers; it’s arranging them so every season reveals something new, whether it’s spring’s delicate blooms or autumn’s fiery foliage.
Start with a focal point—a bench, a sundial, or a climbing rose—to anchor the space, then build outward with soft layers of perennials, shrubs, and annuals. Cottage-style gardens let plants spill freely, while formal layouts use geometric paths and manicured hedges.
I’ve found that even small yards can capture the essence by mixing textures—velvety lamb’s ear next to spiky hollyhocks—and repeating color themes like lavender blues or cream-and-gold tones.
The magic happens in the details: a winding gravel path, a stone seat tucked under a wisteria arbor, or a border of hydrangeas that changes color with the seasons.
What you’ll end up with is a garden that doesn’t just look good year-round but feels like a living tapestry. Imagine strolling past fragrant roses in June, then returning in November to find the same space glowing with berries and evergreens.
The best part? You don’t need a sprawling estate—even a 10-foot-by-10-foot plot can become a pocket of English charm with the right plant choices and a little strategic layering. Let’s break down how to make it happen without the overwhelm.
Here’s where it gets interesting—most English gardens succeed because they embrace imperfection. A few stray stems, a slightly uneven path, or a climbing plant that takes over a trellis? That’s not a mistake; it’s character.
The goal isn’t perfection but a sense of timelessness, where every visit feels like discovering something new. Ready to start sketching your own version?
📚 In This Guide
- What you need
- Instructions
- Tips and common mistakes
- Wrapping up and next steps
What you need
- ● Soil & Amendments: Topsoil (2–3 cubic yards, depending on garden size)
- ● Compost (1–2 bags for enriching soil)
- ○ Peat moss or coconut coir (optional, for moisture retention)
- ● Plants & Greenery: Perennials (e.g., lavender, peonies, foxgloves—5–10 plants per type)
- ● Shrubs (e.g., hydrangeas, boxwoods—3–5 per variety)
- ● Climbing plants (e.g., roses, clematis—2–4 vines)
- ● Bulbs (tulips, daffodils, alliums—50+ for seasonal color)
- ● Grasses & ornamental plants (e.g., fountain grass, sedum—3–6 plants)
- ● Hardscaping: Gravel or decomposed granite (1–2 tons, for pathways)
- ● Flagstone or stepping stones (10–20 pieces, 12"–18" diameter)
- ● Arbors or trellises (1–2, depending on size)
- ● Wooden or metal edging (50–100 feet, for borders)
- ● Must-Haves: Shovel & spade (heavy-duty, for digging)
- ● Garden fork (for aerating soil)
- ● Pruners (bypass or anvil type)
- ● Wheelbarrow (for hauling materials)
- ● Rake (bow or leaf rake, for leveling)
- ● Hose with adjustable nozzle (for watering)
- ● Nice-to-Haves: Soil tester kit (to check pH and nutrients)
- ● Kneeling pad (for comfort during planting)
- ● String & stakes (for marking layouts)
- ● Mulch (2–3 bags, for weed suppression)
- ● Check local landscaping regulations (some areas require permits for hardscaping or water features).
- ● Test your soil type (sandy, clay, or loamy) to adjust amendments.
- ● Plan for water access (hose bib or irrigation system).
- ● Consider seasonal timing—spring or early fall is ideal for planting perennials.
Instructions for crafting an English garden layout with graceful layers
Here’s how to build a garden that feels like stepping into a storybook—structured yet organic, with layers that evolve through the seasons.
🌿 Step 1: Define Your Backbone With Structural Plants
Start by anchoring your design with perennial shrubs and small trees—these are the silent stars of an English garden. I like to choose ornamental grasses, boxwoods, or hydrangeas for their year-round structure. Place them along pathways or as vertical accents to create depth. Think of these as the "bones" of your garden: they’ll hold the space while softer layers fill in around them.
Space them 8-12 feet apart to allow mature growth without overcrowding. For example, a small magnolia or ornamental cherry near the center draws the eye, while a row of boxwood hedges (pruned to 3-4 feet tall) frames walkways. Use mulch to suppress weeds and retain moisture—this is where the 3 cubic feet of shredded bark comes in handy. Spread it 3 inches deep around the base of each plant, keeping it 6 inches away from stems to prevent rot.
☀️ Step 2: Layer in Seasonal Color With Perennials and Bulbs
Now it’s time to add the "paint strokes" that change with each season. English gardens thrive on textural contrast, so mix ferns, peonies, and lavender with tall grasses like Miscanthus for movement. Plant spring bulbs (tulips, daffodils) in drifts of 10-15 bulbs per cluster, then layer summer bloomers (roses, delphiniums) and fall foliage (sedum, asters) around them.
Stagger heights: tall perennials (6-8 feet) at the back, medium (3-4 feet) in the middle, and low ground covers (2-3 feet) in front. For example, a rosemary bush behind a lavender hedge with sweet alyssum spilling over the edge creates a cascading effect. Water deeply once a week (or when the top 2 inches of soil feel dry) to encourage strong root systems—this is where the 5-gallon watering can becomes your best friend.
✂️ Step 3: Add Focal Points and Functional Elements
Every great English garden has a "wow" spot—a stone bench, a sundial, or a small fountain. I often place a wooden arbor draped with clematis near a seating area to create a romantic focal point. For smaller spaces, a vintage-style birdbath or ornamental urn adds character. Position these where they’re visible from multiple angles, like a garden path intersection or the end of a gravel walkway.
Incorporate practical elements too: a raised herb bed near the kitchen, a butterfly-friendly wildflower patch, or a small greenhouse for propagating cuttings. These keep the garden alive and useful. For example, the 4-foot-tall trellis you’ve placed can support climbing roses or jasmine, while the gravel path (2 feet wide) invites exploration without trampling plant beds.
🪴 Step 4: Weave in Pathways and Edging for Flow
Paths are the "spine" of an English garden—they guide visitors through layers of discovery. Use gravel, stepping stones, or brick for a classic look. I like to curve paths slightly to create a sense of meandering, with low hedges or boxwood borders to define edges. For example, a 2-foot-wide gravel path lined with creeping thyme adds fragrance underfoot while keeping weeds at bay.
Add small bridges or stepping stones over any low-lying areas to maintain dry paths. If you’re using stepping stones (24-inch squares), space them 12-18 inches apart for comfort. Avoid straight lines—they feel rigid. Instead, let paths loop and branch naturally, encouraging visitors to linger. This is where the 100 pounds of decorative gravel transforms a muddy area into an inviting route.
💧 Step 5: Maintain Seasonal Interest With Pruning and Deadheading
An English garden isn’t static—it’s a living tapestry that shifts with the seasons. Prune spring-flowering shrubs (like lilacs) right after blooming to encourage new growth. Deadhead annuals (like roses or zinnias) regularly to prolong flowering. In fall, cut back perennials that have died down (but leave seed heads for winter interest—they’re stunning against snow).
I also add seasonal accents: spring bulbs in drifts, summer containers with trailing petunias, and autumn mums in pots. For example, the 10-pack of spring bulbs you planted will naturalize over time, while the 5-gallon container of ferns adds lush greenery to shady spots. Mulch again in late fall to protect roots from freeze-thaw cycles. This keeps your garden lush, layered, and full of life year-round.
Tips & tricks for perfect English garden layouts
Creating an English garden that feels timeless and intentional takes thoughtful planning. Here are my go-to strategies for crafting a layout that feels both structured and organic.
Plant Placement Precision: When positioning your 8-12 feet apart structural plants like magnolias or boxwoods, consider their mature height and spread. I always sketch a rough layout first—this helps visualize how the 3-4 feet tall boxwood hedges will frame walkways and how the 6-8 feet tall perennials will create vertical interest. The key is to place taller elements at the back and gradually step down in height toward the front, creating that classic layered look. This visual hierarchy makes your garden feel intentionally designed rather than randomly planted.
Seasonal Layering Strategy: The magic of an English garden happens through its seasonal transitions, so plan your 10-15 bulb clusters and tall grasses with this in mind. I recommend dedicating specific areas to each season: plant spring bulbs like tulips near seating areas where you'll enjoy their early blooms, position summer roses along pathways for continuous color, and incorporate fall sedums where their fiery hues will catch the light. This creates a garden that's always interesting, even when some plants are dormant. Don't forget to include evergreen elements like boxwoods to provide structure year-round.
Pathway Design Secrets: For that quintessential English garden feel, your 2-foot-wide gravel paths should feel like an invitation to wander rather than a straight route. I always curve paths slightly and add subtle turns to create a sense of discovery. When using stepping stones (24-inch squares), space them 12-18 inches apart and arrange them in irregular patterns—this prevents a rigid, geometric look. The 100 pounds of decorative gravel you'll use should be a mix of colors and textures to complement your plant palette. For extra charm, consider adding a few stepping stones with built-in planters to incorporate more greenery into your pathways.
Focal Point Placement: Every great English garden needs a "wow" moment, and I've found the best locations are where paths intersect or at the end of a visual journey. When positioning your wooden arbor or stone bench, think about how it will be viewed from different angles in the garden. For example, a small fountain placed where it reflects light from multiple directions creates a magical atmosphere. Remember that focal points should be visible from your intended viewing spots—whether that's from a seating area, along a pathway, or from inside your home through a window.
Pro Tips for English Garden Layout
- Creating an English garden that feels timeless and intentional takes thoughtful planning.
- Plant Placement Precision: When positioning your 8-12 feet apart structural plants like magnolias or boxwoods, consider their mature height and spread.
- Seasonal Layering Strategy: The magic of an English garden happens through its seasonal transitions, so plan your 10-15 bulb clusters and tall grasses with this in mind.
Frequently asked questions
Got questions about crafting an English garden layout?
You’re not alone! Whether you're just starting or fine-tuning your design, here are some of the most common queries—and straightforward answers—to help you create a space that feels like a timeless retreat.
What’s the best time of year to start planning my English garden layout?
While you can sketch designs year-round, late winter or early spring is ideal. The ground is workable, and you can observe how sunlight shifts as plants emerge. If you’re planting perennials, aim for fall—they’ll establish roots before winter. For annuals, wait until after the last frost in your zone!
Do I need a formal plan, or can I design as I go?
Both work! A rough sketch helps visualize layers (e.g., tall trees → shrubs → perennials → ground cover), but flexibility is key. Start with a basic grid or path layout, then adjust based on sunlight, soil, and existing plants. Pro tip: Use graph paper or free apps like SketchUp to experiment digitally first.
What’s the most budget-friendly way to incorporate focal points?
Focal points don’t have to break the bank! Try these cost-effective ideas:
- Natural elements: A large boulder, driftwood, or a mature tree adds drama for free.
- DIY structures: Paint an old wooden gate, trellis, or birdbath in soft colors (e.g., sage green, cream).
- Seasonal swaps: Rotate potted plants or seasonal flowers (e.g., tulips in spring, mums in fall) to keep interest high without permanent investments.
My garden feels too “busy”—how do I simplify the layout?
English gardens thrive on layered texture but controlled chaos. To streamline:
The key is balance. Pair traditional elements (e.g., arbors, cottage-style roses) with modern touches like:
Less is more! Let plants breathe—aim for 3 feet of space between mature shrubs.
Can I mix modern and traditional English garden styles?
Think of it as a farmhouse kitchen meets minimalist art—warm, inviting, and intentional.
Wrapping up and next steps
Creating an English garden layout is all about blending nature’s charm with thoughtful design—layering plants, textures, and seasonal interest to craft a space that feels both timeless and uniquely yours.
Whether you’re drawn to the romance of roses, the structure of topiaries, or the whimsy of cottage-style paths, the key is to start small, embrace imperfection, and let your garden evolve with you. 🌿
Ready to bring your vision to life? Sketch a rough layout on paper first, gather your materials, and take it one step at a time. Every plant you place and path you lay is a brushstroke in your outdoor masterpiece—so dive in, get your hands dirty, and enjoy the process!
For extra inspiration, browse seasonal plant guides or join local gardening groups to swap tips with fellow enthusiasts.