Tools
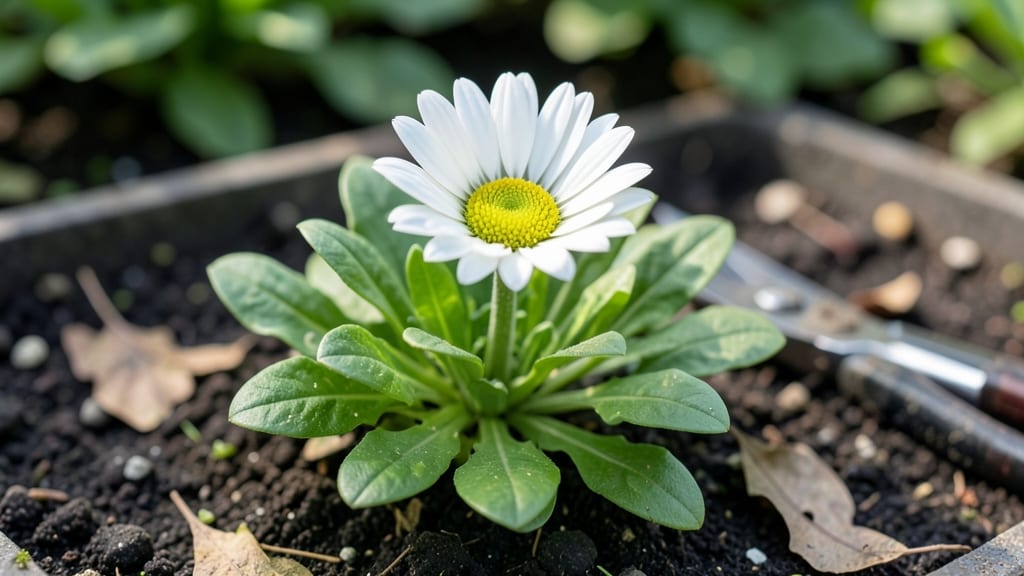
Creating a garden filled with garden daisy flowers transforms any space into a sunlit meadow with almost no effort. 🌼 I’ve designed borders and cottage garden corners where these cheerful blooms steal the show—whether planted in drifts, along pathways, or tucked between perennials for soft contrast.
The secret lies in their versatility: they thrive in full sun or partial shade, bloom from early spring to frost, and pair beautifully with almost any companion.
Start with Leucanthemum for bold white-and-yellow statements or Bellis perennis for delicate, low-growing clusters that spill over edges. Mix them with lavender for a purple-and-white dream or pair with deep purple salvia for striking contrast.
Their year-round color (with seasonal pruning) means you’ll always have something blooming—even in winter, their dried stems add texture to arrangements.
For maximum impact, plant in odd-numbered groups (3, 5, or 7) to create natural-looking drifts. Let them self-seed for effortless renewal, or deadhead spent blooms to encourage nonstop flowers.
The best part? They attract pollinators all season, turning your garden into a buzzing, blooming haven without the fuss of high-maintenance plants.
Whether you’re filling a sunlit border, brightening a shady corner, or designing a pollinator-friendly retreat, daisies deliver instant charm with minimal care. Here’s how to make them the star of your garden layout—without breaking a sweat.
📚 In This Guide
- What you need
- Instructions
- Tips and common mistakes
- Wrapping up and next steps
What you need
- ● Garden Daisy Seeds or Plants: Seeds: 1–2 packets (50–100 seeds per packet) for a small patch.
- ● Plants: 5–10 nursery-grown daisies (check for Oxalis, Bellis, or Leucanthemum varieties).
- ● Well-Draining Soil: 1–2 bags of potting mix or garden soil (amended with compost for better drainage).
- ○ Optional: Perlite or sand (1 cup) to improve aeration.
- ● Sunlight Access: Full sun (6+ hours/day) for best blooms.
- ● Watering Can or Hose: 1–2 gallons capacity (for consistent moisture without overwatering).
- ● Garden Gloves (1 pair) – Protects hands from thorns or rough soil.
- ● Hand Trowel or Transplanter – For easy seed/plant placement.
- ● Pruning Shears – To trim dead blooms and encourage regrowth.
- ● Mulch (Straw or Shredded Bark) – 1–2 inches to retain moisture.
- ○ Fertilizer (Balanced 10-10-10) – 1–2 tbsp per plant (optional, for extra vigor).
Step-by-Step guide to planting and maintaining garden daisies
Here's how to grow cheerful garden daisies that thrive with almost no fuss.
🌱 Step 1: Choose the Right Location and Prepare the Soil
Garden daisies flourish in full sun to partial shade, with at least 6 hours of direct sunlight daily. I always pick a spot with good air circulation to prevent fungal diseases. The soil should drain well—daisies hate soggy roots, so avoid low-lying areas where water pools.
Loosen the top 6 inches of soil with a garden fork to break up compaction. Work in 2-3 inches of compost (from your materials list) to enrich the soil naturally. This ensures your daisies get the nutrients they need without heavy fertilization. Test the soil pH—daisies prefer a slightly acidic to neutral range, 6.0-7.0. If your soil is heavy clay, mix in sand or perlite to improve drainage.
🌱 Step 2: Plant Seeds or Transplants at the Right Time
For seeds, sow them ¼ inch deep in early spring, 2-3 weeks before your last frost date. Press the soil gently around the seeds to ensure good contact but don’t bury them too deeply—they need light to germinate. Space seeds 12-18 inches apart if planting in rows, or 18-24 inches apart for a fuller, more natural look.
If using transplants, choose healthy starter plants with strong stems and vibrant leaves. Plant them in the same depth they were growing in their nursery pots. Water deeply right after planting to settle the soil and remove any air pockets around the roots. Mulch lightly with 1-2 inches of organic mulch (like shredded bark) to retain moisture and suppress weeds.
💧 Step 3: Water Consistently and Monitor Growth
Keep the soil evenly moist but not waterlogged during the first 4-6 weeks after planting. Water deeply once or twice a week, depending on rainfall, until the daisies establish a strong root system. You’ll know they’re settled when they start producing new leaves and stems. Overwatering can lead to yellowing leaves or fungal issues, so always check the top 2 inches of soil—water only when it feels dry.
Once established, daisies are drought-tolerant and only need watering during prolonged dry spells. You’ll see the first blooms appear 6-8 weeks after planting, signaling that your daisies are thriving. Deadhead spent flowers by pinching them off just above the foliage to encourage more blooms and a bushier plant.
☀️ Step 4: Provide Seasonal Care for Year-Round Blooms
In early spring, trim back any dead or damaged stems to ½ inch above the ground. This promotes new growth and keeps the plant looking tidy. Fertilize lightly with a balanced, slow-release fertilizer (like 10-10-10) in early spring and again in midsummer to support continuous blooming. Avoid heavy fertilization, as daisies prefer leaner soil.
In fall, reduce watering slightly as temperatures drop. Daisies are hardy perennials in most climates, so they’ll return year after year with minimal care. If you’re in a colder zone, apply a 2-3 inch layer of mulch around the base to protect the roots from freezing temperatures. You’ll notice new growth emerging in early spring, proving your daisies are ready to bloom again.
✂️ Step 5: Divide and Propagate for More Plants
Every 2-3 years, daisies benefit from division to rejuvenate the plant and create new ones. In early spring, dig up the entire clump and separate it into smaller sections, ensuring each has 3-5 stems and roots. Replant the divisions immediately in fresh soil, watering deeply to help them establish. This is also a great way to share plants with friends or expand your garden.
If you notice your daisies becoming overcrowded or blooming less vigorously, division is your answer. The key is to do it in early spring before new growth begins. You’ll see stronger, healthier plants with more abundant blooms within a season.
Tips & tricks for perfect garden daisy maintenance
Between us, I've watched garden daisies transform from struggling seedlings to vibrant perennials—and the secret lies in these often-overlooked details.
Soil Preparation Secret: The 6-inch soil loosening in Step 1 isn't just about breaking up compaction—it's about creating an oxygen-rich environment for those delicate roots. I like to add a handful of coarse sand to the compost mix when working with clay soil, which helps prevent that dreaded "soggy roots" scenario daisies hate. Think of it as giving your plants a proper foundation, like setting a strong base for a house.
Timing is Everything: That 2-3 week window before your last frost date in Step 2 is your golden opportunity—plant too early and seedlings may get nipped by late frosts, too late and you'll miss the full growing season. I always check my local frost dates and mark the calendar with red flags to remember this critical window. Pro tip: If you're in doubt, err on the earlier side—daisies can handle cooler soil better than they can handle being too warm before their time.
Watering Wisdom: The "evenly moist but not waterlogged" guideline in Step 3 is easier said than done, especially for beginners. Here's my trick: I use my finger to check soil moisture at the 2-inch depth mark—if it feels like a slightly damp sponge, that's perfect. If it's bone dry, it's time to water. And if it's cold and clumpy, you've overdone it. This simple finger test prevents 90% of the watering-related problems I see with new gardeners.
Seasonal Care Strategy: When you're trimming those dead stems to ½ inch above ground in Step 4, don't just snip randomly—look for the first set of healthy leaves below the dead growth. This ensures you're not cutting into the plant's energy source. I also keep a pair of clean, sharp pruners dedicated just to my daisies to prevent spreading disease between plants.
Pro Tips for Garden Daisy Flower
- Between us, I've watched garden daisies transform from struggling seedlings to vibrant perennials—and the secret lies in these often-overlooked details.
- Soil Preparation Secret: The 6-inch soil loosening in Step 1 isn't just about breaking up compaction—it's about creating an oxygen-rich environment for those delicate roots.
- Timing is Everything: That 2-3 week window before your last frost date in Step 2 is your golden opportunity—plant too early and seedlings may get nipped by late frosts, too late and you'll miss the full growing season.
Frequently asked questions
Got questions about keeping your garden daisy flower happy and thriving? Here are some of the most common ones—plus quick, easy answers to help you grow like a pro!
How do I keep my garden daisies blooming all year?
Garden daisies thrive in cool to moderate climates and naturally bloom from spring to fall. For year-round color, plant shasta daisies or oxeye daisies (perennial varieties) and deadhead spent blooms. In warmer zones, choose heat-tolerant types like Gerbera daisies or grow them in partial shade. Pro tip: Mulch with compost to retain moisture and extend blooming!
When is the best time to plant garden daisies?
Plant daisies in early spring (after the last frost) or early fall for best results. This gives roots time to establish before extreme heat or cold. If planting in summer, water deeply and shade young plants until they acclimate. Bonus: Container-grown daisies can be planted year-round in mild climates!
What pests or diseases should I watch for with garden daisies?
Common pests include aphids, slugs, and Japanese beetles, while diseases like powdery mildew or leaf spot can occur in humid conditions. Quick fixes:
- Aphids: Spray with soapy water or introduce ladybugs.
- Slugs: Set out beer traps or use organic slug bait.
- Mildew: Improve airflow and apply neem oil.
Can I grow garden daisies in containers, or do they need a garden bed?
Daisies adapt well to containers as long as the pot has drainage and is at least 12 inches wide. Use a lightweight potting mix and place in full sun to partial shade. Dwarf varieties like Gerbera daisies are perfect for pots—just water consistently and fertilize monthly during blooming season.
Are there any low-maintenance alternatives to traditional garden daisies?
If you love daisies but want even less fuss, try these hardy alternatives:
- Blackfoot Daisy – Drought-tolerant and deer-resistant.
- Coneflower (Echinacea) – Long-lasting blooms and pollinator-friendly.
- Blanket Flower (Gaillardia) – Thrives in heat and poor soil.
- Coreopsis – Bright colors with minimal care.
Wrapping up and next steps
The garden daisy is a true gem for any gardener—easy to grow, hardy, and bursting with cheerful color that brightens spaces year-round with minimal effort. Whether you’re a beginner or a seasoned green thumb, these resilient blooms prove that stunning gardens don’t require endless work. 🌼
Ready to transform your outdoor space? Start by picking your favorite variety, gathering your supplies, and planting with confidence. Your first daisy could be blooming in just a few weeks!
- Next step: Sketch a simple garden layout or mark planting spots to visualize your daisy-filled paradise.
- Pro tip: Share your progress with fellow gardeners—inspiration spreads like wildflowers! 🌱