
Tools
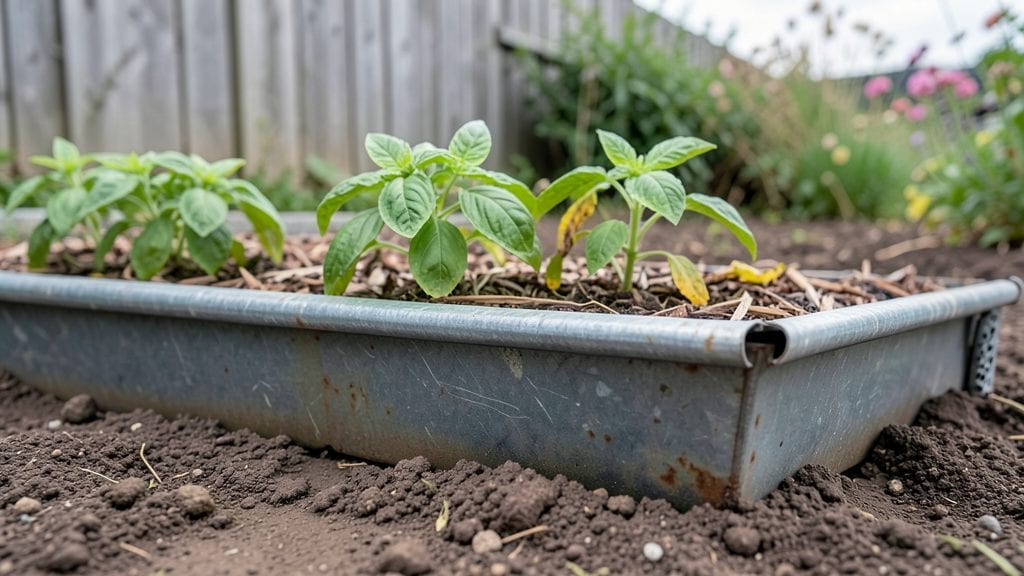
My garden's utility bills dropped by $200 last summer after I installed a simple gutter system that redirects rainwater straight into storage barrels. This isn't just about saving water—it's about turning your yard into a self-sustaining ecosystem where every drop works for you, not against you.
The setup takes less than a weekend, and you'll never look at downspouts the same way again.
You don't need fancy materials to get started—basic PVC or metal gutters work perfectly for most gardens. The key is matching the system to your space: a small rain garden for overflow, a barrel setup for watering, or even decorative gutters that double as planter edges.
My setup uses 10-foot sections connected with simple elbows, and the whole thing cost less than $150 to install. The best part? You'll see results immediately in your water bills and plant health.
Imagine filling your irrigation system with free water, reducing runoff that washes away nutrients, or even creating a miniature pond where rainwater collects naturally. My tomato plants thrived last season because they got consistent moisture without me lifting a finger.
The system also keeps my soil from eroding during heavy rains—something I used to struggle with in my sloped backyard. Once you set it up, you'll wonder why you didn't do it sooner.
Works for any yard size, from tiny urban plots to sprawling rural gardens. The only real requirement is a roof with some slope—nature handles the rest. Here's how to make it work without breaking the bank or your back.
📚 In This Guide
- What you need
- Instructions
- Tips and common mistakes
- Wrapping up and next steps
What you need
- ● Gutter system: Choose aluminum, vinyl, or steel (20–30 ft length, depending on roof size). Opt for seamless gutters to minimize leaks.
- ● Downspout(s): 3–5 ft PVC or metal downspouts (diameter: 2–4 inches). Pro tip: Add extra downspouts for larger roofs! 💡
- ○ Gutter guards: Micro-mesh or reverse-curve (covers entire gutter length). Optional but highly recommended to reduce debris.
- ● Rainwater storage barrel: 50–100+ gallon food-grade barrel (BPA-free) with a spigot. Tip: Add a first-flush diverter to filter out contaminants. ✨
- ● Connectors & end caps: Aluminum or PVC (quantity: 1 per 10 ft of gutter).
- ● Sealant tape: Butyl or silicone (for sealing joints).
- ○ Filter system: Optional—add a sediment filter (100–200 micron) for cleaner water.
- ● Measuring tape (25+ ft)
- ● Drill/driver with 1/4-inch drill bit (for gutter spikes)
- ● Hacksaw or tin snips (for cutting gutters/downspouts)
- ● Level (4–6 ft) to ensure proper slope (¼ inch per foot)
- ● Ladder (extension ladder for 2-story homes)
- ● Screwdriver set (Phillips & flathead)
- ● Caulk gun (for sealant application)
- ● Safety gear: Gloves, goggles, and non-slip shoes.
- ● Roof clearance: Ensure gutters will sit at least 12 inches below the roof edge to prevent overflow.
- ● Slope calculation: Gutters need a ¼-inch drop per foot toward the downspout. Use a level to check! 🔥
- ● Permits: Check local regulations—some areas require permits for rainwater harvesting systems.
- ● Barrel placement: Place the storage barrel on a stable, level surface (e.g., cinder blocks or a stand).
Step-by-step instructions for installing a rainwater harvesting gutter system
Here's the straightforward method I've used to transform stormwater into a free resource for my garden.
Measure and Select Gutter Placement
Begin by measuring the roof edge where you'll install the gutters. A standard 4-inch gutter handles up to 1,125 square feet of roof area, while a 5-inch gutter covers 1,500 square feet. Mark the exact placement along the roofline—gutters should sit at least 6 inches below the roof edge to prevent water damage and slope slightly (¼ inch per foot) toward the downspout for proper drainage.
Use a level to ensure the gutter runs true. If your roof has multiple slopes, install separate gutter sections with downspouts at the lowest points. I always add extra brackets at corners and joints—these spots experience the most stress from water pressure and expansion/contraction.
Install Gutter and Downspout System
Attach gutter hangers every 24-36 inches along the marked roofline, securing them with sturdy screws into the fascia board. For a 4-gutter system, start at the downspout end and work outward, leaving ½-inch gaps between sections for expansion. Seal each joint with gutter sealant to prevent leaks.
Position the downspout at the gutter's lowest point, ensuring it extends at least 6 feet to your rain barrel or storage tank. Use downspout straps every 4-5 feet to secure it vertically. Here's the thing—if your downspout discharges directly onto a driveway or street, you're wasting potential water. Redirect it immediately to your collection system.
Set Up Filtration and Storage
Place a leaf filter screen over the downspout opening to block debris while allowing water flow. Below the screen, install a first-flush diverter—this critical component directs the first gallon of runoff (which carries the most contaminants) away from your storage barrel. Fill your 55-gallon rain barrel with the provided barrel stand on level ground, ensuring the downspout outlet aligns with the barrel's inlet.
For larger systems, connect multiple barrels with flexible tubing or install a 500-gallon storage tank with a pressure pump for irrigation. I always add a mesh screen inside the barrel's inlet to catch any remaining debris that slips past the downspout filter. This keeps your stored water clean and ready for garden use.
Connect to Irrigation or Garden Use
Attach a garden hose bib to the barrel's spigot, positioning it at ground level for easy access. For automated watering, install a pressure regulator and drip irrigation system connected directly to the barrel. The key here is low-pressure delivery—most rain barrels can't handle high-pressure sprinklers without a pump.
Test your system after the first rain by opening the spigot and checking for proper flow. If water trickles slowly, your filter may be clogged—clean it immediately. For best results, use harvested rainwater on vegetables, flowers, and lawns within 24 hours of collection to prevent algae growth in stored water.
Maintain and Optimize Year-Round
Clean gutters and downspouts twice annually (spring and fall) to prevent clogs. Scrub out debris with a gutter brush and flush the system with a hose. Check for leaks at joints and reapply sealant as needed. In colder climates, drain and store barrels indoors or use insulated covers to prevent freezing.
To maximize efficiency, position barrels near high-use garden areas to minimize hose drag. I also recommend installing a rain gauge nearby to track collection volume—this helps you plan water usage and identify potential system improvements. With proper maintenance, a well-designed gutter system can provide thousands of gallons annually, slashing your water bill while keeping your garden thriving.
Tips & tricks for perfect rainwater harvesting systems
A few strategic adjustments can transform your gutter system from functional to highly efficient. Here's what I've learned after installing systems in various climates and roof configurations.
Precision Slope Matters: While the instructions specify a ¼-inch-per-foot slope, I've found that in steeper climates, increasing this to ⅜-inch per foot prevents water pooling during heavy rains. Use a laser level for large roofs to ensure consistent slope—even minor deviations can cause water to back up and overflow. For flat roofs, consider installing gutters with built-in slope adjustments or using adjustable hangers to maintain proper drainage at every section.
Downspout Placement Strategy: The instructions emphasize positioning downspouts at the lowest points, but here's the thing—if your roof has multiple valleys, install secondary downspouts to prevent water from traveling excessive distances. I once saw a system where water had to traverse 20 feet horizontally before reaching the downspout, causing constant overflow. For every additional 10 feet beyond 15 feet, add another downspout to maintain optimal flow rates. This becomes especially critical with 5-inch gutters handling up to 1,500 square feet of roof area.
Filtration Layering: While the first-flush diverter handles the initial gallon of contaminants, I recommend adding a secondary filtration layer—a fine mesh screen (about 100 microns) inside the barrel inlet. This catches any remaining debris that slips past the downspout filter, particularly important if you have overhanging trees. I've seen systems where leaves and twigs would accumulate in the barrel over time, creating breeding grounds for mosquitoes. This extra layer ensures your stored water remains clean and safe for garden use.
Seasonal Adaptation: The twice-annual cleaning schedule works well in most climates, but in areas with heavy autumn leaf fall or frequent summer storms, I recommend increasing this to quarterly inspections. Pay special attention to the leaf filter screen after each heavy rain—clogged filters can cause backups that damage your gutter system. In regions with freeze-thaw cycles, consider installing heated downspout extensions to prevent ice dams from blocking water flow during winter months.
Pro Tips for Gutter For Garden
- A few strategic adjustments can transform your gutter system from functional to highly efficient.
- Precision Slope Matters: While the instructions specify a ¼-inch-per-foot slope, I've found that in steeper climates, increasing this to ⅜-inch per foot prevents water pooling during heavy rains.
- I once saw a system where water had to traverse 20 feet horizontally before reaching the downspout, causing constant overflow.
Frequently asked questions
Got questions about setting up a gutter for garden rainwater harvesting system? You’re not alone! Here are some of the most common concerns—and straightforward answers to help you get started.
What’s the best time of year to install a garden gutter system?
Install your gutter system before the rainy season starts—ideally in late summer or early fall. This gives you time to test for leaks and ensure proper water flow. Avoid winter installations, as frozen pipes or ground can complicate setup. Pro tip: Check your local rainfall patterns to plan ahead!
Are DIY gutters for gardens cheaper than professional installation?
Yes! DIY gutter systems for gardens are often 30–50% cheaper than hiring pros, especially for small setups. Basic materials (like PVC pipes, downspouts, and connectors) cost $50–$200, while labor can run $100–$300+ per hour. Just ensure you have the right tools (saw, drill, sealant) and follow safety guidelines. Warning: Complex slopes or heavy rain may require professional help.
Can I use gutters to water plants directly, or do I need a separate irrigation system?
Gutters alone won’t efficiently water plants, but they’re a great first step! Connect them to a rain barrel or drip irrigation system for targeted watering. Add a first-flush diverter to filter out debris before water reaches your plants. For large gardens, pair gutters with soaker hoses or a simple hose attachment for even distribution.
How do I fix a clogged gutter in my garden system?
Clogs are common—here’s a quick fix: Use a gutter scoop or wet/dry vacuum to remove debris. For stubborn blockages, flush with a hose or pour a mix of hot water + vinegar to dissolve grime. Install leaf guards or mesh screens to prevent future clogs. Pro tip: Clean gutters every 3–6 months (or after heavy storms) to keep water flowing smoothly!
Will a garden gutter system work with my home’s existing roof gutters?
You can divert water from your roof gutters into a separate garden system using tee connectors or downspout extensions. Just ensure the slope directs water toward your rain barrel or irrigation setup. If your roof gutters are already connected to a downspout, you may need to add a splitter to redirect flow. Key: Measure your roof’s pitch to avoid overflow!
Wrapping up and next steps
Installing a gutter for garden rainwater harvesting system isn’t just eco-friendly—it’s a smart investment in your home and wallet! By capturing rainwater, you’ll slash utility bills, reduce stormwater runoff, and even boost your garden’s health. 🌱
Ready to take the next step? Start by assessing your roof’s size and choosing the right gutters, then gather your tools and follow the steps we’ve outlined. Whether you DIY or hire a pro, you’ll be well on your way to a more sustainable (and cost-effective) future!