
Tools
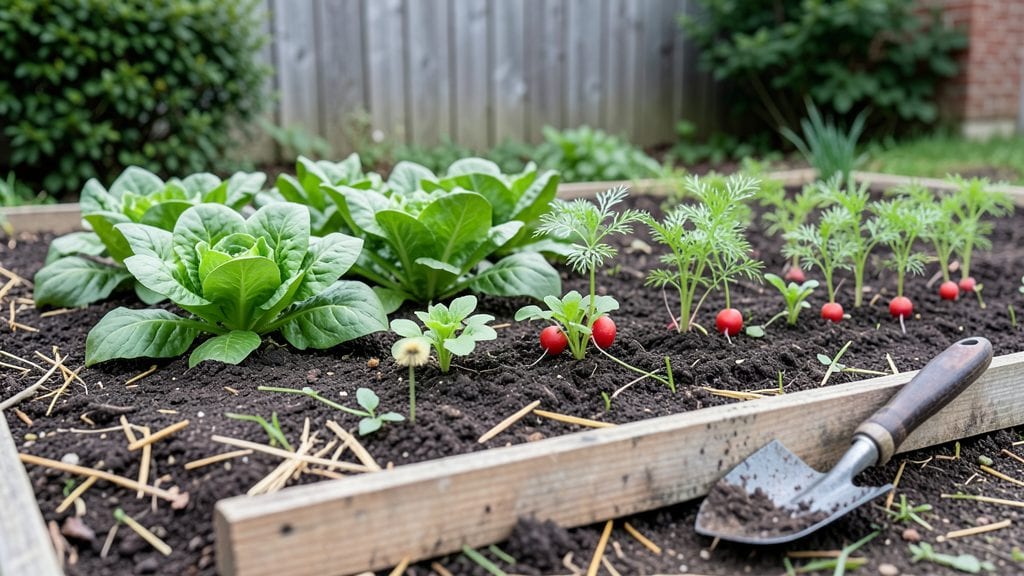
Building a homemade garden bed starts with a stack of cedar planks and a weekend afternoon. ✨ I’ve turned scrap wood into planters that outlast store-bought kits—no fancy tools, just screws and sweat.
These elevated beds warm up faster in spring, drain better in winter, and keep weeds at bay without bending over all season.
The beauty is in the customization: cedar resists rot, bricks add rustic charm, or even old pallets work if you stain them first.
My 4×8-foot bed uses 2×6 lumber, costs $150 (or less with reclaimed wood), and holds 27 cubic feet of soil—enough for tomatoes, herbs, and peppers without crowding. The key? Level the ground first, then let the bed’s height do the work for your back.
By summer’s first harvest, you’ll taste the difference—soil stays loose, roots breathe, and you’ll never dig again. Add a drip line for hassle-free watering, and your bed will look as good as it performs.
Whether you’re growing veggies, flowers, or both, this project pays dividends in less work and more yields.
Pro tip: Line the bottom with cardboard to block weeds, and use galvanized screws to prevent rust. For colder climates, add insulated edges—my bed stays 10°F warmer in early spring, giving plants a head start. Ready to build yours?
📚 In This Guide
- What you need
- Instructions
- Tips and common mistakes
- Wrapping up and next steps
What you need
- ● Wood: Untreated cedar, redwood, or pine (4x4 or 6x6 posts for corners, 2x6 or 2x8 boards for sides) – quantity depends on bed size (e.g., 4 corners + 4-6 side panels for a 4’x8’ bed).
- ● Screws: Deck screws (2.5"–3") or galvanized nails – ~100–150 screws for a standard bed.
- ● Landscape fabric: Heavy-duty (3–4 ft wider than bed dimensions) to block weeds.
- ● Gravel or sand: 2–3 inches (for drainage at the bottom).
- ● Soil: High-quality garden soil or a mix of topsoil + compost (avoid clay-heavy soil).
- ● Drill/driver: With Phillips or square-drive bit (for screws).
- ● Measuring tape: 25 ft or longer.
- ● Level: 24" or 48" for even bed placement.
- ● Carpenter’s square: For precise corner cuts.
- ● Staple gun: To secure landscape fabric.
- ● Wood preservative: For longevity (if using untreated wood).
- ● Corner braces: Metal brackets for extra stability.
- ● Drip irrigation kit: For hassle-free watering.
- ● Mulch: Straw or wood chips to retain moisture.
- ● Paint/stain: For a polished look (use non-toxic options).
Step-by-Step instructions for building homemade garden beds
Here’s how to craft sturdy, customizable raised beds that extend your growing season and protect plants from soil-borne diseases.
🪴 Step 1: Gather and Prepare Materials for the Frame
Start with untreated cedar or redwood lumber—these resist rot and last for years. Cut 2x6 boards into four equal lengths: two for the long sides (8 feet each) and two for the short sides (4 feet each). If you’re using pre-cut lumber, ensure the corners meet snugly at 90-degree angles before assembly.
Drill 3/8-inch pilot holes at each corner to prevent wood splitting when you drive in the 2.5-inch deck screws. Pre-drilling also keeps the frame square and stable. I like to use a speed square tool to mark the exact angle—this ensures your bed stays perfectly rectangular and won’t warp over time.
🌱 Step 2: Assemble the Frame and Add Support
Lay the two 8-foot boards parallel on a flat surface, then attach the 4-foot boards at each end using the deck screws. I tighten the screws just enough to hold the frame together, then flip it over to check for wobble. If the frame feels unstable, add 2x4 corner braces on the inside for extra support—this is especially important if your bed is wider than 4 feet.
For deeper beds (over 12 inches), add a center support beam along the length to prevent sagging. This is non-negotiable for heavy soils or root crops like potatoes. Once the frame is secure, flip it right-side up and give it a final check for square corners—tap gently with a rubber mallet if needed to adjust alignment.
💧 Step 3: Line the Bed and Fill with Soil
Lay a landscape fabric layer inside the frame to block weeds and improve drainage. Secure it with staple guns along the edges, leaving a 2-inch overhang to prevent soil from leaking out. Now, fill the bed in layers: start with 2 inches of coarse gravel at the bottom for drainage, then add 6 inches of compost mixed with topsoil in a 2:1 ratio. This ensures your plants get the nutrients they need without compacting.
Moisten the soil lightly before planting—it should feel like a wrung-out sponge, not soggy. Avoid garden soil from your yard; it’s often too dense and may contain pests. Instead, use the pre-mixed potting soil you’ve prepared, and top with 1 inch of mulch to retain moisture and suppress weeds.
☀️ Step 4: Position for Optimal Sun and Access
Place your bed where it gets 6-8 hours of sunlight daily, ideally near a water source for easy irrigation. If your yard has partial shade, orient the long sides east-west to maximize light exposure. For year-round growing, position the bed on a level surface—uneven ground causes drainage issues and makes maintenance harder.
Leave 18-24 inches of walking space around the bed for easy access. I like to add gravel pathways between beds to keep soil from splashing onto leaves during watering. Once in place, give the soil a final light watering to settle it before planting.
✂️ Step 5: Plant and Maintain for Long-Term Success
Start with disease-resistant varieties suited to your climate, and space plants according to their mature size. For example, tomatoes and peppers need 18 inches apart, while leafy greens can grow 6 inches apart. Water deeply once a week, aiming for 1 inch of water per week—more in hot climates, less in cool ones.
Check the soil 1 inch below the surface before watering; if it’s dry, it’s time to hydrate. Avoid overhead watering to prevent fungal diseases. Instead, use a soaker hose or drip irrigation for targeted moisture delivery. With proper care, your homemade bed will stay productive for 5-10 years—or until you’re ready to upgrade!
Tips & tricks for perfect homemade garden beds
Building your own raised garden beds transforms your outdoor space into a thriving, low-maintenance oasis—but only if you nail these key details. Here’s how to avoid common pitfalls and create beds that last for years.
Precision Cutting Pays Off: When cutting your 2x6 boards for the frame in Step 1, invest in a quality circular saw or ask your local hardware store to cut them for you. Precision is critical—uneven boards will create gaps that let soil escape and weeds creep in. I’ve learned the hard way that cutting corners (literally) leads to wobbly frames. Use a speed square tool to verify your 90-degree angles before assembly, and mark your cuts with a pencil and straightedge for clean lines.
Support Matters More Than You Think: In Step 2, don’t skip the 2x4 corner braces if your bed is wider than 4 feet—this isn’t optional. I’ve seen beds sag dramatically after just one season when builders skipped this step. For extra-large beds (over 6 feet long), consider adding a center support beam even if your depth is under 12 inches. The extra stability prevents soil compaction and makes your bed last longer. A rubber mallet is your best friend for gently tapping boards into alignment without damaging the wood.
Soil Science for Success: The 2:1 ratio of compost to topsoil in Step 3 isn’t just a suggestion—it’s the sweet spot for drainage and nutrient balance. I recommend sifting your soil mixture through a 1/4-inch mesh screen before filling the bed to eliminate clumps that could create air pockets. For heavy clay soils, increase the compost ratio to 3:1 temporarily—this helps break up compacted soil while you build organic matter. And remember: that 2-inch gravel layer is non-negotiable for preventing waterlogging, especially in rainy climates.
Sunlight Strategy: The 6-8 hours of sunlight requirement in Step 4 is non-negotiable for most vegetables, but here’s the pro move: orient your bed’s long sides east-west instead of north-south. This maximizes morning sun exposure (when plants are most active) while preventing afternoon shade from nearby structures. For partial-shade gardens, choose shade-tolerant plants like lettuce or spinach, but still aim for at least 4 hours of direct sunlight—these beds are designed for productivity, after all.
Pro Tips for Homemade Garden Bed
- Building your own raised garden beds transforms your outdoor space into a thriving, low-maintenance oasis—but only if you nail these key details.
- Precision Cutting Pays Off: When cutting your 2x6 boards for the frame in Step 1, invest in a quality circular saw or ask your local hardware store to cut them for you.
- Support Matters More Than You Think: In Step 2, don’t skip the 2x4 corner braces if your bed is wider than 4 feet—this isn’t optional.
Frequently asked questions
Got questions about building and maintaining your homemade garden bed? You’re not alone! Here are some of the most common concerns—and their simple solutions.
What’s the best time of year to build a raised garden bed?
You can build a raised bed anytime, but spring or early fall is ideal. Avoid extreme heat or cold, which can make materials harder to work with. If building in winter, plan for a slow start—soil may take longer to warm up.
Can I reuse materials like pallets or old wood for my garden bed?
Yes! Pallets, cinder blocks, or even old lumber can work—but check for toxic chemicals (like pressure-treated wood with arsenic). Opt for untreated cedar, redwood, or recycled composite materials to keep your plants safe and healthy.
How do I keep pests out of my raised garden bed?
Use physical barriers like hardware cloth (for burrowing pests) or row covers. Plant pest-repelling companions (e.g., marigolds, basil) and avoid overcrowding. A 3-inch mulch layer also deters many insects naturally.
Do raised beds need special drainage? What if my area gets heavy rain?
Yes! Ensure your bed has drainage holes (if using containers) or is built on a slight slope. For clay-heavy soil, mix in sand or compost to improve drainage. Overwatering? Check soil moisture before adding more water.
How often should I refill or rotate crops in a raised bed?
Refill with fresh soil every 2–3 years or when nutrients deplete. Rotate crops annually to prevent disease and pests. Heavy feeders (like tomatoes) should be followed by light feeders (like lettuce) for balanced soil health.
Can I grow vegetables in a raised bed during winter?
Use cold-hardy crops (kale, spinach, carrots) and extend the season with row covers or cold frames. Mulch heavily to insulate roots. Some plants (like broccoli) even sweeten after a frost!
Wrapping up and next steps
Building your own homemade garden bed is a rewarding way to create a thriving, year-round growing space tailored to your needs! Whether you’re a beginner or a seasoned gardener, these elevated raised planters offer endless possibilities—from fresh herbs to bountiful veggies—without the hassle of traditional in-ground gardening. 🌱
Now that you’re armed with materials, tips, and answers to common questions, it’s time to roll up your sleeves and start building. Grab your tools, gather your supplies, and let your creativity grow—literally!
Your future harvest (and proud "I built this!" moment) awaits. Check out our step-by-step guide to kick off your project today!