Propagation
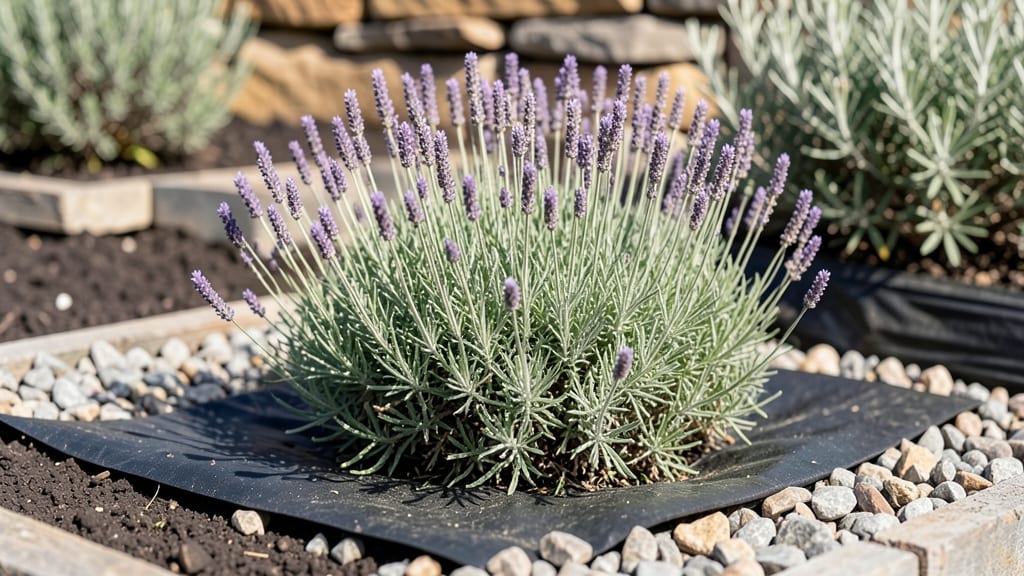
Keeping weeds from growing in your garden starts with blocking sunlight before they sprout. 🌱 I used to spend hours pulling weeds only to see them return—until I discovered the power of natural barriers that smother them without chemicals.
The key is combining physical blockades with smart planting habits that make your garden less inviting to weeds.
You don’t need fancy tools—just a few simple supplies like thick mulch, landscape fabric, or even cardboard layers. Spacing plants properly (about 12-18 inches apart) gives them room to shade the soil naturally, while ground covers like clover or creeping thyme outcompete weeds.
My vegetable beds now stay weed-free for months with just these adjustments.
By summer’s end, you’ll have a garden where weeds barely show their faces. The soil stays moist longer, plants thrive without competition, and your back won’t ache from endless pulling. The real secret? Consistency—once you establish these barriers, maintenance becomes a breeze.
Works for flower beds, vegetable patches, or even between patio stones. Start small with one section this season, and watch how quickly the difference becomes obvious. Ready to reclaim your garden from the weeds?
📚 In This Guide
- What you need
- Instructions
- Tips and common mistakes
- Wrapping up and next steps
What you need
- ● Landscape fabric (geotextile fabric) – 4–6 feet wide, heavy-duty (3–4 oz per sq. yd), and UV-stabilized (e.g., blank">Eco-Friendly Weed Barrier). Pro tip: 💡 Measure your garden beds first—buy 10–20% extra for overlaps!
- ● Garden staples or U-shaped landscape pins – 12–18 inches long, galvanized or stainless steel (resists rust). Quantity: ~1 staple every 12–18 inches around edges.
- ○ Edging material (optional but recommended) – Plastic, metal, or stone edging (e.g., blank">Galvanized Steel Edging) to secure fabric edges. Length: Match garden bed perimeter.
- ● Mulch (organic or inorganic) – 3–4 inches thick. Options: Wood chips/shredded bark (e.g., blank">Cedar Mulch – natural weed suppression + moisture retention).
- ● Gravel or crushed stone (e.g., blank">Landscape Gravel – long-lasting but may need reapplication).
- ● Cardboard or newspaper (free! Use uncoated, ink-free layers for biodegradable weed block).
- ● Scissors or utility knife – For cutting fabric/edging to size.
- ● Gloves & knee pads – Because gardening is hard work! 😅
- ● Living mulch – Fast-growing ground covers like clover, creeping thyme, or comfrey to smother weeds naturally.
- ● Vinyl or plastic sheeting – Black plastic (for solarization) or clear plastic (to trap heat and kill weeds).
- ● Corn gluten meal – Natural pre-emergent herbicide (apply in early spring).
- ● Hose with spray nozzle – For wetting down cardboard/newspaper before mulching.
- ● String or twine – To temporarily mark fabric edges before stapling.
Step-by-Step guide to creating weed-blocking light barriers in your garden
Here’s how to smother weeds naturally using materials you likely already have.
🌱 Step 1: Choose Your Weed-Blocking Material
Cardboard is my go-to because it’s free, decomposes over time, and blocks sunlight completely. Cut sheets to fit between rows or around plants, overlapping edges by 2-3 inches to eliminate gaps. Avoid glossy paper—it reflects light and can scorch plants.
For long-term barriers, use black landscape fabric (available at garden centers). It’s reusable and lets water through while keeping weeds at bay for 1-2 seasons. Lay it flat, smoothing out wrinkles so light can’t sneak through.
🪴 Step 2: Prepare the Garden Bed
Remove existing weeds by hand or with a hoe, pulling them out at the root. Don’t leave fragments—they’ll regrow. Rake the soil smooth to create an even surface for your barrier. If your soil is rocky, add a 1-inch layer of compost first to improve drainage.
For raised beds, line the bottom with cardboard before adding soil. This prevents weeds from creeping up from below. Press edges firmly into the soil to secure them, especially in windy areas.
☀️ Step 3: Install the Light-Blocking Layer
Lay your chosen material directly on the soil, ensuring full coverage. For cardboard, use staples or landscape pins to anchor edges, especially in high-traffic areas. If using fabric, weigh it down with bricks or rocks at the edges to prevent shifting.
Leave a 1-inch border around plants to avoid smothering them. For mulch paths, overlap sheets by 3-4 inches to create a seamless barrier. Check weekly for gaps—weeds will sprout through even tiny openings.
💧 Step 4: Add Mulch for Extra Protection
Top your barrier with 2-3 inches of organic mulch like straw or wood chips. This keeps the fabric/cardboard in place and adds nutrients as it breaks down. Mulch also helps retain moisture, reducing the need for frequent watering.
For pathways, use gravel or pebbles instead. They reflect light and deter weeds while improving drainage. Avoid organic mulch on paths—it decomposes and becomes a weed magnet.
⏰ Step 5: Monitor and Refresh as Needed
Check your barriers every 2-3 weeks for signs of weeds poking through. If you see sprouts, pull them immediately—they’ll spread fast. Replace torn cardboard or fabric before weeds establish roots.
In 3-6 months, the cardboard will decompose. Remove it, add fresh compost, and replace the barrier. With fabric, you can reuse it for 1-2 seasons before it breaks down.
Tips & tricks for perfect weed-blocking barriers
A few simple strategies will help you create weed-free garden paths that last. These tricks save time and frustration while keeping your barriers effective for seasons.
Material Selection Matters: For cardboard, choose uncoated boxes without glossy ink—those reflective surfaces can actually scorch nearby plants. I always flatten any corrugated sections to create a smooth, even barrier that blocks light completely. If using newspaper, layer at least 4-6 sheets for full coverage, as single sheets let light penetrate.
Edge Security is Critical: In Step 3, when anchoring your barrier, don't just rely on visual overlap—press edges firmly into the soil and secure with landscape pins every 12 inches for cardboard or bricks every 2 feet for fabric. I've seen weeds sneak through tiny gaps when edges weren't properly secured, especially in windy areas. A well-anchored barrier stays put through rain and wind.
Mulch Choice Makes a Difference: When adding your 2-3 inches of mulch in Step 4, choose materials based on your needs. Straw breaks down quickly, adding nutrients but requiring more frequent replacement. Wood chips last longer but may take 2-3 years to fully decompose. For pathways, I recommend crushed gravel—it never decomposes, stays in place, and reflects sunlight to deter weeds naturally.
Seasonal Refresh Strategy: The 3-6 month lifespan of cardboard is actually an advantage—it breaks down just enough to mix into your soil as compost. I schedule my spring garden prep to include removing old barriers, adding fresh compost, and reinstalling new materials. This creates a natural cycle where your weed barriers become part of your soil improvement plan.
Pro Tips for Keep Weeds From Growing In Garden
- A few simple strategies will help you create weed-free garden paths that last.
- Material Selection Matters: For cardboard, choose uncoated boxes without glossy ink—those reflective surfaces can actually scorch nearby plants.
- I've seen weeds sneak through tiny gaps when edges weren't properly secured, especially in windy areas.
Frequently asked questions
What’s the best time of year to install weed barriers?
Install barriers in early spring (before weeds sprout) or late fall (after plants die back). This gives you a clean slate and prevents weeds from establishing roots around the edges. If you’re planting new beds, lay barriers before adding mulch or soil.
Will weed barriers harm my plants or soil?
No—high-quality barriers (like cardboard, landscape fabric, or thick mulch) are safe for soil and plants. Just ensure they’re not toxic (avoid plastic with additives) and leave space for plant roots to spread. Always secure edges to prevent gaps where weeds can sneak in!
How often do I need to replace or refresh weed barriers?
Most barriers last 2–5 years, depending on material. Cardboard breaks down in 1–2 years, while landscape fabric can last 5+ years. Check annually for tears or shifting—patch holes with extra fabric or mulch. Over time, top with 2–3 inches of mulch to extend their life.
Can I use mulch alone to block weeds, or do I need a barrier?
Mulch helps suppress weeds by blocking light, but it’s not a standalone solution. For heavy weed pressure, combine mulch (3+ inches) with a barrier layer (like cardboard) underneath. Organic mulches (straw, wood chips) break down over time, so replenish them yearly.
Do weed barriers work in shady areas?
Yes! Barriers block weeds regardless of sunlight by physically preventing seeds from germinating. In shady spots, pair barriers with dense mulch (like shredded leaves or pine needles) to smother any remaining weeds. Just ensure the barrier is fully covered—even small gaps can let weeds through.
Wrapping up and next steps
Keeping weeds at bay doesn’t have to be a battle—with the right natural barriers, you can block light, smother growth, and reclaim your garden’s beauty effortlessly! Whether you choose mulch, cardboard, or landscape fabric, these methods are simple, eco-friendly, and effective.
The key is consistency and choosing the right technique for your garden’s needs.
Now that you’re armed with these strategies, take action this weekend! Start with one section of your garden, apply your chosen barrier, and watch those weeds retreat. Happy gardening—your weed-free oasis awaits! 🌱✨