
Tools
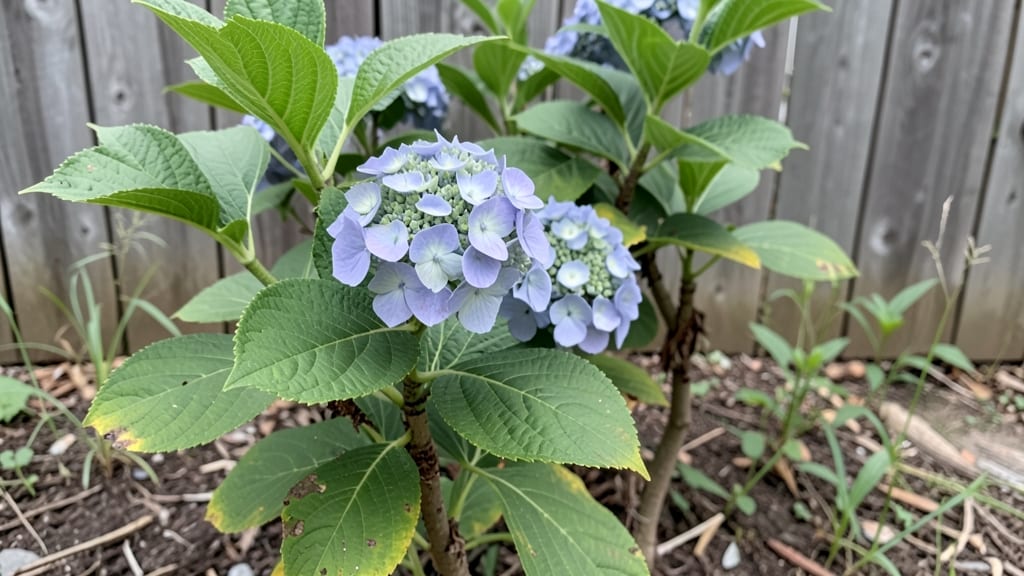
Hydrangeas for garden design are the secret weapon behind some of the most effortlessly stunning landscapes—lush, textured, and packed with color that lasts from summer through fall. 🌿 I remember the first time I saw a hydrangea hedge in full bloom, its rounded mounds spilling over like a watercolor painting, and I knew I had to bring that drama to my own yard.
The best part? They thrive with minimal fuss, making them perfect for both bold statements and subtle accents.
Start with their natural versatility—hydrangeas work as dramatic focal points, soft borders, or even cascading spillers in containers. Pair them with complementary plants like lavender for contrast or hostas for shade-loving harmony.
Their blooms shift color based on soil pH, so you can tweak them from pink to blue with simple amendments, adding another layer of customization to your design.
The key is placement: group them where they’ll get morning sun and afternoon shade, and watch them become the backbone of your garden’s seasonal show.
Imagine your garden in late summer, when hydrangeas burst into their peak—velvety blooms in every shade from lavender to deep violet, their leaves rustling in the breeze.
They’ll keep the interest going long after other annuals fade, and their large, rounded forms add structure to cottage gardens, modern landscapes, or even urban courtyards. With the right companions and a little strategic planting, they’ll become the star of your outdoor space without demanding constant attention.
Whether you’re working with a small urban plot or a sprawling backyard, hydrangeas adapt to the theme. For a cottage garden, let them mingle with peonies and roses; for a sleek modern look, pair them with boxwoods and ornamental grasses.
The possibilities are endless—and the payoff is a garden that feels lush, intentional, and full of life year after year.
📚 In This Guide
- What you need
- Instructions
- Tips and common mistakes
- Wrapping up and next steps
What you need
- ● Hydrangea plants (1–3 per location, depending on desired coverage): Choose between mophead, lacecap, or panicle varieties (e.g., Hydrangea macrophylla, H. paniculata, or H. arborescens).
- ● Opt for bare-root (spring/fall) or container-grown (year-round) plants.
- ● Well-draining soil mix (50% garden soil + 50% compost or peat moss for acid-loving varieties like H. macrophylla).
- ● Organic mulch (2–3 inches of shredded bark, pine needles, or straw to retain moisture).
- ● Slow-release fertilizer (10-10-10 or acid-loving plant formula, e.g., Miracle-Gro Azalea, Camellia & Rhododendron).
- ● Garden gloves (1 pair, heavy-duty for digging).
- ● Trowel or spade (for planting and soil prep).
- ● Watering can or hose with a gentle spray nozzle (for post-planting hydration).
- ● pH testing kit (to check soil acidity—hydrangeas thrive in pH 5.2–6.0 for blue/purple blooms).
- ● Aluminum sulfate or liquid lime (to adjust soil pH for color-changing varieties).
- ● Stakes or plant supports (for tall varieties like H. paniculata).
- ● Drip irrigation system (for consistent moisture in hot climates).
- ● Pruners (sharp, clean pair for shaping in late winter/early spring).
Instructions for planting hydrangeas that thrive year after year
Here's the straightforward method I use to keep hydrangeas blooming reliably—no fuss, just beauty.
🌱 Step 1: Choose the Perfect Planting Spot
Hydrangeas love partial shade, especially in hotter climates. Pick a location that gets morning sun and afternoon shade—this prevents leaf scorch while ensuring enough light for vibrant blooms. I always test the spot by watching how sunlight moves across the area throughout the day.
Check the soil drainage by digging a hole 12 inches deep and filling it with water. If it drains in less than 2 hours, the spot is good. If water pools after that, you'll need to amend the soil with compost to improve drainage. Hydrangeas hate soggy roots, but they also won't thrive in rocky, dry soil.
🪴 Step 2: Prepare the Soil for Healthy Roots
Loosen the soil in a 12-inch diameter circle around the planting hole to encourage root spread. Mix in 3-4 inches of compost or well-rotted manure to enrich the soil naturally. Hydrangeas are heavy feeders, so this step sets them up for years of growth.
For blue blooms, add 1 cup of aluminum sulfate to the soil mix (follow package instructions). For pink blooms, skip this and use 1 cup of lime instead. I always test the pH first with a simple soil kit—hydrangeas need 5.5-6.0 for blue or 6.0-7.0 for pink. If your soil is neutral, you can adjust color later with fertilizer.
☀️ Step 3: Plant at the Right Depth and Water Thoroughly
Dig a hole twice as wide as the root ball but no deeper. Place the hydrangea in so the top of the root ball sits 1 inch above ground level. This prevents the stem from rotting if soil settles later. Gently spread the roots outward and fill the hole with soil, pressing lightly to remove air pockets.
Water immediately with 1 gallon of water to settle the soil. Keep the area moist for the first 2 weeks—you'll know it's right when the soil feels damp 2 inches down but not soggy. Mulch around the base with 2-3 inches of shredded bark or pine needles to retain moisture and protect roots from temperature swings.
💧 Step 4: Maintain Consistent Care for Long-Term Blooms
Water deeply once a week during the first growing season, increasing to twice a week in summer if there's no rain. Hydrangeas show thirst by wilting leaves or drooping blooms—this is your signal to water. I always check the soil with my finger before watering to avoid overdoing it.
Fertilize in early spring with a balanced 10-10-10 fertilizer (about ¼ cup per plant) to encourage new growth. Deadhead spent blooms in late summer to promote next year's flowers. I also prune in late winter to shape the plant—just cut back old wood to 6-8 inches from the ground, leaving new growth intact.
✂️ Step 5: Winterize for Next Year's Color
In fall, apply 3-4 inches of mulch around the base to insulate roots. Hydrangeas are hardy, but young plants benefit from extra protection. I also wrap the crown with burlap or frost cloth in colder zones if temperatures dip below 10°F.
Wait until spring to prune again—never cut back in winter as you risk damaging new buds. When new growth appears in early spring, that's your cue to assess the plant's shape and remove any dead or crossing branches. With this care, your hydrangeas will reward you with bold color for years.
Tips & tricks for perfect hydrangea planting
A few simple tricks that'll make all the difference in keeping your hydrangeas vibrant and healthy for years to come.
Soil Drainage Test: In Step 1, when you're testing your planting spot, take it a step further by doing the drainage test in the hottest part of the day. This mimics summer conditions and gives you a more accurate picture of how your soil will behave when your hydrangeas need it most. If water drains in less than 2 hours, you're golden—but if it pools, don't just add compost. Mix in some perlite or coarse sand too to create better airflow for those roots.
Color Science: The pH adjustment in Step 2 is where the magic happens for bloom color. I've learned the hard way that testing your soil's pH first makes all the difference. Grab a simple soil kit from your garden center—it's worth the $5 to avoid guessing. Remember, blue blooms need that acidic range (5.5-6.0), while pink prefers slightly alkaline (6.0-7.0). If you're between zones, you can always adjust later with fertilizer, but starting right is easier.
Winter Protection: When temperatures dip below 10°F in Step 5, don't just wrap your hydrangeas—give them a little extra insulation. I like to mound soil around the base up to the first set of buds after wrapping with burlap. This creates a protective barrier against those freezing winds. For container hydrangeas, move them to a sheltered spot or cover with extra mulch—they're more vulnerable to cold snaps.
Watering Wisdom: During the first two weeks after planting, I've found that checking soil moisture with your finger is more reliable than setting a timer. Stick your finger about 2 inches down—if it feels dry, that's your cue to water. The goal is consistent moisture, not soggy soil. Once established, hydrangeas are surprisingly drought-tolerant, but they'll always show you when they're thirsty by wilting or drooping blooms. That's their way of saying "I need a drink!"
Pro Tips for Hydrangea For Garden
- A few simple tricks that'll make all the difference in keeping your hydrangeas vibrant and healthy for years to come.
- Soil Drainage Test: In Step 1, when you're testing your planting spot, take it a step further by doing the drainage test in the hottest part of the day.
- Color Science: The pH adjustment in Step 2 is where the magic happens for bloom color.
Frequently asked questions
Got questions about growing hydrangeas? You’re not alone! Here are answers to the most common queries—from planting to care—to help your garden bloom effortlessly.
When is the best time to plant hydrangeas?
Plant hydrangeas in early spring or fall for the best results. This gives roots time to establish before extreme heat or cold. Avoid planting in summer—young plants struggle with drought stress. If you’re in a mild climate, late fall works too!
How often should I water hydrangeas?
Water deeply 1-2 times per week, aiming for 1-2 inches of water per session. Mulch around the base to retain moisture, especially in hot months. Overwatering can cause root rot, so ensure soil drains well. Pro tip: Container hydrangeas may need daily watering in summer!
Why are my hydrangea flowers turning brown?
Brown blooms often mean too much sun, dehydration, or pests. Check for:
- Sunburn: Move to partial shade if leaves scorch.
- Pests: Inspect for aphids or spider mites (spray with soapy water).
- Water stress: Adjust irrigation—consistency is key!
Do hydrangeas survive winter?
Most hydrangeas (like Bigleaf or Oakleaf) are hardy to zones 5-9. For colder climates, mulch heavily and wrap container plants in burlap. Panicle hydrangeas are the toughest—often need zero winter prep!
What’s a low-maintenance hydrangea alternative?
Try Panicle hydrangeas (like ‘Limelight’ or ‘Little Lime’)—they thrive in full sun, handle drought better, and bloom late summer to fall. Oakleaf hydrangeas also offer year-round interest with minimal fuss!
Wrapping up and next steps
Hydrangeas are the ultimate low-maintenance superstars for any garden, offering stunning blooms that keep your outdoor space vibrant year-round with minimal effort. Whether you’re a seasoned gardener or just starting out, these versatile plants deliver beauty, shade, and charm—without the fuss. 🌸
Ready to transform your garden? Start by choosing your favorite variety, gathering your supplies, and planting with confidence. Your dream garden is just a few steps away!