
Landscaping
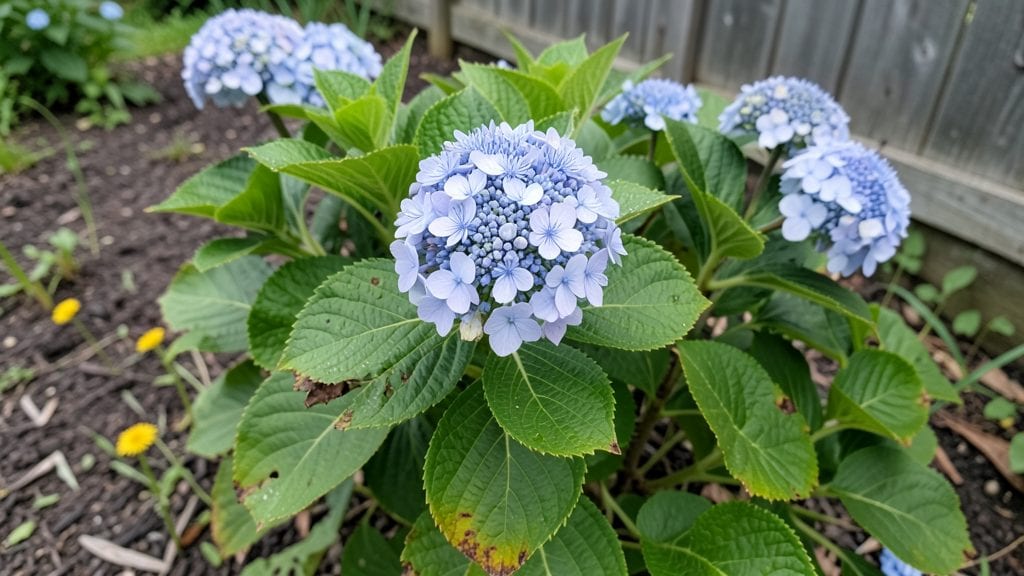
My plant garden design transforms a flat yard into a living tapestry that changes with every season—until I discovered how height, texture, and color could create drama while making space feel alive. 🌿 I used to think gardens were just about filling space— everything easier to maintain.
The right layout gives you year-round interest without extra work.
Start with a backbone of structural plants—tall shrubs, small trees, or evergreens—to frame the space. Then weave in mid-height perennials for seasonal blooms and ground covers to soften paths.
My favorite trick? Grouping plants by water needs so irrigation becomes a breeze. Even small yards can feel lush when you work with layers instead of against them.
You’ll end up with a garden that looks polished in spring, thrives in summer, glows in fall, and stays interesting in winter. The key is balancing evergreens for structure with seasonal stars like coneflowers, black-eyed Susans, and ornamental grasses.
Think of it as a three-dimensional painting where every plant has its own role in the composition.
This approach works for any style—cottage charm, modern minimalism, or full-blown edible landscapes. Whether you’re redesigning a postage-stamp patio or a half-acre backyard, the principles stay the same. Let’s bring your vision to life with plants that do the heavy lifting for you.
📚 In This Guide
- What you need
- Instructions
- Tips and common mistakes
- Wrapping up and next steps
What you need
- ● Plants: Tall backdrop plants (e.g., Bamboo, Holly, or Arborvitae) – 3-5 per layer
- ● Medium-height shrubs (e.g., Boxwood, Hydrangea, or Azalea) – 5-8 per layer
- ● Low-growing perennials (e.g., Hostas, Lavender, or Sedum) – 10-15 per layer
- ● Ground cover (e.g., Creeping Thyme, Moss, or Ajuga) – Enough to fill gaps
- ● Soil & Amendments: Topsoil (2-3 cubic yards for a 10’x10’ area)
- ● Compost or organic matter (1-2 bags)
- ● Slow-release fertilizer (e.g., 10-10-10 or plant-specific blend)
- ● Hardware & Structures: Garden stakes or trellises (for climbing plants like Clematis or Jasmine)
- ● Mulch (e.g., Wood chips, gravel, or pine straw) – 2-3 bags
- ○ Edging material (e.g., Brick, stone, or metal) – Optional but recommended
- ● Tools: Garden trowel or spade
- ● Pruners (bypass for clean cuts)
- ● Wheelbarrow (for hauling soil)
- ● Measuring tape & string (for layout planning)
- ● Gloves & knee pads (for comfort!)
- ● Decorative Elements: Garden ornaments (e.g., Solar-powered lights, birdbaths, or sculptures)
- ● Pathway stones or stepping stones
- ● Functional Add-Ons: Raised garden beds (for better drainage)
- ● Drip irrigation system (for low-maintenance watering)
- ● Seasonal plants (e.g., Bulbs for spring, annuals for summer)
- ● Safety & Comfort: Sunscreen & hat (for sunny days!)
- ● Portable water source (hose or watering can)
Step-by-step instructions for designing a layered plant garden
Here's my foolproof approach to creating a garden that thrives year-round with intentional layers.
🌿 Step 1: Define Your Garden's Purpose and Scale
First, sketch your space on paper, marking fixed elements like fences, patios, or trees. Measure the area to determine how many 4-foot sections you can create—this will dictate your plant groupings. I always design for 3-4 layers (tall, mid-height, ground cover, and accents) to maximize visual interest and functionality. Consider your climate zone: coastal gardens need salt-tolerant plants, while desert landscapes require drought-resistant species.
Think about the garden's primary function—whether it's for cutting flowers, edible harvests, or wildlife support. This shapes your plant choices. For example, if you want year-round color, include evergreens like boxwood or holly in your tall layer. If you're prioritizing pollinators, add native milkweed or coneflowers to your mid-height layer. Sketch rough circles for each plant's mature spread to visualize spacing before planting.
🪴 Step 2: Plan Your Tall Layer (Back of the Bed)
This is where you place your structural plants—those that will anchor the design and provide height. I typically use 3-5 plants per 4-foot section spaced 18-24 inches apart to create a natural, unforced look. Choose plants with varied textures and foliage colors: a silvery lamb's ear, a deep purple smoke bush, or a golden variegated ninebark all add dimension. For year-round interest, include evergreens like arborvitae or boxwood alongside deciduous options like hydrangeas or butterfly bushes.
Dig holes twice as wide as the root ball and as deep to encourage root spread. Amend the native soil with compost if it's heavy clay or sandy. Water each plant deeply before backfilling to eliminate air pockets. Mulch with 2-3 inches of shredded bark to retain moisture and suppress weeds. This layer sets the stage for everything else—take your time here.
🌱 Step 3: Add Your Mid-Height Layer (Middle of the Bed)
Now fill the gaps with 3-4 plants per section, choosing species that bloom at different times to extend your garden's season. I like to mix perennials like coneflowers and black-eyed Susans with ornamental grasses for movement. For a cutting garden, add snip-and-grow plants like zinnias or cosmos. Space these 12-18 inches apart, leaving room for their mature spread. Avoid planting anything taller than your tall layer here—this creates visual chaos.
Dig holes just deep enough to accommodate the root ball, then water thoroughly to settle the soil. Here's where I often make a mistake: planting too close to the tall layer plants. Always step back and visualize the mature plant sizes. If you're unsure, err on the side of spacing too far apart—you can always add filler plants later. This layer should feel lush but never crowded.
☀️ Step 4: Create Your Ground Layer (Front of the Bed)
This is where you get creative with spreaders and fillers—plants that cascade, creep, or stay low to the ground. I use a mix of 3-5 plants per section, including ground covers like creeping thyme or ajuga, along with bulbs like daffodils or alliums for early-season color. For a pollinator-friendly garden, add creeping phlox or clover. Space these 6-12 inches apart to create a dense, weed-suppressing carpet. If you're using annuals, like sweet alyssum, plant them in a diamond pattern for a polished look.
Dig holes just deep enough to cover the roots, then water gently to avoid disturbing the soil around your mid-height plants. Here's the trick: use a hand trowel to create small pockets for delicate roots, like those of creeping phlox, so you don't damage them. This layer is all about softening the edges and tying everything together. If it looks sparse at first, give it time—most ground covers fill in beautifully within a season.
✂️ Step 5: Incorporate Accent Plants and Finishing Touches
Now add the exclamation points of your design—plants that draw the eye or highlight a focal point. I like to use 1-2 accent plants per section, like a striking variegated hosta or a bold-colored heuchera. Place these where they'll be seen from your favorite seating area or along a pathway. For a container garden, add a single ornamental grass or succulent to break up the monotony. Water everything deeply one final time to ensure the roots settle into their new home.
Finally, add mulch or decorative stones to define pathways and plant beds. I prefer 3 inches of shredded bark mulch in earthy tones to blend seamlessly with the garden. Step back and take photos from different angles—you'll spot areas that need adjustment. This is your chance to refine before the garden matures. Once everything is in place, you'll have a layered design that thrives year-round with minimal maintenance.
Tips & tricks for perfect layered garden designs
Designing a layered garden that thrives year-round takes more than just planting—it's about strategic planning and thoughtful execution. Here's how to elevate your garden design from good to extraordinary.
Visualize Before You Plant: Sketch your garden layout to scale using graph paper, where each square represents 1 foot. This helps you visualize how plants will mature and interact. I always mark fixed elements like fences or patios first, then overlay my 4-foot sections to ensure balanced proportions. Use colored pencils to differentiate plant layers—this visual aid catches spacing errors before you dig a single hole.
Layer Functionality Matters: When selecting plants for each layer, consider their purpose beyond aesthetics. In your tall layer, include plants that provide vertical interest and structure, like arborvitae or hydrangeas, while your ground layer should feature plants that suppress weeds and retain moisture, such as creeping thyme or ajuga. This functional approach ensures your garden remains healthy and productive throughout all seasons.
Soil Preparation is Non-Negotiable: Before planting, conduct a simple soil test to determine pH and nutrient levels. Amend your native soil with 2-3 inches of compost mixed into the top 6-12 inches of soil, especially if you have heavy clay or sandy soil. For the tall layer plants, dig holes twice as wide as the root ball to encourage proper root spread—this is where most gardeners make the critical mistake of planting too shallow.
Seasonal Interest Planning: To achieve year-round beauty, select plants with staggered bloom times and varying foliage colors. For example, include early spring bloomers like daffodils in your ground layer, summer perennials like coneflowers in the mid-height layer, and evergreens like boxwood in the tall layer. Don't forget to incorporate plants with winter interest, such as ornamental grasses or berry-producing shrubs, to keep your garden visually engaging in every season.
Pro Tips for Plant Garden Design
- Designing a layered garden that thrives year-round takes more than just planting—it's about strategic planning and thoughtful execution.
- Visualize Before You Plant: Sketch your garden layout to scale using graph paper, where each square represents 1 foot.
- Layer Functionality Matters: When selecting plants for each layer, consider their purpose beyond aesthetics.
Frequently asked questions
Got questions about designing a layered plant garden?
Here are answers to the most common ones—whether you're a beginner or refining your green thumb!
What’s the best way to start a layered garden if I have limited space?
Use vertical layers like trellises for climbing plants (e.g., morning glories or ivy) and stack containers at different heights. Opt for compact perennials (like hostas or ferns) in the mid-layer and ground covers (e.g., creeping thyme) for the base. Even small balconies or windowsills can host a thriving, multi-tiered garden!
When is the ideal time to plant a layered garden for year-round success?
Start in early spring (after the last frost) for warm-season plants, or late summer/early fall for cool-season varieties. For perennials, plant in spring; for annuals, stagger plantings every 2–3 weeks to extend blooms. Evergreens and shrubs can go in fall for root establishment.
How do I fix uneven growth or dead spots in my layered garden?
First, check sunlight exposure—some layers may need pruning to open up light for lower plants. For dead spots, remove diseased foliage and amend soil with compost. If roots are crowded, transplant or divide overgrown perennials. Mulch helps retain moisture and suppress weeds, keeping layers lush!
Can I mix edible plants with ornamental ones in a layered design?
Pair herbs (like rosemary or thyme) at the mid-layer with vegetables (e.g., lettuce or radishes) beneath, and fruit bushes (e.g., blueberries) as taller accents. Just ensure edibles get enough space (check plant tags) and avoid toxic combos (e.g., foxglove near veggies). Pollinator-friendly flowers (like marigolds) boost yields too!
What are low-maintenance alternatives to high-upkeep layered gardens?
Choose drought-tolerant plants (e.g., succulents, lavender, or sedum) for minimal watering. Use self-seeding annuals (like cosmos) to reduce replanting. Native plants thrive with less intervention, and ground covers (e.g., ajuga or clover) suppress weeds. Group plants by needs to simplify care!
Wrapping up and next steps
Designing a layered garden isn’t just about aesthetics—it’s about creating a thriving, functional space that brings joy all year round. 🌿 Whether you’re maximizing productivity with herbs and veggies or crafting serene layers of flowers and shrubs, the key is balance: height, texture, and seasonal interest.
Start small, experiment fearlessly, and watch your garden transform into a lush, ever-evolving masterpiece.
Ready to dive in? Sketch your first layout today! Grab a notebook (or a digital tool), jot down your favorite plants, and let your vision take root. Every great garden begins with a single step—and yours could be next! 🌱