
Tools
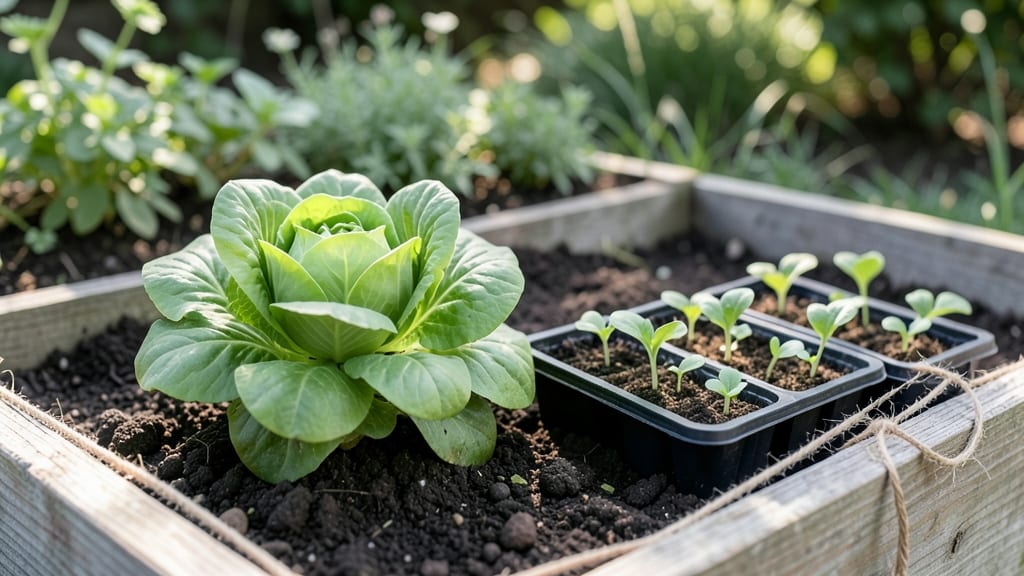
Temporary garden beds let you grow food or flowers without permanent changes to your yard. I’ve used them to test new spots, extend my growing season, and even create pop-up displays for neighbors’ parties—all without digging or committing to a full garden layout.
The beauty is in their flexibility: you can set them up in 30 minutes and move them when needed.
Cardboard, landscape fabric, or even wooden frames work perfectly for these beds. I prefer cardboard for its free cost and natural breakdown, but fabric lasts longer if you reuse it.
Place them where you have at least 6 hours of sunlight, and avoid spots where they’ll get trampled or shaded by trees. Best plants include fast growers like lettuce, radishes, and herbs, which thrive in temporary setups.
You’ll end up with a neat, contained growing area that’s easy to maintain and customize. No weeds to pull, no soil to till, and no long-term cleanup—just fresh produce or vibrant blooms in weeks.
The only downside? They don’t hold moisture as well as permanent beds, so watering consistently is key.
Perfect for renters, small spaces, or anyone who wants to try gardening without a big investment. Once you see how simple and effective they are, you might just fall in love with the idea of growing anywhere. Let’s get started!
📚 In This Guide
- What you need
- Instructions
- Tips and common mistakes
- Wrapping up and next steps
What you need
- ● Cardboard or thick newspaper: 10-15 sheets (for weed suppression and moisture retention). Use uncoated, non-glossy paper to avoid chemicals.
- ● Compost or well-aged manure: 2-4 cubic feet per 4’x8’ bed (aim for rich, nutrient-dense soil).
- ● Mulch (straw, wood chips, or leaves): 2-3 inches thick to retain moisture and suppress weeds.
- ○ Garden twine or landscape fabric: Optional but helpful for securing edges or reinforcing beds.
- ● Gloves and a trowel: For hands-on work—choose durable gloves for comfort.
- ● Watering can or hose with a gentle spray nozzle: For even moisture distribution.
- ● Measuring tape and stakes: To mark and define bed dimensions (4’x8’ is a common size for easy access).
- ● Bio-degradable weed barrier cloth: For longer-lasting weed control (lasts 1-2 seasons).
- ● Plant supports (stakes, cages, or trellises): For taller plants like tomatoes or cucumbers.
- ● Slow-release fertilizer: Mix into compost for a nutrient boost.
- ● Kneeling pad: For extra comfort during planting.
- ● Seedling trays or pots: If starting plants indoors before transplanting.
How to create temporary garden beds for flexible planting
Here’s my go-to method for setting up temporary beds that let you grow vegetables, herbs, or flowers without permanent groundwork.
Choose Your Location and Clear the Area
Pick a flat, sunny spot that gets at least 6 hours of sunlight daily. Avoid areas with standing water or dense weeds—these beds work best where the ground is already somewhat clear. Use a rake to remove rocks, debris, and any stubborn weeds, focusing on the top 4-6 inches of soil. The goal is to create a clean, workable surface without tilling deeply, which can disrupt soil structure and bring up weeds.
If your chosen area has thick grass or weeds, lay down black plastic sheeting for 4-6 weeks before planting to smother them. This step is optional but saves time later. Just weigh down the edges with bricks or landscape fabric to keep it in place. Once the area is clear, you’re ready to build your temporary bed.
Build the Bed Frame for Structure
Construct a simple frame using 2x4 lumber or cedar planks to create a rectangular or square bed about 4 feet wide and 8 feet long. The height should be 6-12 inches off the ground to improve drainage and reduce weed competition. Secure the corners with screws or stakes, ensuring the frame is level. This elevated structure also makes it easier to reach plants without bending over.
Line the inside of the frame with cardboard or thick newspaper to suppress weeds and retain moisture. Overlap the edges by 2-3 inches and secure with staples or tape. This layer acts as a barrier, preventing weeds from growing up through the bed. Avoid using treated lumber, as chemicals can leach into the soil and harm plants.
Fill the Bed with Organic Materials
Fill the frame with a 4-inch layer of coarse wood chips or straw to improve drainage and aeration. This layer breaks down over time, adding organic matter to the soil. Next, add a 6-inch layer of compost—this is the heart of your temporary bed, providing nutrients and structure. Spread the compost evenly, fluffing it with your hands or a rake to create a loose, crumbly texture.
Top the bed with a 2-inch layer of finished compost or aged manure to ensure plants have immediate access to nutrients. Mix in a handful of granular organic fertilizer (like 10-10-10) if you’re planting heavy feeders like tomatoes or peppers. Water the entire bed lightly to settle the layers and moisten the soil, but avoid oversaturating it.
Plant and Mulch for Long-Term Success
Plant your seeds or seedlings directly into the bed, spacing them according to their mature size. For example, bush beans should be 3-4 inches apart, while tomatoes need 18-24 inches between plants. Gently press the soil around each plant to secure it without compacting the bed. Water thoroughly after planting to help roots establish.
Cover the entire bed with a 2-3 inch layer of straw or wood chips to retain moisture, suppress weeds, and regulate soil temperature. Mulch also keeps the bed looking neat and reduces the need for frequent watering. Replenish the mulch every 4-6 weeks as it breaks down, especially during hot, dry periods. This method keeps your temporary bed productive for one full growing season or even longer with minimal upkeep.
Maintain and Extend the Bed’s Lifespan
Water the bed deeply once a week, or more often during dry spells, to keep the soil evenly moist but not soggy. Check the top 1-2 inches of soil—if it feels dry, it’s time to water. Avoid overhead watering, which can spread disease. Instead, use a soaker hose or drip irrigation to deliver moisture directly to the roots.
Monitor the bed for weeds or pests, but don’t panic if a few pop up. A temporary bed is designed for flexibility, so you can easily remove weeds by hand or pull up affected plants if necessary. At the end of the season, remove the frame and compost the organic materials to enrich your garden soil. If you want to reuse the space next year, repeat the process with fresh materials.
Tips & tricks for perfect temporary garden beds
These practical tips will help you create temporary garden beds that last all season while avoiding common pitfalls.
Sunlight Secret: The 6 hours of daily sunlight mentioned in Step 1 is non-negotiable for most vegetables and herbs. If your location gets less light, consider growing shade-tolerant plants like lettuce or Swiss chard instead. For maximum productivity, place your bed where it gets morning sun and afternoon shade during hot summers—this prevents soil from drying out too quickly.
Frame Flexibility: While the instructions suggest 2x4 lumber, you can use other materials like untreated pallet wood or even sturdy cardboard boxes for smaller beds. The key is maintaining that 6-12 inch height—this elevation improves drainage and makes weeding easier. If using wood, untreated cedar lasts longest and resists rot, but any untreated wood will work for a single season.
Compost Layering: When adding your 6-inch compost layer in Step 3, mix in a handful of worm castings if available. These add beneficial microbes that help plants absorb nutrients more efficiently. For heavy feeders like tomatoes, you can increase the compost layer to 8 inches—just adjust the top mulch layer accordingly to maintain the same bed height.
Watering Wisdom: The once-a-week watering guideline in Step 5 works best in moderate climates. In hotter regions, you may need to water every 3-4 days, while cooler climates might stretch it to 10 days. Always check that top 1-2 inches of soil—this is the best indicator of when your plants need water. Early morning is the ideal time to water, as it reduces evaporation and fungal growth.
Pro Tips for Temporary Garden Beds
- These practical tips will help you create temporary garden beds that last all season while avoiding common pitfalls.
- Sunlight Secret: The 6 hours of daily sunlight mentioned in Step 1 is non-negotiable for most vegetables and herbs.
- Frame Flexibility: While the instructions suggest 2x4 lumber, you can use other materials like untreated pallet wood or even sturdy cardboard boxes for smaller beds.
Frequently asked questions
Got questions about temporary garden beds? You’re not alone!
Here are some of the most common concerns—and straightforward answers—to help you get started with confidence. Whether you’re a first-timer or a seasoned gardener, these FAQs will clear up any doubts before you dig in.
What’s the best time of year to set up temporary garden beds?
Temporary beds work year-round, but timing depends on your climate and crops. For cool-season veggies (like lettuce or peas), spring or fall is ideal. Warm-season plants (tomatoes, peppers) thrive in summer beds. In colder regions, wait until after the last frost—typically late April to early June. Pro tip: Use row covers early in the season to extend the growing window!
How long can I use a temporary garden bed before replacing the fabric?
Most landscape fabric lasts 1–3 seasons (or 12–24 months) before degrading. Signs it’s time to replace it include mold, tears, or roots breaking through. For longer use, opt for thicker, UV-stabilized fabric (like 4–6 oz). If you’re reusing beds, rotate their locations yearly to prevent soil depletion.
Do temporary beds need special irrigation? Will they dry out faster?
Yes, fabric beds can dry out quicker due to reduced moisture retention. Use drip irrigation or soaker hoses for consistent watering, and mulch the soil surface to lock in moisture. Water deeply 2–3 times per week (adjust for rain). A 5-gallon bucket test helps gauge drainage—if water pools, add compost to improve absorption.
Can I grow anything in temporary beds, or are some plants better suited?
Most vegetables, herbs, and even small fruits (like strawberries) thrive in temporary beds. Avoid deep-rooted plants (asparagus, artichokes) or heavy feeders (corn, pumpkins)—they’ll outgrow the space. Leafy greens, radishes, and bush beans are perfect for short-term beds. For perennials, use the beds as starter plots before transplanting.
Will pests or weeds be a bigger problem in temporary beds?
Fabric beds reduce weeds but don’t eliminate pests. Use row covers for insects and companion planting (like marigolds or basil) to deter pests naturally. Check for slugs or aphids regularly—handpick or use neem oil if needed. Weeds may sprout along the fabric edges; pull them early to avoid spreading.
What do I do with the bed after the season ends?
Remove plants, compost them, and flip or replace the fabric if it’s worn. Till the soil lightly to aerate, then let it rest for a season. Avoid reusing the same spot consecutively without replenishing nutrients. Store fabric in a dry place for next year, or repurpose it as weed barrier in pathways. →
Wrapping up and next steps
Temporary garden beds offer a flexible, low-effort way to grow fresh produce without long-term commitment—perfect for renters, urban gardeners, or anyone craving quick results! 🌱 Whether you’re reviving soil, testing crops, or maximizing small spaces, these beds deliver season-long success with minimal upkeep.
The best part? You can adapt, reuse, and expand as your green thumb grows.
Ready to dive in? Start small—try a 4’x8’ bed with your favorite veggies or herbs—and watch your confidence (and harvests!) flourish. Happy planting! 🌿