
Tools
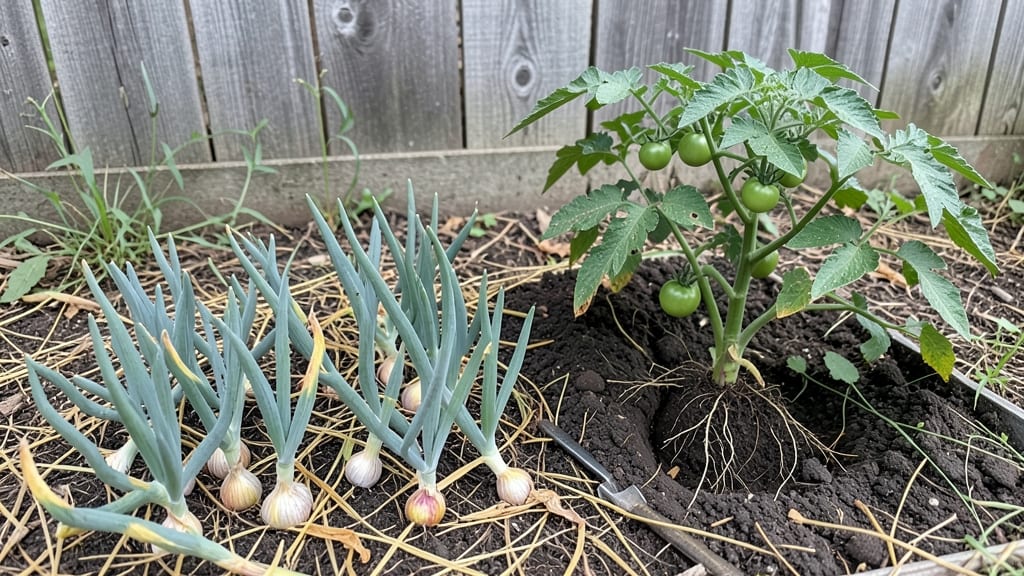
The kitchen garden revival isn't just about growing food—it's about reclaiming a corner of your world where every leaf and bloom feels intentional. I transformed my tiny balcony into a year-round harvest zone, and the results shocked even me.
The key? Thinking vertically, choosing crops that thrive in layers, and letting go of old notions that kitchen gardens need big plots.
Start with what you love to eat: cherry tomatoes that spill over trellises, basil that grows in hanging pockets, or radishes that pop up in shallow containers.
My setup uses three 5-gallon buckets, a 4-foot tall vertical panel, and a rolling cart for seasonal swaps—no fancy tools, just smart organization. The best part? You can tweak this for any space, from a windowsill to a backyard corner.
By summer, you'll be snipping fresh herbs for meals, harvesting crisp greens in winter, and watching bees buzz around flowers that also feed your table. The garden becomes a living pantry, not just a pretty view.
And when neighbors ask how you do it, you'll just smile—the secret is in the layers.
This works for city balconies, suburban backyards, or even indoor grow setups. The only rule? Make it yours. Whether you go for cottage charm or modern minimalism, the goal is the same: a garden that gives back all year long.
📚 In This Guide
- What you need
- Instructions
- Tips and common mistakes
- Wrapping up and next steps
What you need
- ● Growing Containers: 3–5 10–15 gallon pots (fabric or plastic) or a raised bed (4’x8’) for better drainage.
- ● High-Quality Soil: 1–2 bags of organic potting mix (or compost + perlite for DIY blends).
- ● Seeds/Seedlings: Fast-growing varieties like lettuce, herbs (basil, parsley), radishes, or microgreens (pick 3–5 types).
- ● Mulch: Straw or shredded leaves (1–2 inches) to retain moisture and suppress weeds.
- ● Watering Supplies: A watering can (2–3 gallons) with a rose attachment.
- ○ Drip irrigation kit (optional, for automation).
- ● Hand Trowel: Stainless steel or ergonomic for planting and weeding.
- ● Pruners: Bypass pruners for trimming herbs/veggies.
- ○ Garden Gloves: Lightweight, breathable (optional but handy!).
- ● pH Test Kit: To monitor soil health (critical for year-round success!).
- ● Grow Lights: LED full-spectrum bulbs for indoor/low-light setups.
- ● Self-Watering Planters: For hassle-free hydration (great for busy gardeners!).
- ● Compost Bin: Turn kitchen scraps into nutrient-rich soil.
- ● Vertical Garden Kit: Maximize space with wall-mounted planters.
Instructions for reviving your kitchen garden in small spaces
Transform even the tiniest corner into a thriving harvest zone with these practical steps.
Assess and Prepare Your Space
Start by measuring your available area—even a 4-foot by 4-foot patch can produce enough for four people. Clear away weeds and debris, then loosen the soil to a depth of 6 inches using a garden fork. This aeration helps roots establish quickly. If your soil feels compacted or heavy, mix in 2 inches of compost from the materials list to improve drainage and fertility.
Pay attention to sunlight patterns throughout the day. Most vegetables need at least 6 hours of direct sun, while leafy greens tolerate 4-5 hours. Mark the sunniest spot with a stake—this will be your primary planting zone. If shade is an issue, prioritize fast-growing crops like radishes or lettuce that mature quickly.
Plan for Year-Round Success
Divide your space into four equal sections to create a simple crop rotation system. This prevents soil depletion and reduces pest buildup. In each section, plant cool-season crops like spinach or kale in early spring and fall, then switch to warm-season crops like tomatoes or peppers in summer. Use the 1-gallon containers from your supplies for heat-loving plants that need extra warmth.
Extend your growing season by adding row covers or a small cold frame (if available) to protect tender plants. These tools create a 10-15°F warmer microclimate, letting you plant 4-6 weeks earlier in spring or harvest 2-3 weeks later in fall. Check soil temperature with a thermometer—most seeds need at least 50°F to germinate.
Start with Easy, High-Yield Crops
Begin with fast-maturing varieties like bush beans, lettuce, or radishes—they’ll give you quick wins and keep motivation high. Plant seeds ½ inch deep in well-prepared soil, spacing them according to the packet instructions. For example, radishes should be 1 inch apart, while bush beans need 3-4 inches between plants. Use the seed-starting tray for delicate seedlings that need extra care.
Water gently after planting to settle the soil, then maintain 1 inch of moisture in the top layer at all times. Avoid overhead watering once seedlings emerge—it spreads disease. Instead, use a drip irrigation system or water at the base with a watering can. You’ll know you’re doing it right when the soil feels damp but not soggy.
Maintain and Protect Your Harvest
Fertilize every 4-6 weeks with the balanced organic fertilizer from your supplies, following the package rate. This keeps plants vigorous without overfeeding. Watch for pests like aphids or cabbage worms—remove them by hand or spray with neem oil (if available) in the evening when bees aren’t active. A physical barrier, like row covers, works well for early-season protection.
Harvest regularly to encourage more production. For example, pick lettuce leaves when they reach 3-4 inches tall, and harvest radishes when they’re 1 inch in diameter. Never let vegetables overmature—they’ll turn bitter or woody. Mulch with 2 inches of straw to retain moisture, suppress weeds, and regulate soil temperature. This simple step cuts down on watering by 30-40%.
Rotate and Refresh for Next Season
Before planting your next crop, remove spent plants and add another 1-2 inches of compost to replenish nutrients. Rotate your planting sections so the same family of plants (like tomatoes or brassicas) isn’t in the same spot next year. This breaks pest and disease cycles naturally. If using containers, refresh the soil completely—old potting mix loses structure and fertility over time.
Take notes on what worked and what didn’t. Did your tomatoes thrive in the 1-gallon containers, or did they outgrow them by midsummer? Did the radishes bolt too quickly in the heat? Adjust your plan for next season based on these observations. A small garden like this rewards attention—your efforts will show in the harvest.
Tips & tricks for perfect small-space garden productivity
Small gardens deliver big rewards when you focus on the right techniques—here's how to maximize every square inch.
Soil Prep Matters: In Step 1, don't just loosen the top 2 inches of soil—go deeper with your garden fork to break up compacted layers down to that full 6-inch depth. I've seen roots struggle when they hit hardpan just below the surface. The extra effort pays off with stronger plants that can access nutrients deeper in the soil.
Sunlight Strategy: When marking your sunniest spot in Step 1, observe the area at different times of day. The morning sun might be perfect for leafy greens, while afternoon sun works better for tomatoes. I've had radishes thrive where tomatoes would wilt—it's all about matching plants to their ideal light conditions.
Season Extension Hack: For that 10-15°F warmer microclimate in Step 2, consider using clear plastic bottles cut in half as mini cold frames. They're free, portable, and create the same protective effect as commercial frames. Just make sure to remove them when temperatures rise above 75°F to prevent overheating.
Watering Wisdom: In Step 3, that 1 inch of moisture guideline works best when measured at the soil surface—not when water appears on top. I use a simple screwdriver to check moisture levels—if it comes out clean, you need water; if it's damp, hold off. This prevents both underwatering and soggy soil that invites disease.
Pro Tips for Kitchen Garden Revival
- Small gardens deliver big rewards when you focus on the right techniques—here's how to maximize every square inch.
- Soil Prep Matters: In Step 1, don't just loosen the top 2 inches of soil—go deeper with your garden fork to break up compacted layers down to that full 6-inch depth.
- Sunlight Strategy: When marking your sunniest spot in Step 1, observe the area at different times of day.
Frequently asked questions
What’s the best way to start a kitchen garden in a small space?
Use vertical gardening (trellises, hanging pots) and container gardening (raised beds, window boxes) to maximize space. Opt for compact, high-yield varieties like cherry tomatoes, dwarf peppers, or leafy greens. Start small—even a sunny windowsill or balcony can work!
When is the best time to plant for year-round harvests?
For cool-season crops (kale, spinach, carrots), plant in early spring or fall. Warm-season crops (tomatoes, peppers) thrive in late spring/summer. Use season extenders (row covers, cold frames) to push limits. Succession planting (sowing seeds every 2–3 weeks) ensures continuous harvests.
How much does a kitchen garden revival cost, and where can I save money?
Costs vary, but you can start for under $50 with DIY containers (repurposed buckets, pallets) and seeds from local swap meets. Save on soil by composting kitchen scraps or using free yard waste from neighbors. Skip expensive tools—many tasks (like pruning) can be done with scissors or a fork!
What’s the easiest way to deal with pests without chemicals?
Prevent pests with companion planting (e.g., basil near tomatoes), row covers, or neem oil sprays. Handpick bugs early, and attract predators like ladybugs with dill or marigolds. Healthy soil (rich in worms) naturally deters pests. Rotate crops yearly to break pest cycles.
Can I grow a kitchen garden in hot climates or apartments?
In hot climates, choose heat-tolerant varieties (okra, sweet potatoes) and provide shade. For apartments, prioritize herbs (basil, mint) and microgreens—they thrive in pots with 4–6 hours of light. Use grow lights if natural light is limited. Even a sunny windowsill can yield fresh greens!
Wrapping up and next steps
The kitchen garden revival isn’t just about reclaiming space—it’s about reclaiming joy. Whether you’re growing herbs in a sunny windowsill or cultivating a full harvest in a raised bed, small spaces can yield big rewards.
The key? Start small, stay consistent, and let your green thumb grow with each season.
Ready to take the next step? Begin with one or two easy-to-grow plants, track your progress, and watch your confidence (and harvest!) flourish. Your future self—and your taste buds—will thank you! 🌱✨