
Tools
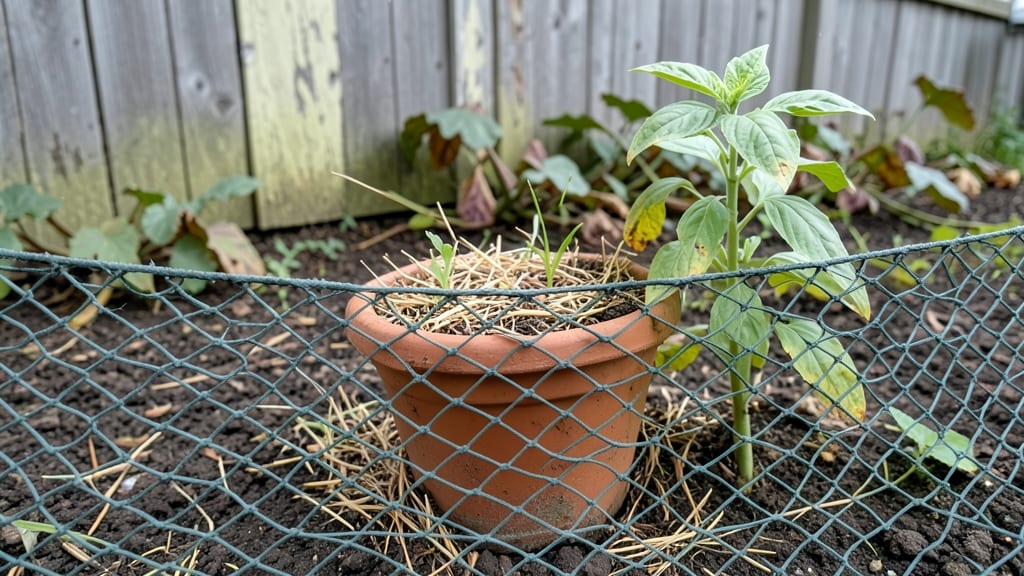
Transforming tight spaces into productive gardens starts with the right mesh for garden barriers and supports. 🌱 I’ve used everything from sturdy hardware cloth to decorative trellis mesh, and each has a surprising impact on what—and how—you grow.
The secret isn’t just saving space; it’s creating a smarter, more protected growing environment where even small yards feel like greenhouses.
Hardware cloth keeps critters like rabbits and squirrels out, while landscape fabric suppresses weeds without smothering plants. Trellis mesh, on the other hand, turns floppy vines into vertical masterpieces—think cucumbers climbing to the sky or morning glories framing a patio.
Durability varies: hardware cloth lasts decades, but decorative mesh might need replacing every few years. The right choice depends on whether you prioritize function or flair.
You’ll end up with a garden that’s easier to manage, looks intentional, and produces more. Imagine tomatoes thriving without staking, herbs growing up instead of sprawling, and a front yard that feels like a curated garden show.
The best part? These setups take less than an hour to install and pay dividends all season long.
Whether you’re dealing with a balcony, a raised bed, or a fenced yard, mesh opens up possibilities. From pest-proofing to adding height, it’s the unsung hero of compact gardening. Let’s break down how to pick the perfect type for your project—and avoid the mistakes that turn DIY into frustration.
📚 In This Guide
- What you need
- Instructions
- Tips and common mistakes
- Wrapping up and next steps
What you need
- ● Garden Mesh: 1–2 rolls of heavy-duty galvanized or PVC-coated mesh (e.g., 1/2"–3/4" hexagonal or diamond mesh, 4'–6' wide, 50–100 ft long). Pro tip: 💡 Choose UV-resistant mesh for longevity!
- ● Support Structure: Wooden posts: 4–6 pieces of pressure-treated 4x4 lumber (8 ft long) for corners or vertical supports.
- ● OR metal pipes: 4–6 sections of galvanized steel conduit (1.5" diameter, 8 ft long) for a modern look.
- ● OR PVC pipes: 4–6 pieces of schedule 40 PVC, 2" diameter (eco-friendly and lightweight).
- ● Fasteners: Zippers ties or plastic-coated wire (10–20 pieces) to secure mesh to the frame.
- ● Outdoor-rated screws (e.g., deck screws, 2.5"–3" long) or metal stakes for anchoring.
- ● Extras for Stability: L-brackets or corner braces (4–6 pieces) to reinforce joints.
- ○ Concrete footings (optional but recommended for heavy structures—use quikrete or pre-cast blocks).
- ● Drip irrigation kit (for hassle-free watering).
- ● Landscape fabric (to block weeds behind the mesh).
- ● LED grow lights (if your garden gets minimal sunlight).
- ● Decorative paint/stain (to match your yard’s aesthetic).
Step-by-Step instructions for building a mesh garden framework
Here's how to create a sturdy vertical garden using mesh—perfect for small spaces or urban balconies.
🪴 Step 1: Measure and Cut Mesh Panels to Size
Start by measuring your vertical space. For a 4-foot-tall garden, cut mesh panels to 3 feet wide (to account for framing) and 4 feet tall. Use heavy-duty wire cutters to trim the mesh cleanly—uneven edges make installation messy. I like to mark measurements with a fabric marker before cutting to avoid mistakes.
If your structure has curves (like a trellis), bend the mesh gently along the wire grid—don’t force it, or the wires will snap. For corners, overlap mesh by 2-3 inches and secure with garden staples or zip ties to prevent sagging. Test-fit each panel before attaching to ensure it aligns perfectly with your frame.
🌱 Step 2: Assemble the Frame and Attach Mesh
Build your frame using 2x4 lumber or galvanized metal pipes (whichever matches your design). For a 4-plant setup, a simple A-frame or rectangular box works best. Pre-drill holes where mesh panels will attach—this prevents splintering and makes securing easier. Use outdoor-rated screws or heavy-duty staples to fasten the mesh tautly to the frame.
Pull the mesh tight before securing it; loose mesh will sag under plant weight and look unprofessional. For extra stability, add horizontal supports every 2 feet along the frame. If using metal pipes, wrap mesh around the structure and secure with zip ties every 12 inches to keep it snug. Double-check that no sharp edges poke through—smooth everything out for plant safety.
☀️ Step 3: Add Growing Medium and Plant Supports
Line the mesh with landscape fabric to prevent soil from slipping through the gaps. Fill the frame with lightweight potting mix (avoid garden soil—it’s too heavy and compacts). For a 4-plant setup, use about 3 gallons of mix per panel. Press the soil gently against the mesh to create pockets for roots while keeping it loose enough for drainage.
Plant your chosen climbers (like beans, peas, or ivy) at the bottom corners of the mesh. Space them 6-8 inches apart to allow room to grow. If using herbs or shallow-rooted plants, mix in perlite for extra airflow. Water thoroughly after planting to settle the soil and encourage root contact with the mesh. Avoid overwatering—mesh gardens dry out faster than ground-level beds.
💧 Step 4: Secure and Maintain the Structure
Anchor your mesh garden to a stable wall, fence, or freestanding post using L-brackets or heavy-duty straps. For freestanding frames, bury the base 6 inches deep or use concrete footings to prevent tipping in wind. If your garden is tall, add cross-bracing between panels for extra wind resistance—especially if you live in a breezy area.
Check the mesh weekly for tears or loose staples, especially after heavy rain or wind. Trim plants regularly to prevent overcrowding, and fertilize every 4-6 weeks with a balanced liquid fertilizer. If using edibles, harvest frequently to encourage new growth. With proper care, your mesh garden will stay sturdy and productive for years.
Tips & tricks for perfect vertical mesh garden framework
Here's what I've learned after building (and fixing!) several mesh gardens—these tricks make all the difference for long-term success.
Mesh Selection Matters: Not all mesh is created equal. For a 4-foot-tall garden, choose ½-inch hardware cloth or plastic-coated wire mesh—it's durable enough to hold soil and plants while allowing proper drainage. Avoid cheap plastic mesh that can tear easily. In Step 1, when cutting your 4-foot panels, double-check the mesh rating—some garden mesh is too flimsy for vertical loads.
Frame Stability is Non-Negotiable: In Step 2, when attaching mesh to your frame, remember that 2x4 lumber works well for small gardens, but for anything taller than 5 feet, upgrade to 4x4 posts or galvanized steel pipes. I've seen too many wobbly frames collapse under plant weight! Add those horizontal supports every 2 feet—it's worth the extra effort to prevent sagging. For windy areas, consider adding diagonal bracing between panels.
Soil Weight Consideration: The 3 gallons of lightweight potting mix per panel in Step 3 is crucial—heavy garden soil will pull your mesh apart over time. Mix in perlite or vermiculite (about 10% of the total volume) to improve drainage and reduce weight. When pressing soil against the mesh, work gently to create pockets without compacting it too much. Overly dense soil will suffocate roots and make watering inefficient.
Plant Placement Strategy: In Step 3, when planting your climbers, place the heaviest plants (like beans) at the bottom corners where the mesh is most supported. Lighter plants (like herbs) can go toward the top. Space them 6-8 inches apart to prevent overcrowding—this gives roots room to spread against the mesh. For vining plants, consider adding soft ties to guide them upward gently without damaging stems.
Pro Tips for Mesh For Garden
- Here's what I've learned after building (and fixing!) several mesh gardens—these tricks make all the difference for long-term success.
- Mesh Selection Matters: Not all mesh is created equal.
- Frame Stability is Non-Negotiable: In Step 2, when attaching mesh to your frame, remember that 2x4 lumber works well for small gardens, but for anything taller than 5 feet, upgrade to 4x4 posts or galvanized steel pipes.
Frequently asked questions
Got questions about using mesh for garden projects? You’re not alone! Here are some of the most common concerns—and their straightforward solutions—to help you plan like a pro.
What’s the best type of mesh for a garden?
For most garden projects, plastic-coated wire mesh (like hardware cloth) or galvanized steel mesh are top choices. Plastic mesh is lightweight and rust-resistant, ideal for trellises or plant supports, while galvanized steel is sturdier for heavier structures like raised beds or animal enclosures. Choose based on durability needs and budget!
When is the best time to install garden mesh?
Install mesh before planting season—typically in early spring or late winter—for trellises, cages, or raised beds. If retrofitting, do it before plants grow too tall to avoid damaging roots or stems. For erosion control, install mesh immediately after clearing debris to prevent soil loss.
Can I use mesh instead of fencing for a garden?
Mesh works as a cost-effective, lightweight alternative to traditional fencing. Use 1/2-inch hardware cloth for small gardens or 1-inch mesh for larger areas. Secure it to posts or stakes, and add plants like roses or ivy for a natural, decorative look. Just ensure it’s buried or anchored deeply to deter critters!
How do I keep pests out with garden mesh?
To block pests like rabbits or rodents, use mesh with holes smaller than 1 inch. Bury the mesh 6 inches deep around the perimeter to prevent digging. For flying insects, pair mesh with fine netting or row covers. Pro tip: Check for gaps regularly—even tiny holes can let pests through!
What’s the easiest way to attach mesh to a frame?
Use staple guns, zip ties, or wire ties for quick assembly. For wood frames, pre-drill holes and secure with screws or nails. For metal frames, galvanized staples work best. Always overlap mesh seams by 6–12 inches and seal edges with wire or tape to ensure stability.
Wrapping up and next steps
Transforming your compact yard into a lush, space-saving garden is easier than ever with the right mesh for garden framework! Whether you're a beginner or a seasoned green thumb, vertical gardening opens up endless creative possibilities—think fresh herbs, vibrant flowers, or even veggies—without sacrificing precious square footage. 🌱✨
Ready to take the plunge? Start by sketching your dream design, gathering your materials, and diving into your first project. Your future garden awaits—what will you grow first? 🌿💚