
Tools
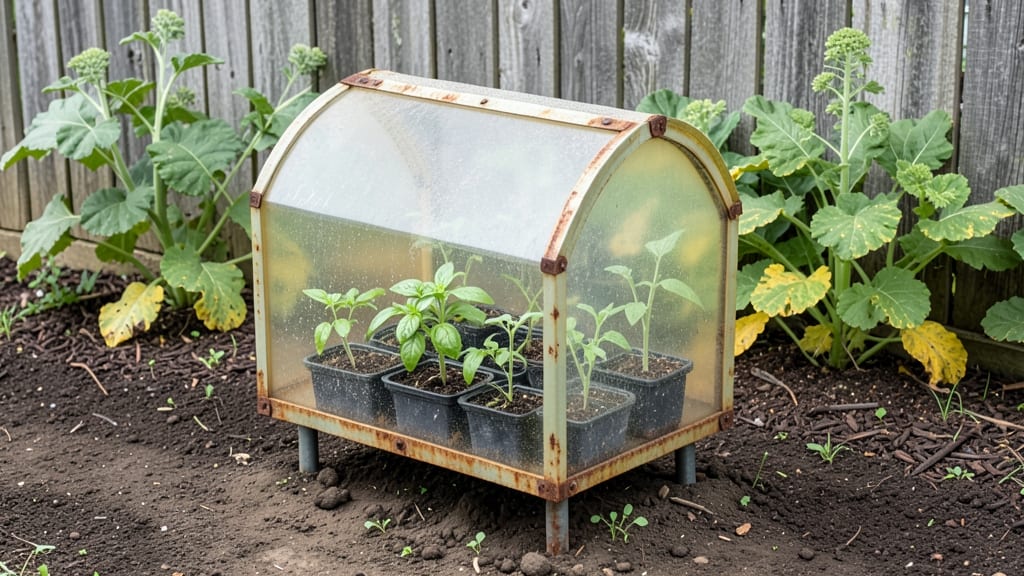
A mini garden greenhouse lets you grow fresh herbs and veggies even when your neighbors are still shoveling snow. 🌱 I’ve tested everything from plastic pop-up tents to sleek glass domes, and the right one can extend your growing season by 3-4 months—no fancy greenhouses required.
The key is matching its size to your space and plants, whether that’s a balcony, windowsill, or corner of the yard.
You don’t need a sunroom to make it work. A 4’x4’ footprint fits most patios, while vertical models save space in tiny apartments. My go-to setup uses a clear polycarbonate shell (durable and lightweight) with adjustable vents—critical for avoiding overheating on sunny days.
For seed starting, even a 1’x2’ tabletop model works wonders, giving seedlings the cozy environment they crave before transplanting.
Imagine snipping fresh basil in December or harvesting cherry tomatoes in October while your friends are still shopping at the store. The greenhouse keeps roots warm, protects from pests, and traps humidity, so your plants stay lush and productive long after the first frost.
Best of all? You can move it around to follow the sun or protect delicate plants from unexpected cold snaps.
Whether you’re growing microgreens, starting tomatoes, or overwintering tender perennials, the right greenhouse turns a small space into a high-output growing machine. Let’s pick the perfect model for your setup and get those plants thriving year-round.
📚 In This Guide
- What you need
- Instructions
- Tips and common mistakes
- Wrapping up and next steps
What you need
- ● Base Structure: Wooden frame (2x4 lumber, 1x12 boards for sides) – ~10-12 ft total
- ● OR pre-made greenhouse kit (e.g., 4’x4’ or 6’x6’ with polycarbonate panels)
- ● Covering: Clear polycarbonate panels (4mm–6mm thickness) – 2-4 sheets, depending on size
- ● OR greenhouse plastic sheeting (6mil thickness, UV-resistant)
- ● Hardware: Screws (deck screws or galvanized) – 50+ pieces
- ● Hinges (for doors) – 1-2 sets
- ● Latches or zip ties (to secure panels)
- ● Weatherstripping (for sealing gaps)
- ● Tools: Drill/driver
- ● Measuring tape & pencil
- ● Saw (if cutting custom wood)
- ● Scissors or utility knife (for plastic)
- ● Small fan or vent kit (for airflow)
- ● Thermometer/hygrometer (to monitor conditions)
- ● Grow lights (LED, full-spectrum for low-light areas)
- ● Drip irrigation system (automated watering)
- ● Insulation (reflective bubble wrap or foam boards for cold climates)
Step-by-Step guide to assembling your mini garden greenhouse
Here's how to create a climate-controlled micro-environment that extends your growing season—no matter your starting space.
🪴 Step 1: Select and Position the Base Structure
Choose a location that receives at least 6 hours of sunlight daily, preferably on a flat surface like a patio or balcony. I recommend placing it near a water source for easy access during maintenance. The base should be sturdy—concrete blocks or a heavy-duty tray prevents wind from tipping it over. If you're using a pre-made greenhouse kit, follow the manufacturer’s weight distribution guidelines to avoid instability.
For DIY bases, I use cinder blocks or pavers arranged in a square or rectangular shape, leaving 2-3 inches of clearance between blocks for drainage. This gap ensures excess water can escape while still providing a stable foundation. Level the base with a rubber mallet if needed—uneven surfaces will cause structural stress over time.
☀️ Step 2: Install the Frame and Secure Transparent Panels
Assemble the frame according to the manufacturer’s instructions, ensuring all joints are tight and reinforced with screws or clamps. For DIY models, I use PVC pipes or aluminum tubing because they resist rust and won’t warp under temperature fluctuations. The frame should be slightly taller than your tallest plants—typically 24-36 inches—to allow for air circulation and easy access.
Attach the transparent panels (polycarbonate or acrylic) last. Start at the bottom and work upward, securing each panel with weatherstripping along the edges to seal gaps. This prevents drafts and retains humidity. If your greenhouse has vents, position them opposite each other to create a cross-breeze effect—critical for preventing heat buildup on sunny days.
💧 Step 3: Configure Internal Climate Controls
Place a thermometer and hygrometer inside to monitor conditions—ideal temperatures range from 65-75°F during the day and 55-60°F at night. If your greenhouse lacks built-in vents, install adjustable louvers at the top to release excess heat. I also add a small fan on a timer to circulate air for 10-15 minutes every 2 hours, which mimics natural breezes and strengthens plant stems.
For humidity control, mist the interior lightly once daily or use a pebble tray with water beneath shelves. Avoid overwatering the tray—it should only add moisture to the air, not flood the base. If condensation forms on the panels, it’s a sign the humidity is too high; crack a vent or remove a few plants temporarily to balance the environment.
🌱 Step 4: Introduce Plants Gradually and Monitor Growth
Start with heat-tolerant seedlings like basil, peppers, or herbs, which thrive in the controlled conditions. Harden off plants for 3-5 days before moving them inside—sudden exposure to the greenhouse’s warmth can shock tender foliage. Place new additions on the bottom shelves first, where temperatures are slightly cooler and humidity stabilizes more slowly.
Watch for first signs of stress: yellowing leaves or wilting indicate either overwatering or insufficient airflow. Adjust your care routine immediately—reduce watering if the soil feels damp to the touch, or increase ventilation if leaves appear dusty or curled. I keep a small notebook inside the greenhouse to track plant responses and environmental adjustments over time.
⏰ Step 5: Maintain Seasonal Adjustments for Long-Term Success
Every 2-3 weeks, inspect the greenhouse for algae buildup on panels—a sign of excess moisture. Wipe panels with a mild vinegar solution (1 part vinegar to 3 parts water) to restore transparency and prevent heat absorption loss. In winter, add insulated blankets or bubble wrap to the interior panels at night to protect plants from sudden cold snaps.
Rotate plants quarter-turn weekly to ensure even light exposure—you’ll notice stems leaning toward the strongest light source if you skip this step. Prune leggy growth immediately to encourage bushier, more productive plants. With these adjustments, your greenhouse will function as a year-round micro-climate, delivering fresh harvests regardless of the season.
Tips & tricks for perfect mini garden greenhouse assembly
Building a functional greenhouse isn't rocket science, but these insider tips will help you avoid common pitfalls and create an environment where your plants will truly thrive.
Foundation Stability: In Step 1, don't overlook the importance of that 2-3 inch clearance between cinder blocks or pavers. I learned this the hard way—when I skipped this step, water pooled under my base during heavy rains, creating a breeding ground for mold. Use a level to ensure your foundation is perfectly even before assembly. For extra stability on windy days, consider adding corner braces to your DIY frame, especially if you're using lightweight materials like PVC.
Ventilation Strategy: The 10-15 minute ventilation cycle in Step 3 is your secret weapon against heat stress. I recommend installing vents at both high and low points—this creates a stack effect that naturally draws hot air out while pulling cooler air in. For DIY models without built-in vents, I've had great success with adjustable window screens secured with bungee cords. Position them opposite each other to maximize airflow and prevent stagnant hot spots that can scorch delicate foliage.
Light Management: While your greenhouse needs at least 6 hours of sunlight daily, too much direct sun can create a greenhouse effect that overheats your plants. In Step 2, when attaching transparent panels, leave a small gap at the top—about 1 inch—to allow hot air to escape. For afternoon sun exposure, consider adding a shade cloth (30-50% coverage) on the south-facing side. This simple adjustment can prevent wilting in heat-sensitive plants while still providing plenty of light for growth.
Seasonal Adaptation: The quarter-turn weekly rotation in Step 5 becomes even more critical in winter. When temperatures drop below 60°F at night, I add a small ceramic heater (set to low) inside my greenhouse for 2-3 hours during the coldest nights. This prevents temperature swings that can shock plants. For summer maintenance, I swap out the insulated blankets for reflective aluminum foil on the interior panels—this bounces excess heat away while still allowing light penetration.
Pro Tips for Mini Garden Greenhouse
- Building a functional greenhouse isn't rocket science, but these insider tips will help you avoid common pitfalls and create an environment where your plants will truly thrive.
- Foundation Stability: In Step 1, don't overlook the importance of that 2-3 inch clearance between cinder blocks or pavers.
- Ventilation Strategy: The 10-15 minute ventilation cycle in Step 3 is your secret weapon against heat stress.
Frequently asked questions
Got questions about maximizing your mini garden greenhouse? You’re not alone! Here are some of the most common concerns—and their solutions—to help you grow like a pro.
What’s the best time of year to set up a mini greenhouse?
A mini greenhouse works year-round, but the best time to set it up is early spring (before last frost) or late summer (to extend the growing season). If you’re starting seeds indoors, place it in a sunny spot 6–8 weeks before transplanting. For overwintering, set it up in fall to protect tender plants from frost.
How do I prevent frost damage in cold climates?
Use a thermometer to monitor temps—most mini greenhouses handle down to 30°F (-1°C), but add a clear plastic cover or row cover for extra insulation. Place it in a sheltered spot (like near a south-facing wall) and avoid overwatering, which can freeze. A small fan on low can also circulate warm air.
How often should I water plants in a mini greenhouse?
Check soil moisture daily—greenhouses trap humidity, so overwatering is a common mistake. Water only when the top inch feels dry, and use a self-watering tray or drip system to maintain consistency. Avoid wetting leaves to prevent fungal issues. Ventilation (even for 10 minutes daily) helps regulate moisture levels.
Can I grow vegetables, or is it just for herbs and flowers?
Mini greenhouses are perfect for leafy greens (lettuce, spinach), herbs (basil, cilantro), and compact veggies (cherry tomatoes, peppers). Just ensure your model has enough height (at least 2–3 feet) and choose fast-maturing varieties. Avoid root crops like carrots unless you opt for a deeper container setup.
Why are my plants wilting even though I’m watering them?
Wilting in a greenhouse usually means poor airflow or root stress. Open vents or doors daily to prevent heat buildup, and check for overcrowding (thin seedlings if needed). If soil feels soggy, your greenhouse may lack drainage—add a tray under the pot to catch excess water. Yellowing leaves? It could be nutrient burn from concentrated fertilizers.
Are there affordable alternatives to a full greenhouse?
Yes! For under $50, try a clear plastic storage bin with a lid (drill ventilation holes), a repurposed fish tank (with a removable top), or a DIY frame covered in plexiglass. Even a large grow bag or cloche can work for small plants. Pair it with a heat mat for cold snaps!
Wrapping up and next steps
A mini garden greenhouse isn’t just a tool—it’s your ticket to year-round gardening success, no matter your climate or space! 🌱 By controlling temperature, humidity, and pests, you’ll grow healthier plants faster, even in small spaces.
Whether you’re a beginner or a seasoned green thumb, this climate-controlled haven makes gardening easier, smarter, and more rewarding.
Ready to transform your balcony, patio, or windowsill into a thriving garden? Start small—pick your favorite plants, gather your supplies, and build (or buy!) your greenhouse today. The best time to grow was yesterday, but the second-best time is now! 🌿
- 📌 Next step: Sketch your design or browse greenhouse kits.
- 📌 Pro tip: Begin with low-maintenance herbs or leafy greens for quick wins!