
Watering
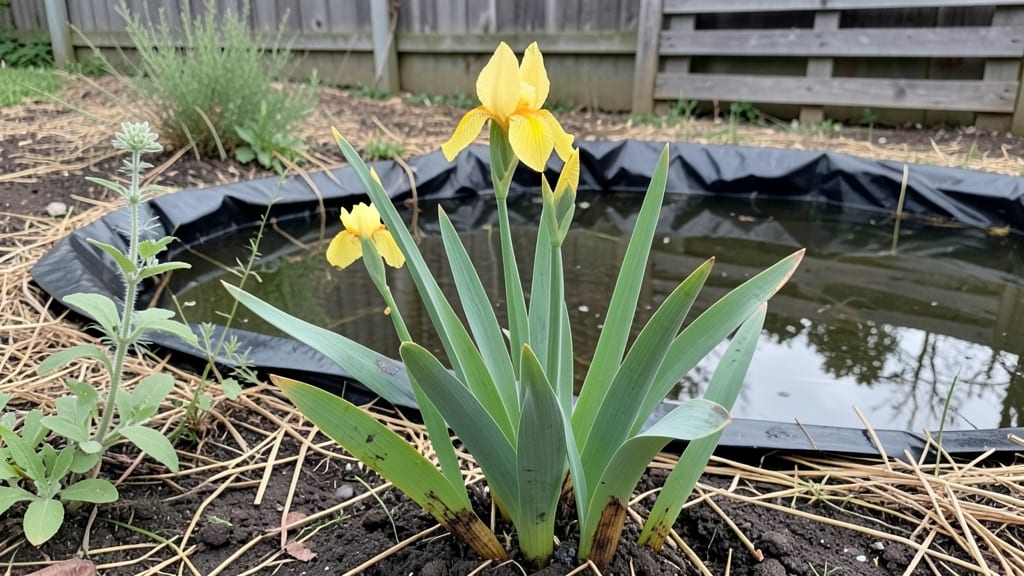
A water garden park transforms any backyard into a tranquil sanctuary where water flows naturally and wildlife thrives. 🌿 I designed mine after years of watching ducks and dragonflies vanish from my neighborhood—until I created a space that brought them back.
The key isn’t just a pond; it’s the right plants, circulation, and hidden details that make it feel alive.
Start with a shallow, winding stream or small pond (3’ x 5’ works for beginners) and line it with water-tolerant plants like cattails or water lilies. Add a solar-powered fountain for movement, and place rocks or logs as natural edges.
Wildlife will arrive on their own—frogs, butterflies, and even hummingbirds—once the water stays clean and the plants provide shelter.
By summer’s end, your garden park will hum with life: dragonflies skimming the surface, fish darting between reeds, and the sound of water masking city noise.
The maintenance is simple—weekly skimming, a pond vacuum twice a year, and fertilizing plants in spring—but the payoff is a space that feels like a secret escape.
Works in urban backyards, rural lots, or even a large container setup. The magic isn’t in the scale; it’s in the details that make it feel wild yet intentional. Let’s build yours step by step.
📚 In This Guide
- What you need
- Instructions
- Tips and common mistakes
- Wrapping up and next steps
What you need
- ● Water Source: Garden hose (½” diameter, 50+ ft), submersible pump (½–1 HP, 3,000+ GPH), or natural spring/stream access.
- ● Liner: EPDM rubber pond liner (thickness: 45 mil for small ponds, 60 mil for larger installations).
- ● Rocks & Boulders: 2–5 tons of smooth river rocks (1–3” diameter) for edging, waterfalls, and filtration.
- ● Plants: Marginal plants (e.g., Iris pseudacorus, Caltha palustris) – 5–10 plants.
- ● Submerged plants (e.g., Anacharis, Hornwort) – 10+ stems.
- ● Floating plants (e.g., Water lilies, Duckweed) – 3–5 plants.
- ● Wildlife Attractions: Logs, flat stones, or pre-made wildlife structures (e.g., frog/toad houses).
- ● Filtration System: UV clarifier (for algae control) or biological filter media (e.g., lava rock, bio-balls).
- ● Shovel, spade, and level (for digging and shaping).
- ● Wheelbarrow (2–3 cu. ft. capacity) for hauling rocks/soil.
- ● Measuring tape (25+ ft) and string line for layout.
- ● Safety gear: Gloves, knee pads, and eye protection.
- ● Permits: Check local regulations—some areas require approval for water features or wildlife habitats.
- ● Solar-powered fountain or waterfall kit (adds movement and aeration).
- ● Pond dye (natural shades like blue or green to reduce algae).
- ● Automatic fish feeder (if stocking koi or goldfish).
- ● Pathway materials (stepping stones, gravel, or decomposed granite) for accessibility.
Step-by-Step instructions for designing your water garden park
Transform your space into a tranquil water garden that attracts wildlife and soothes the soul.
💧 Step 1: Plan Your Water Flow and Layout
Start by sketching your design on paper, focusing on the natural flow of water. I like to create gentle curves rather than straight lines—they mimic nature and feel more organic. Place your water feature where it will receive at least 4-6 hours of sunlight daily, but avoid areas where leaves will fall directly into the water to minimize debris.
Consider the size of your space. A small pond (3' x 5') works beautifully for a backyard oasis, while a larger water garden (6' x 8') can support more aquatic plants and wildlife. Mark the outline with stakes and string to visualize the shape before digging. This ensures you won’t accidentally disturb existing roots or underground utilities.
🪴 Step 2: Excavate and Prepare the Base
Dig the pond to a depth of 12-18 inches at the deepest point, sloping the sides gently to create a natural look. The edges should be slightly wider at the top (about 2-3 feet) to prevent erosion and make maintenance easier. Line the bottom with a pond liner (pre-cut to size and secured with landscape staples) to prevent leaks and keep the water contained.
Add a layer of sand (about 1 inch thick) over the liner to create a smooth, stable base. This prevents punctures and makes it easier to arrange rocks and plants later. For a more natural feel, place flat stones along the edges to create a terraced look—this also helps stabilize the soil and reduces erosion from rain.
☀️ Step 3: Install the Water Feature and Filtration
Place your water pump and filter system near the deepest part of the pond, ensuring they’re hidden beneath rocks or plants for a seamless look. Connect the pump to a pre-formed pond shell or a simple plastic liner with a waterfall feature if you want movement. The pump should circulate water at a rate of about 1,000 gallons per hour to keep it oxygenated and free of stagnation.
Add a small waterfall or fountain to create movement and aerate the water. This not only enhances the serene ambiance but also discourages mosquito breeding. Position the water feature so it cascades naturally into the pond, creating a soft, rhythmic sound that blends perfectly with the garden’s tranquility. Test the flow before adding plants to ensure everything works as expected.
🌿 Step 4: Add Plants and Wildlife Attractions
Start with oxygenating plants like hornwort or water hyacinth to keep the water clean and support aquatic life. These plants thrive in 4-6 inches of water and spread quickly, so plant them in clusters around the edges. For a natural border, add marginal plants like cattails or rushes, which grow in shallow water and provide habitat for frogs and insects.
Incorporate rocks and boulders to create hiding spots for wildlife. Dragonflies, frogs, and even small fish will take up residence if you provide the right environment. Place a few flat stones partially submerged to give sunbathing frogs a place to rest. Avoid overcrowding—leave open spaces so the water garden feels open and inviting rather than cluttered.
⏰ Step 5: Maintain and Enjoy Your Water Garden
Check the water level weekly and top off with dechlorinated water (let tap water sit for 24 hours to remove chlorine). Use a net to remove fallen leaves and debris every 2-3 weeks to prevent buildup. In early spring, trim back any overgrown plants and add fresh mulch around the edges to keep weeds at bay.
Monitor the pump and filter system monthly to ensure they’re running smoothly. A small waterfall or fountain will need occasional cleaning to prevent clogs, but regular maintenance keeps your water garden thriving. Sit back and enjoy the soothing sounds of water, the sight of wildlife, and the peaceful atmosphere you’ve created—a true oasis in your own backyard.
Tips & tricks for perfect water garden park design
Creating a serene water garden requires attention to detail—these insights will help you avoid common pitfalls and elevate your design from good to breathtaking.
The Sunlight Factor: The 4-6 hours of daily sunlight mentioned in Step 1 is crucial for plant health and water quality. Position your garden where sunlight hits during the warmest part of the day, but avoid areas where falling leaves will clog your filter. I've learned this the hard way—overhanging branches can turn your peaceful oasis into a maintenance nightmare. Consider adding a small overhang or shade cloth if nearby trees are unavoidable.
Depth and Shape Strategy: When excavating in Step 2, remember that the 12-18 inch depth at the center creates the perfect habitat for fish and amphibians while preventing stagnation. The gently sloping sides (about 2-3 feet wider at the top) aren't just for looks—they create natural ledges for marginal plants and reduce erosion during heavy rains. I recommend using a level to ensure consistent slopes, especially if you're working with uneven terrain.
Pump Placement Pro: In Step 3, hiding your pump beneath rocks or plants isn't just about aesthetics—proper placement prevents overheating and extends equipment life. Position the pump near the deepest point but ensure it's easily accessible for maintenance. I've seen many gardeners struggle with pumps that get buried too deeply, making repairs difficult. A good rule of thumb is to leave at least 6 inches of clearance above the pump for easy access.
Plant Layering Technique: The oxygenating plants (like hornwort) in Step 4 need that 4-6 inches of water to thrive, but don't crowd them—they should have room to spread naturally. I like to create three distinct plant zones: floating plants in the center, oxygenators in mid-depth, and marginal plants at the edges. This layered approach creates visual depth and supports a more diverse ecosystem. Start with just a few plants and let them establish before adding more to prevent overcrowding.
Pro Tips for Water Garden Park
- Creating a serene water garden requires attention to detail—these insights will help you avoid common pitfalls and elevate your design from good to breathtaking.
- The Sunlight Factor: The 4-6 hours of daily sunlight mentioned in Step 1 is crucial for plant health and water quality.
- Depth and Shape Strategy: When excavating in Step 2, remember that the 12-18 inch depth at the center creates the perfect habitat for fish and amphibians while preventing stagnation.
Frequently asked questions
Got questions about creating your own water garden park? You’re not alone! Here are some of the most common queries—and their straightforward answers—to help you plan with confidence.
What’s the best time of year to start a water garden park?
Spring or early fall is ideal! Spring lets you plant aquatic species before summer heat, while fall avoids extreme temperatures. Avoid winter in cold climates—plants and fish may struggle. If you’re in a warm region, summer can work, but prioritize shade and hydration for plants.
How much maintenance does a water garden park require?
Moderate, but manageable! Expect weekly tasks like debris removal, water testing (pH, clarity), and pruning plants. Fish ponds need occasional feeding and filter cleaning. Pro tip: native plants and hardy species cut down on upkeep. A well-designed system with zoning (shallow vs. deep areas) also reduces effort.
Can I build a water garden park on a budget?
Start small with a container pond (even a large tub works) or repurpose existing features like rain barrels or old sinks. Use mulch to suppress weeds, opt for low-cost plants like water lilies, and DIY the liner with pond underlayment. Prioritize essentials: pump, filter, and fish-safe materials.
What wildlife thrives in a water garden park, and how do I attract it?
Frogs, dragonflies, birds, and beneficial insects love water gardens! Plant cattails, reeds, and lotus flowers for shelter. Add a small stream or waterfall to draw wildlife. Avoid pesticides—let nature balance itself. For fish, stock with koi or goldfish (they’re hardy and control mosquito larvae!).
What’s the biggest mistake beginners make when designing a water garden?
Overcomplicating the layout! Many skip proper drainage or ignore sunlight needs, leading to stagnant water or dead plants. Keep it simple: 1-2 inches of water depth for plants, 3+ feet for fish, and partial shade to prevent algae. Test your soil and water chemistry before planting—it saves headaches later!
Wrapping up and next steps
Creating a water garden park is more than just a landscaping project—it’s an invitation to harmony with nature. By blending natural flow, wildlife-friendly design, and serene aesthetics, you’ve unlocked a space that nurtures both your soul and the local ecosystem.
Whether you’re a seasoned gardener or just starting, the key is to start small, stay consistent, and let nature guide you.
Ready to transform your vision into reality? Sketch your first design today—grab a notebook, visit your local nursery for inspiration, and take that first step toward your tranquil oasis! 🌿💧