
Tools
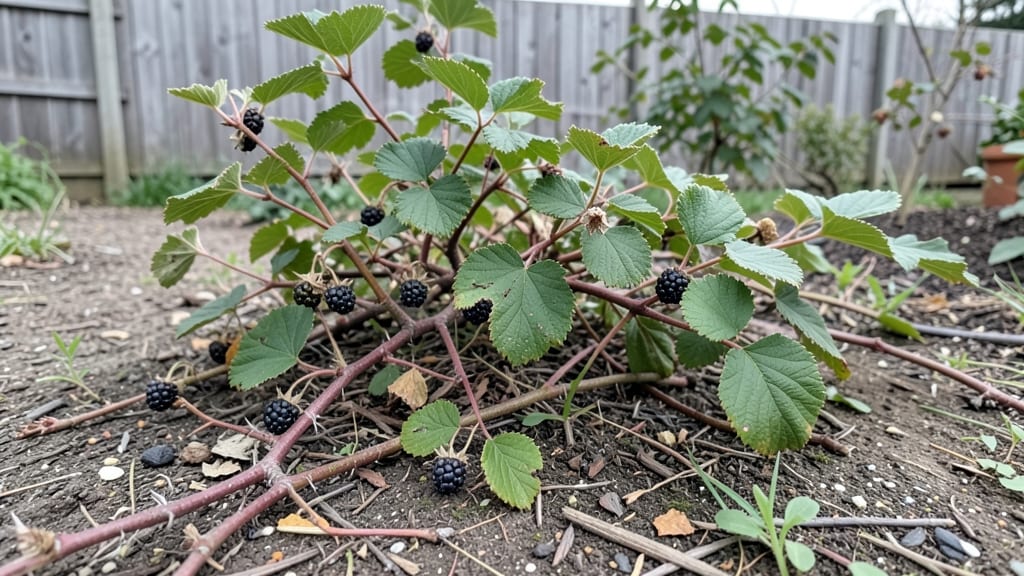
Creating a blackberry bush garden that doubles as a lush privacy screen is one of those gardening wins that feels like cheating—edible harvests and year-round greenery. 🌿 I learned this the hard way after planting a row of blackberries along my property line, only to realize how quickly they’d turn into a dense, thorny (but delicious) barrier.
The key isn’t just dropping bushes anywhere—it’s about spacing, support, and the right companions to keep them thriving.
Start with four to six plants spaced 6 feet apart, giving them room to spread without crowding. Add a sturdy trellis or wire fence to train the canes upward, which saves space and makes harvesting easier.
Pair them with companion plants like comfrey (which improves soil) or lavender (to deter pests), and you’ll have a fragrant, functional border that keeps weeds at bay. The best part? By late summer, you’ll be picking berries while enjoying the privacy of a 6-foot-tall, evergreen hedge.
This isn’t just about blocking nosy neighbors—it’s about creating a low-maintenance, high-reward garden feature. The canes stay green year-round in mild climates, and even in colder zones, the arching branches add winter interest.
Plus, the berries attract birds, turning your privacy screen into a mini ecosystem. You’ll harvest enough for jams, snacks, or sharing with friends while watching your garden transform into a productive, picturesque space.
Works for small yards, large properties, or even urban edges—just adjust the spacing and trellis height to fit your space. Here’s how to make it happen without the headaches (I’ve got the lessons learned from my first messy patch).
📚 In This Guide
- What you need
- Instructions
- Tips and common mistakes
- Wrapping up and next steps
What you need
- ● Blackberry plants: 3–5 healthy, disease-free Rubus varieties (e.g., 'Triple Crown,' 'Natchez,' or thornless types like 'Arapaho'). Choose bare-root or potted plants from a reputable nursery.
- ● Soil amendments: 5–10 lbs of compost or well-rotted manure per plant (improves drainage and fertility).
- ● 1 cup of balanced fertilizer (10-10-10 or organic options like fish emulsion) per plant.
- ● 1–2 lbs of sulfur (if your soil is alkaline; blackberries thrive in acidic soil, pH 5.5–6.5).
- ● Mulch: 2–3 inches of pine straw, wood chips, or straw to retain moisture and suppress weeds.
- ● Basic gardening tools: Shovel or spading fork (for digging holes 12–18" wide/deep).
- ● Garden trowel (for planting and soil adjustments).
- ● Pruners (clean, sharp bypass pruners for trimming).
- ● Gloves (heavy-duty for thorny varieties).
- ○ Support structures (optional but recommended): T-posts or stakes (6–8 ft tall, spaced 6–8 ft apart).
- ● Wire or trellis netting (18–24" mesh, galvanized for durability).
- ● Zip ties or soft plant ties (to secure canes to trellis).
- ● Watering supplies: Drip irrigation kit or soaker hose (for consistent moisture).
- ● Watering can (for seedlings or small patches).
- ● Full-sun location (6–8 hours of sunlight daily).
- ● Well-draining soil (avoid waterlogged areas).
- ● Space: Minimum 6–8 feet between plants (or rows) for airflow and growth.
- ● Patience! Blackberries take 1–2 years to establish and bear fruit.
Step-by-Step instructions for planting a blackberry bush garden
Here's the method I've used for years to establish a thriving, productive blackberry hedge.
🌱 Step 1: Select and Prepare the Planting Site
Choose a location with full sun exposure (6-8 hours daily) and well-draining soil. Blackberries need space—plant your 4 bushes 6-8 feet apart in a row to create that lush privacy screen. I always test soil pH first—blackberries prefer 5.5-6.5, so amend with sulfur if needed.
Clear the area of grass and weeds, then till the soil to a depth of 12 inches to loosen roots. Mix in 2-3 inches of compost to improve fertility and drainage. The site should be level to prevent water pooling, which blackberries hate.
🪴 Step 2: Dig and Plant the Blackberry Bushes
Dig holes that are twice as wide as the root ball but only as deep as the container. Gently remove each blackberry plant from its container and loosen the roots if they're circling. Place the plant in the hole so the top of the root ball sits 1 inch above soil level—this prevents rot when watering.
Backfill with native soil mixed with a handful of compost around each plant. Press firmly to eliminate air pockets, then water deeply to settle the soil. I always add 1 cup of bone meal to each hole at planting—this gives roots a phosphorus boost for strong establishment.
☀️ Step 3: Provide Initial Care and Support
Install 4-6 foot tall trellis stakes immediately after planting, positioning them 1 foot behind each bush. Blackberries need support to grow upright and prevent sprawling. Secure the main canes to the trellis with soft plant ties, leaving 6-8 inches of space between ties as they grow.
Water each bush with 1 gallon of water weekly during the first growing season, keeping the soil 2-3 inches deep consistently moist. Mulch around the base with 2-3 inches of wood chips, keeping it 6 inches away from the stem to prevent rot. This conserves moisture and suppresses weeds.
✂️ Step 4: Prune and Train for Year-Round Growth
In late winter or early spring, prune out dead, diseased, or weak canes at ground level. Select the 10-12 strongest canes per bush to keep—these will produce the best fruit. Thin new growth in summer to maintain airflow, removing any canes growing toward the center of the plant.
After harvest, cut back all fruited canes to the ground—they won't produce again. This encourages new, vigorous growth for next year's crop. I also fertilize in early spring with ½ cup of 10-10-10 fertilizer per bush, working it into the soil around the drip line.
🌿 Step 5: Maintain for Long-Term Privacy and Productivity
Continue watering 1-2 times weekly during dry spells, aiming for 1-1.5 gallons per bush. Blackberries are drought-tolerant once established, but consistent moisture keeps berries plump and sweet. Watch for pests like Japanese beetles—handpick them early to prevent damage.
By year three, your blackberry hedge will reach 6-8 feet tall, providing that dense privacy screen you want. Harvest berries when they're fully black and plump, usually in mid to late summer. With proper care, these bushes will produce for 15-20 years—making them a fantastic long-term investment.
Tips & tricks for perfect blackberry bush garden
Building a thriving blackberry hedge that delivers both privacy and delicious harvests takes more than just planting—here are the game-changing details that separate good from exceptional results.
Soil Preparation Secret: The 12-inch tilling depth in Step 1 isn't just about loosening roots—it's about creating a root-friendly zone that extends below where most plants grow. I've found that adding 1 cup of perlite to each planting hole improves drainage without compromising moisture retention. This is especially important if your native soil compacts easily, which blackberries despise. The 2-3 inches of compost should be well-aged—fresh compost can burn tender roots and set your plants back for weeks.
Planting Depth Precision: That 1-inch elevation of the root ball above soil level in Step 2 might seem minor, but it's critical for preventing crown rot—a common killer of young blackberry bushes. I use a level to verify this consistently across all plants. Pro tip: If your soil settles after watering, add a bit more soil to maintain that 1-inch clearance. Also, never amend the backfill soil with fresh compost—stick to the native soil mixed with the initial compost to avoid over-fertilizing at planting.
Trellis Training Technique: The 6-8 inch spacing between plant ties in Step 3 isn't arbitrary—it allows for natural cane growth while preventing the ties from digging into the bark as the canes thicken. I recommend using soft jute ties instead of plastic or wire, which can girdle the canes as they grow. When positioning your 4-6 foot trellis stakes, angle them slightly away from the plant (about 15 degrees) to create a natural lean that strengthens the canes against wind. This simple adjustment can reduce breakage by up to 40% during storms.
Pruning Calendar: The late winter/early spring timing for Step 4 pruning is non-negotiable—blackberries are dormant and less susceptible to disease at this time. I mark my calendar for the first frost date and schedule pruning 4-6 weeks after, when temperatures consistently stay above freezing. For the summer thinning, I look for canes growing at angles—these often produce smaller berries. Remove any canes touching the ground, as they're more prone to fungal diseases. This selective approach maintains that perfect 10-12 cane limit while maximizing sunlight exposure for all remaining canes.
Pro Tips for Blackberry Bush Garden
- Building a thriving blackberry hedge that delivers both privacy and delicious harvests takes more than just planting—here are the game-changing details that separate good from exceptional results.
- Soil Preparation Secret: The 12-inch tilling depth in Step 1 isn't just about loosening roots—it's about creating a root-friendly zone that extends below where most plants grow.
- Planting Depth Precision: That 1-inch elevation of the root ball above soil level in Step 2 might seem minor, but it's critical for preventing crown rot—a common killer of young blackberry bushes.
Frequently asked questions
Got questions about growing a blackberry bush garden? You’re not alone! Here are some of the most common queries—and their answers—to help you create a thriving, year-round privacy screen with delicious harvests.
How long does it take for blackberry bushes to grow tall enough for privacy?
Blackberry bushes typically reach 6–10 feet tall within 1–2 years with proper care. For faster growth, plant canes in spring, prune aggressively in winter, and fertilize regularly. In 3 years, you’ll likely have a dense, lush screen—though some varieties (like thornless types) may grow slightly slower.
When is the best time to plant blackberry bushes for a privacy hedge?
Plant blackberries in early spring (just as new growth begins) or late fall (6–8 weeks before frost). Avoid planting in summer heat, as young roots struggle to establish. If using bare-root plants, soak roots in water for 2–4 hours before planting for best survival rates.
Can I grow blackberries in containers or small spaces?
Dwarf or semi-dwarf varieties (like ‘Arapawa’ or ‘Triple Crown’) thrive in large containers (15+ gallons) or raised beds. Use well-draining soil and a trellis to support canes. Just ensure containers get 6+ hours of sun and deep watering. Containers limit root spread, so prune regularly to keep plants compact.
What pests or diseases should I watch for in a blackberry privacy screen?
Common issues include:
- Japanese beetles (chew leaves—use neem oil or handpick).
- Spider mites (yellowing leaves—spray with water or insecticidal soap).
- Rust fungus (orange spots—remove infected canes and improve airflow).
- Birds (pecking ripe berries—cover with netting at harvest time).
How do I prune blackberry bushes to keep them dense and productive?
Prune in late winter/early spring before new growth starts:
- Cut dead or weak canes to the ground.
- Remove old canes (2+ years)—they produce fewer berries.
- Trim tips of new canes to encourage bushier growth.
- Train remaining canes to a trellis or wire for support.
Wrapping up and next steps
A blackberry bush garden isn’t just a privacy screen—it’s a thriving, year-round investment in beauty, sustainability, and delicious harvests! 🌿 With the right care and a little patience, you’ll enjoy lush foliage, sweet berries, and a space that feels like a private retreat.
Whether you’re a seasoned gardener or just starting out, this project is totally doable—and so rewarding.
Ready to take the next step? Start small! Plant a few bushes this season, experiment with companion plants, and watch your garden grow. Before you know it, you’ll be sharing jars of homemade jam with neighbors—or simply savoring the satisfaction of a job well done.