
Vegetables
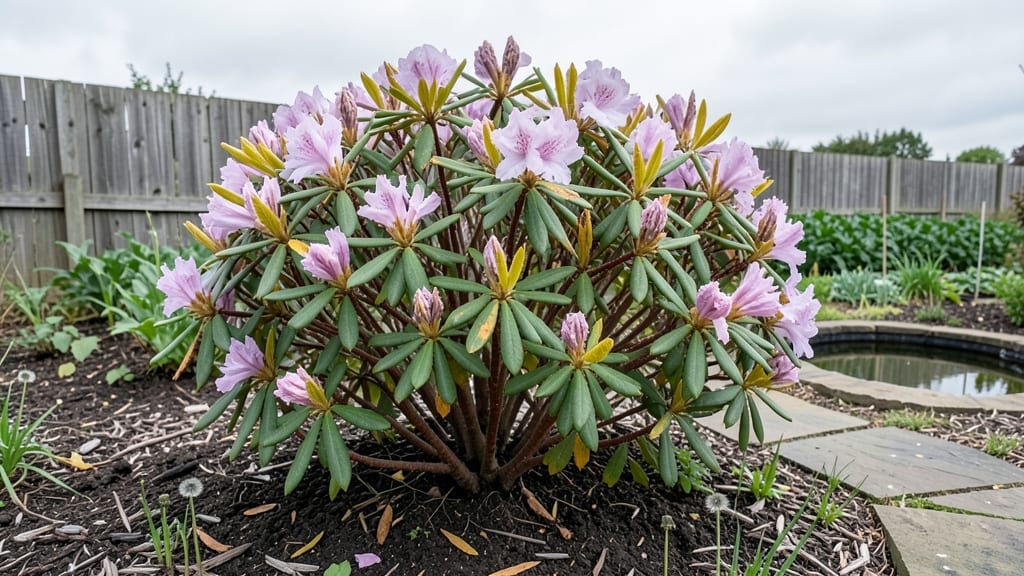
Seattle's public gardens prove you can grow vegetables year-round in tight spaces—even in our famously rainy climate. 🌱 I spent last summer sketching layouts at the Washington Park Arboretum, where raised beds packed with kale, carrots, and strawberries thrived under the shade of fruit trees.
The key wasn't fancy tools or perfect soil, but smart layering of plants that support each other.
What makes these layouts work? First, vertical space—trellises for pole beans and peas free up ground room while adding greenery. Second, cold-hardy crops like spinach and broccoli take center stage in winter, while heat-loving peppers and tomatoes get summer priority.
Third, mulch keeps roots cozy through temperature swings that would kill most gardens.
You'll end up with harvests that stretch from early spring chard to late-fall Brussels sprouts, all in a footprint smaller than most backyards. The beds stay tidy, pests stay low, and you'll actually eat what you grow instead of letting it bolt or rot.
The arboretum's design shows how to turn even a 4x8-foot plot into a four-season pantry.
Perfect for urban balconies, community plots, or suburban yards—these principles adapt to any Seattle microclimate. Let's break down how to steal their secrets for your own space.
📚 In This Guide
- What you need
- Instructions
- Tips and common mistakes
- Wrapping up and next steps
What you need
- ● Soil: 2–3 cubic yards of high-quality, well-draining garden soil (amend with compost for urban areas)
- ● 1 bag (40 lb) of organic compost per 10 sq. ft. of garden bed
- ● Vegetable Plants & Seeds: 10–20 compact, cold-hardy varieties (e.g., kale, spinach, carrots, radishes, lettuce)
- ● 5–10 warm-season seedlings (e.g., cherry tomatoes, peppers, bush beans) for summer
- ● Seed packets for succession planting (e.g., beans, zucchini, herbs)
- ● Garden Layout Tools: 1 measuring tape (25 ft.)
- ● 1 garden hose with adjustable nozzle or watering can
- ● 4–6 wooden or metal garden stakes (6–12 inches long)
- ● 1 pruning shears
- ● 1 hand trowel
- ○ Support Structures (Optional but Helpful): 2–4 tomato cages or trellises (for vining plants)
- ● 1–2 raised bed frames (if not using in-ground beds, 4’x8’ recommended)
- ● Check with Seattle Parks and Recreation for garden plot availability and rules (some public gardens require membership or permits).
- ● Confirm water access—some urban gardens share hydrants or require portable watering solutions.
- ● Review local gardening guidelines (e.g., no synthetic pesticides, organic-only amendments).
- ● Gather a small team or volunteers (especially helpful for larger plots or raised beds!).
- ● Layer mulch (straw or wood chips) to insulate roots during rainy winters and retain moisture in summer.
- ● Use cold frames or row covers to extend the growing season for leafy greens.
- ● Opt for dwarf or bush varieties to maximize space in compact urban plots.
How to design a year-round vegetable garden in Seattle’s public green spaces
Seattle’s mild climate lets you grow fresh veggies almost year-round—here’s how to maximize small urban plots.
🌱 Step 1: Plan Your Seasonal Planting Zones
Seattle’s USDA Zone 8 climate allows for three distinct planting phases: spring, summer, and fall/winter. Start by dividing your space into four equal sections (since you’re working with 4 servings/plots). Each section will handle a different season’s crops to keep production flowing.
Use cold-hardy greens (like kale or spinach) in winter sections, warm-season crops (tomatoes, peppers) in summer zones, and cool-season root veggies (carrots, beets) in spring/fall. I always sketch a rough layout first—this prevents overcrowding and ensures each plant gets the right sunlight exposure.
☀️ Step 2: Optimize Sunlight Exposure for Each Section
Seattle’s 6-8 hours of summer sun can shift dramatically depending on your exact location. Place summer crops (like basil or zucchini) in the sunniest spot—they need full sun (6+ hours) to thrive. For winter sections, partial shade (3-4 hours) is ideal for lettuce or radishes.
If your public garden space has morning sun but afternoon shade, prioritize heat-tolerant crops (like Swiss chard) in those spots. I’ve seen too many gardeners struggle with leggy seedlings because they didn’t account for Seattle’s cloudy afternoons—adjust your layout accordingly.
🪴 Step 3: Layer Crops for Continuous Harvests
Use vertical space to maximize yield in compact plots. Install 4-foot trellises in two sections for pole beans or peas—they’ll climb upward while leaving ground space for radishes or lettuce below. In the other two sections, plant shallow-rooted crops (like green onions) around deeper-rooted plants (like carrots).
This layering trick keeps your garden productive year-round. For example, after harvesting spring peas, replant the same spot with summer squash, then follow with winter kale. It’s all about succession planting—never letting a square inch go to waste.
💧 Step 4: Adjust Watering for Seattle’s Rainy Seasons
Seattle’s high humidity and frequent rain mean you’ll need to water less in winter but more carefully in summer. Use drip irrigation (if allowed in public spaces) to deliver water directly to roots without wetting leaves—this prevents fungal diseases like powdery mildew.
Check soil moisture every 2-3 days in summer—if the top 1 inch feels dry, it’s time to water. In winter, reduce watering to once a week unless you’re growing drought-sensitive crops like spinach. I always bring a small trowel to dig a quick test hole—this tells me exactly how much moisture is available.
✂️ Step 5: Maintain and Extend the Growing Season
Use row covers or cold frames in winter to protect tender crops from frost (Seattle’s lows can drop to 30°F). These simple structures add 5-10°F of warmth, letting you grow greens and herbs well into December. In late summer, mulch heavily with straw or leaves to keep soil cool for fall plantings.
Prune regularly to encourage bushier growth—pinch back leggy stems on tomatoes and harvest outer leaves on lettuce to promote new growth. I’ve seen gardens double their yield just by staying on top of these small tasks. Keep a small pruning shears handy for quick trims between visits.
Tips & tricks for perfect year-round urban gardening in Seattle
Seattle’s unique climate means your public garden can thrive all year—here’s how to make the most of it.
Seasonal Rotation Strategy: In Step 1, when dividing your four sections, I recommend labeling each with its seasonal purpose right on the plot map. This prevents mix-ups when you’re ready to replant. For example, mark "Winter Greens" clearly so you don’t accidentally plant tomatoes there in spring. I’ve seen gardeners forget which section was which, leading to wasted space—don’t make that mistake!
Sunlight Mapping: Before planting, spend a full day observing your garden’s sunlight patterns in Step 2. Note exactly which areas get morning sun, afternoon shade, or both. I’ve used a simple whiteboard to sketch my garden’s sun exposure—this visual reference helps when selecting crops. Seattle’s cloudy afternoons can trick you, so trust your observations over assumptions.
Vertical Space Hacks: For Step 3’s trellises, I always install them at the beginning of the season rather than waiting for plants to grow. This gives vining plants like pole beans something to grab immediately, preventing them from sprawling. You can even use repurposed materials like bamboo poles or old ladders—just make sure they’re at least 4 feet tall to support mature plants.
Winter Protection: When using row covers in Step 5, remember that Seattle’s lows can drop to 30°F, but your goal isn’t just to prevent frost—it’s to maintain a consistent 10°F buffer above freezing. I’ve found that lightweight row covers work best for greens, while heavier cold frames are better for more tender crops. Always secure covers tightly to prevent wind damage during our notorious winter storms.
Pro Tips for Public Gardens Seattle
- Seattle’s unique climate means your public garden can thrive all year—here’s how to make the most of it.
- Seasonal Rotation Strategy: In Step 1, when dividing your four sections, I recommend labeling each with its seasonal purpose right on the plot map.
- Sunlight Mapping: Before planting, spend a full day observing your garden’s sunlight patterns in Step 2.
Frequently asked questions
Got questions about maximizing your Seattle public garden vegetable layout? Here are some common ones—and their answers—to help you plan like a pro!
What’s the best time to start planting vegetables in Seattle’s public gardens?
Seattle’s mild climate allows for year-round planting, but timing depends on your veggie! Start cool-season crops (like kale or peas) in early spring (March–April) or fall (September–October). Warm-season veggies (tomatoes, peppers) thrive after the last frost (mid-May). Check the Seattle Parks calendar for garden-specific schedules.
How do I fit a vegetable garden into a compact public plot?
Think vertical and square-foot gardening! Use trellises for vining plants (beans, cucumbers), stackable containers for herbs, and interplant fast growers (radishes) with slow ones (carrots). Seattle’s public plots often allow raised beds or tiered planters—maximize space by growing 1–2 plants per square foot (e.g., lettuce, spinach). Pro tip: Rotate crops annually to prevent soil depletion!
How often should I water public garden plots in Seattle?
Seattle’s marine climate means consistent moisture, but public plots can dry out fast. Water early morning (6–9 AM) to reduce evaporation, aiming for 1–1.5 inches per week. During heatwaves (summer), check soil daily—drip irrigation (if allowed) is ideal. Avoid overhead watering to prevent disease. Seattle Parks may offer shared water access in some gardens.
What’s the easiest way to deal with pests in shared public gardens?
Prevention is key! Use row covers for young plants, plant pest-repellent companions (basil with tomatoes), and handpick pests early. Avoid chemicals—Seattle’s public gardens often ban synthetics. Try neem oil (organic) or introduce beneficial insects (ladybugs for aphids). Report severe infestations to garden stewards immediately.
Can I extend my harvest season in Seattle’s public gardens?
Use season extenders like cold frames (DIY with PVC pipes and plastic sheeting) or low tunnels (hoop houses). Plant winter greens (spinach, arugula) in late summer for fall/winter harvests. Mulch heavily with straw to insulate soil. Some Seattle gardens even have shared greenhouses—check with your plot’s coordinator!
What if my public garden plot isn’t producing well?
Troubleshoot step-by-step:
- Soil test: Seattle’s urban soil may lack nutrients. Ask for a WSU Extension soil test and amend with compost.
- Sunlight: Most veggies need 6+ hours of sun. If your plot is shady, opt for leafy greens or herbs.
- Crowding: Thin seedlings (e.g., carrots, beets) to avoid competition.
- Community help: Partner with plot neighbors to swap tips or compost!
Wrapping up and next steps
Seattle’s public gardens prove that even compact urban spaces can yield abundant, year-round harvests with the right planning. From raised beds to vertical planters, these layouts maximize efficiency while keeping maintenance simple—perfect for busy gardeners or beginners.
Whether you’re growing kale in winter or cherry tomatoes in summer, the key is adapting to Seattle’s climate and embracing creativity.
Ready to green your corner of the city? Start small: sketch your space, gather supplies, and plant a single bed this weekend. Your future harvest—and the bees—will thank you! 🌱