
Vegetables
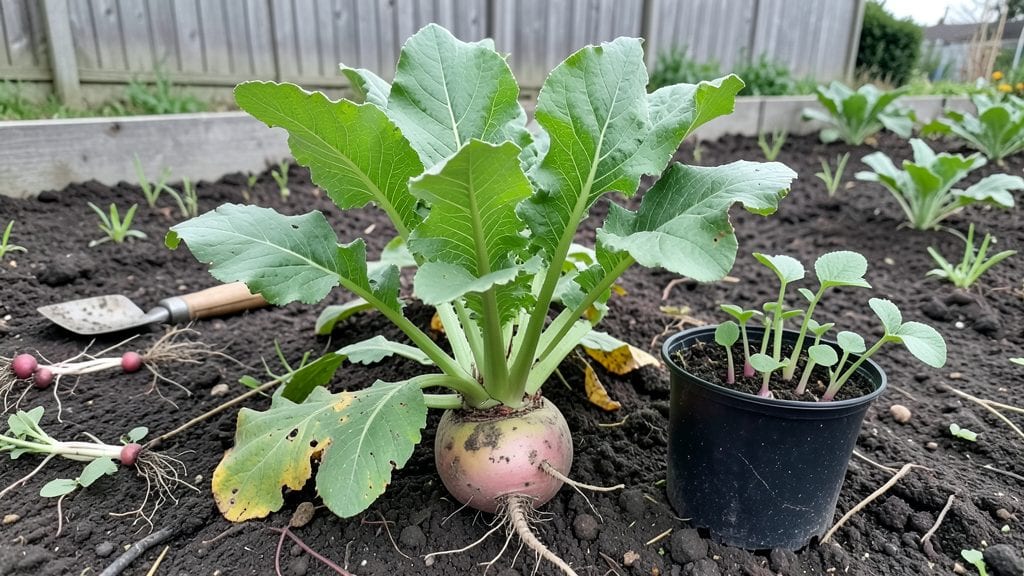
My R vegetable gardening system packs a full year’s harvest into just 4x8 feet—no sprawling rows or wasted space. I designed it after watching my city backyard garden struggle with overcrowding, and now I grow more in half the footprint.
The key is rotating crops by season while keeping pathways narrow enough to walk between beds without crushing plants.
You’ll need four 4x8-foot raised beds (or in-ground sections) and a simple rotation plan that swaps out cool-season crops like kale and peas for warm-season tomatoes and peppers. The beds stay productive year-round because I layer in cold-hardy greens under row covers in winter and fast-maturing radishes in spring.
Even in small spaces, this layout gives every plant room to thrive without competing for sunlight.
By summer’s end, you’ll be pulling pound after pound of fresh produce—tomatoes so ripe they burst, peppers that practically glow, and herbs that taste like they grew in a secret garden.
The best part? No more guessing which plants to squeeze in. This system tells you exactly where everything goes, so you maximize every square inch without the chaos.
Works for apartments with containers, suburban backyards, or even a sunny corner of your patio. The same principles scale up or down—just adjust the bed sizes. Let’s get your compact garden growing all year!
📚 In This Guide
- What you need
- Instructions
- Tips and common mistakes
- Wrapping up and next steps
What you need
- ● Garden Beds or Containers: 1-2 raised beds (4’ x 8’ or smaller) or container pots (12"+ depth, 12-18" diameter)
- ○ Optional: Vertical planters or wall-mounted pockets for climbing veggies (e.g., peas, beans)
- ● Soil & Amendments: 2-3 bags high-quality potting mix (or compost blend for raised beds)
- ● 1 bag organic compost (for nutrient boost)
- ○ 1 lb worm castings (optional, for slow-release nutrients)
- ● Seeds or Seedlings: Choose fast-growing, compact varieties like: Leafy greens (lettuce, kale, spinach)
- ● Radishes (30-day harvest!)
- ● Bush beans or dwarf peas
- ● Cherry tomatoes (determinate types)
- ● Herbs (basil, cilantro, parsley)
- ● Pro Tip: Start with 5-10 seeds per variety to test what thrives in your space! 🌱
- ● 1 hand trowel (for planting small seeds)
- ● 1 pruners or small shears (for trimming)
- ● 1 watering can or hose with gentle nozzle (avoid blasting seeds!)
- ● 1 garden gloves (to protect your hands)
- ○ Optional but handy: Seedling trays (for starting indoors)
- ● Row covers (to extend growing seasons)
- ● pH testing kit (to monitor soil health)
- ● ✅ Sunlight: At least 6 hours of direct sun daily (south-facing is ideal).
- ● ✅ Water Access: A nearby spigot or water source for consistent hydration.
- ● ✅ Climate Awareness: Check your frost dates to plan planting windows (e.g., cool-season crops in spring/fall).
- ● ✅ Time Commitment: 10-15 minutes daily for watering, weeding, and harvesting.
Step-by-step instructions for designing a year-round compact vegetable garden
Let’s create a space-efficient layout that produces fresh vegetables in every season—no matter how small your yard.
Plan Your Garden Layout by Seasonal Zones
Start by dividing your space into four distinct zones based on seasonal growth cycles. I recommend allocating one 4-foot by 4-foot square for each season—spring, summer, fall, and winter. This keeps plants from competing for nutrients and allows you to rotate crops effectively. For example, plant cool-season crops like lettuce and spinach in spring and fall zones, while summer zones can handle heat-lovers like tomatoes and peppers.
Sketch a simple grid on paper, labeling each zone with its primary purpose. This visual helps you visualize how plants will interact as they grow. If your space is extra tight, consider vertical gardening in one corner—trellises or stacked planters can free up ground space for other crops. Just make sure each zone gets the right amount of sunlight for its seasonal plants.
Prepare the Soil for Each Zone
Before planting, mix 2 inches of compost into the top 6 inches of soil for each zone. This ensures your vegetables have the nutrients they need to thrive year-round. I like to use a broadfork to loosen the soil without disturbing the structure too much—this keeps roots healthy and improves drainage. If your soil is particularly dense, add a handful of perlite to each zone to help with aeration.
Test the soil’s moisture level by grabbing a handful—it should hold together but not be soggy. If it feels dry, water each zone until moisture reaches 4 inches deep. Wait until the soil feels slightly damp to the touch before planting. This prevents overwatering, which can lead to root rot or fungal issues. A well-prepared bed sets the stage for strong, productive plants.
Plant Cool-Season Crops in Spring and Fall Zones
In your spring and fall zones, sow seeds or transplant seedlings of cool-season vegetables like kale, broccoli, and carrots. These plants thrive in temperatures between 50°F and 70°F, making them perfect for early spring and late fall. Plant seeds ½ inch deep and space them according to the packet instructions—usually 2-3 inches apart for leafy greens and 1-2 inches apart for root vegetables like radishes.
Mulch each zone with 1-2 inches of straw to retain moisture and suppress weeds. This is especially important in spring, when rain can be inconsistent. Water gently after planting to settle the soil around the seeds or seedlings. You’ll notice the first true leaves emerge within 7-14 days, signaling that your plants are off to a strong start.
Transition to Warm-Season Crops in Summer Zones
Once the soil in your summer zones warms to at least 60°F, it’s time to plant heat-loving vegetables like tomatoes, peppers, and cucumbers. These crops need full sun (6-8 hours daily) and well-draining soil to prevent blossom end rot. Transplant seedlings 12-18 inches apart to give them room to spread—crowding leads to poor air circulation and disease.
Use cage supports or stakes for tomatoes and cucumbers to keep them off the ground and make harvesting easier. Water deeply at the base of each plant, avoiding the leaves to prevent fungal diseases. You’ll see new growth within 10-14 days, and flowers will appear shortly after. This is your cue to start monitoring for pests and adjusting watering as needed—warm-season plants need consistent moisture but hate soggy roots.
Extend the Season with Winter Crops and Protective Measures
In your winter zone, plant cold-hardy crops like Brussels sprouts, winter lettuce, and spinach. These thrive in temperatures down to 25°F and can even improve in flavor after a light frost. Cover young seedlings with row covers or cold frames if temperatures drop below 30°F to protect them from frost damage. This simple step extends your harvest well into the winter months.
Reduce watering in winter to once every 7-10 days, unless you experience a warm spell. Overwatering can lead to root rot in cold, damp soil. Prune any dead or yellowing leaves to encourage new growth. By following this seasonal rotation, you’ll have a continuous supply of fresh vegetables without needing a massive garden space.
Tips & tricks for perfect year-round compact vegetable gardening
Small spaces don't mean small harvests—these practical tips will help you maximize every square foot of your garden while keeping your plants thriving through all four seasons.
Seasonal Rotation Strategy: The four-zone system works best when you actually rotate crops annually. After harvesting winter crops, don't replant them in the same zone—this prevents soil depletion and disease buildup. I mark each zone with colored stakes so I know exactly what went where last year. For example, if you grew tomatoes in your summer zone last year, plant beans or squash there this summer instead.
Soil Preparation Shortcuts: If turning 6 inches of soil feels overwhelming, work in layers. After removing the top layer of grass or weeds, add 2 inches of compost, then till it in just 2-3 inches deep. Repeat this process until you've incorporated compost through the full 6 inches. This method takes less effort while still improving drainage and nutrient content. For dense soil, mix in a handful of perlite per square foot—it lightens the soil without needing a full tilling session.
Sunlight Monitoring: Most gardeners assume they know their sun exposure, but I recommend tracking it for a full week before planting. Use a simple app or mark a notebook with times the sun hits each zone. Cool-season crops need at least 4-6 hours of sun, while warm-season crops require full 6-8 hours. I've found that some "sunny" corners actually get blocked by neighboring buildings or trees for part of the day—this simple check prevents underperforming zones.
Winter Protection Hacks: When temperatures drop below 30°F, don't just throw row covers over plants—create a mini greenhouse effect. Place a clear plastic bottle (like a 2-liter soda bottle) over each seedling, cutting the bottom off and burying it slightly in the soil. This traps heat while still allowing light and air circulation. For larger plants, use a single row cover weighted down with bricks at the edges to prevent wind damage. I've extended harvests by weeks using these simple techniques.
Pro Tips for R Vegetable Gardening
- Small spaces don't mean small harvests—these practical tips will help you maximize every square foot of your garden while keeping your plants thriving through all four seasons.
- Seasonal Rotation Strategy: The four-zone system works best when you actually rotate crops annually.
- Soil Preparation Shortcuts: If turning 6 inches of soil feels overwhelming, work in layers.
Frequently asked questions
Can I grow vegetables year-round in a small space?
With the right layout and planning, you can enjoy fresh produce every season. Use raised beds, vertical gardening, or container pots to maximize space. Choose cold-hardy crops like kale, spinach, and carrots for winter, while tomatoes, peppers, and basil thrive in summer. Succession planting (sowing new seeds every few weeks) keeps your harvest flowing!
When is the best time to start planting in my climate?
Timing depends on your zone, but a general rule is to plant cool-season crops (like lettuce or peas) 4-6 weeks before the last frost and warm-season crops (like beans or cucumbers) 2-3 weeks after. For year-round gardens, stagger plantings every 2-3 weeks. Check your local frost dates or use a planting calendar to tailor your schedule.
What are the most space-efficient vegetables to grow?
Prioritize compact, high-yield crops like:
- Leafy greens (spinach, kale, Swiss chard)
- Herbs (basil, cilantro, parsley)
- Radishes (ready in 3-4 weeks!)
- Bush beans (no trellis needed)
- Cherry tomatoes (grow vertically)
How do I keep pests away without chemicals?
Prevention is key! Start with healthy soil (rich in compost) to boost plant resilience. Use physical barriers like row covers or netting for insects. Handpick pests early, or introduce beneficial bugs like ladybugs or praying mantises. For slugs, set out beer traps (yes, really!) or use copper tape around beds. Crop rotation also disrupts pest life cycles.
What if my space is really tiny—like a balcony or patio?
No problem! Container gardening is your best friend. Use:
- Window boxes for herbs and microgreens
- Hanging planters for strawberries or cherry tomatoes
- Stackable pots (5+ gallons per plant) for peppers or bush beans
- Vertical pockets (like Kreg Board) for greens
Wrapping up and next steps
Starting a year-round R vegetable garden in compact spaces isn’t just possible—it’s rewarding! With the right layout, space-saving techniques, and a dash of creativity, you can grow fresh, nutrient-packed veggies all year long.
Whether you’re a beginner or a seasoned gardener, every small step—like maximizing vertical space or choosing fast-growing crops—adds up to a thriving harvest.
Ready to dive in? Start small—pick one section of your garden or balcony to begin, then expand as you gain confidence. Your future self (and taste buds!) will thank you. 🌱