
Tools
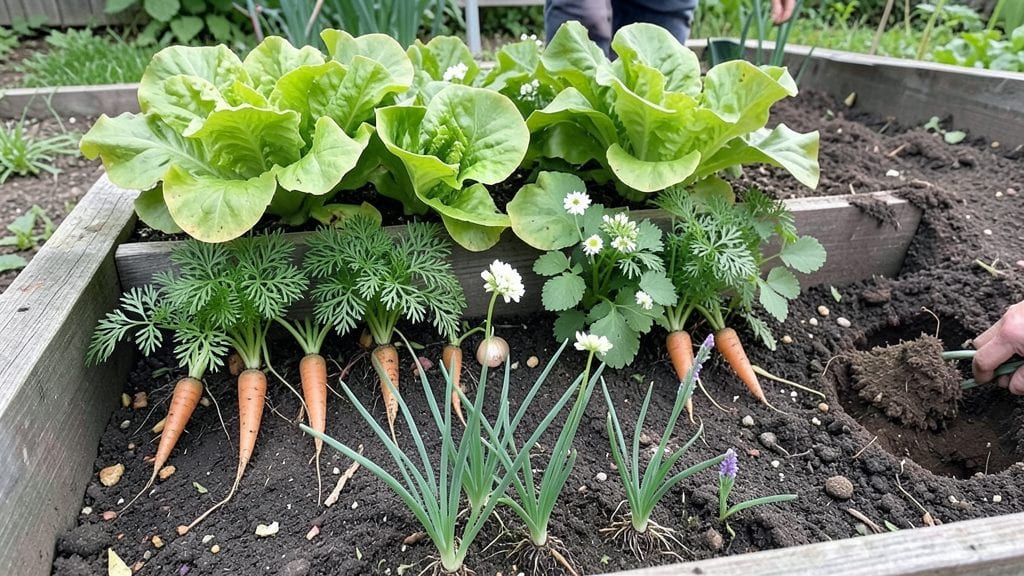
My raised garden layers transformed a cramped backyard into a vertical jungle of productivity. 🌱 The modular height system lets you stack plants like shelves—tall sunflowers at the back, bushy basil in the middle, and crisp lettuce at the front—all in the same bed.
No more wasted space or plants fighting for sunlight.
This isn’t just clever design—it’s a game-changer for airflow and root depth. I’ve packed in three layers of growth where one bed used to struggle, and the soil stays looser longer because water drains better.
The tallest plants get their light, the middle ones thrive without shading, and the low growers stay cool in summer. Plus, harvesting becomes a breeze.
You’ll end up with a garden that looks like a living tapestry—vibrant green at every height, blooms at eye level, and greens you can reach without bending.
The best part? You can rotate crops seasonally, keeping the bed productive year-round without replanting the whole thing. Here’s how to stack it right.
Works for any size bed, from 4-foot squares to long, narrow strips. The key is matching plant heights to their sunlight needs and keeping the heaviest plants at the bottom. Let’s build this vertical system step by step—no digging required.
📚 In This Guide
- What you need
- Instructions
- Tips and common mistakes
- Wrapping up and next steps
What you need
- ● Wood or Composite Lumber: 2x6 or 2x8 boards (untreated cedar or redwood recommended for durability) – 6–8 pieces, 8 ft long
- ● 1x4 or 1x6 boards (for internal framing) – 4–6 pieces, 8 ft long
- ● Hardware: 3-inch exterior wood screws (stainless steel) – 50+ pieces
- ● Corner braces or L-brackets (galvanized) – 8–12 pieces
- ● Heavy-duty landscape screws (for securing layers) – 20+ pieces
- ● Layering System Components: Adjustable legs or risers (e.g., 4-inch or 6-inch height increments) – 4–6 pieces per layer
- ● Non-corrosive washers and nuts (for threaded risers) – 10+ sets
- ● Landscape Fabric or Cardboard: 1 roll (to suppress weeds and retain moisture).
- ● Drill & Driver Bit Set: Cordless drill with Phillips and hex bits.
- ● Circular Saw or Miter Saw: For precise cuts (or pre-cut lumber).
- ● Measuring Tape & Pencil: For marking cuts and assembly.
- ● Level: To ensure even layers (2–4 ft bubble level).
- ● Wood stain or sealant (for longevity).
- ● Drainage pipes or gravel (for bottom layers).
- ● Garden trellis or vertical supports (for climbing plants).
- ● Soil mix calculator (to estimate compost/soil needs per layer).
Step-by-Step instructions for building a modular raised garden system
Here's how to create a layered, customizable raised bed that maximizes space and root depth.
🪴 Step 1: Plan and Measure Your Layered Layout
Start by sketching your design on paper. I like to use 4 layers—each about 12 inches deep—so roots can grow freely without competing. Measure your space first: a 4-foot by 8-foot footprint gives plenty of room for 4 layers side by side. Each layer should have its own 12-inch by 16-inch frame for stability.
Decide which plants go where: deep-rooted veggies like carrots and potatoes in the bottom layers, mid-height plants like peppers and tomatoes in the middle, and shallow-rooted herbs or greens on top. This vertical organization prevents overcrowding and makes harvesting easier. Mark your measurements directly on the ground with stakes to avoid mistakes during assembly.
🌱 Step 2: Build and Assemble the Modular Frames
Use untreated 2x6 lumber for each layer’s frame—it’s sturdy enough to hold soil and plants without rotting quickly. Cut four pieces per layer: two 16-inch lengths for the long sides and two 12-inch lengths for the short sides. Assemble them into rectangles with 2.5-inch deck screws, pre-drilling holes to prevent splitting.
Stack the frames vertically, spacing each layer 6 inches apart to allow airflow and easy access. Secure them with 3-inch corner brackets at each joint—this keeps the whole structure stable even when filled with soil and plants. I like to add a 1-inch lip on the inside edges of each layer to prevent soil from spilling into the gaps between layers.
💧 Step 3: Layer Soil and Compost for Optimal Growth
Fill the bottom layer with a mix of 20 gallons of garden soil and 10 gallons of compost—this gives deep-rooted plants the nutrients they need. For the middle layer, use 15 gallons of potting mix blended with 5 gallons of compost, since these plants won’t need as much depth. The top layer gets 10 gallons of lightweight potting mix>, perfect for herbs and shallow greens.
Don’t compact the soil as you fill each layer—roots need room to spread. Instead, fluff it gently with your hands or a small rake to create air pockets. Water each layer lightly after filling to settle the soil without displacing it. This step ensures your plants have the right conditions from day one, whether they’re deep-rooted or not.
☀️ Step 4: Plant and Maintain the Modular System
Start with the bottom layer, planting deep-rooted crops like potatoes or asparagus. Move up to mid-height plants like tomatoes or peppers in the middle layer, and finish with shallow-rooted herbs or lettuce on top. Space plants according to their mature size—crowding will stunt growth and make harvesting difficult.
Water each layer separately, focusing on the bottom first. Let the water soak through before moving to the next layer up—this prevents runoff and ensures even moisture. I check soil moisture by sticking my finger 1 inch deep>. If it feels dry, it’s time to water. Mulch the top layer with 2 inches of straw> to retain moisture and suppress weeds.
⏰ Step 5: Rotate and Refresh for Year-Round Use
After the first harvest, remove spent plants and refresh the soil with a 5-gallon top-up of compost> in each layer. Rotate crops seasonally—what grew well in the bottom layer in spring might thrive in the middle layer in summer. This keeps nutrients balanced and prevents soil depletion.
In fall, add a 3-inch layer of leaves or straw mulch> over the top layer to protect plants through winter. Come spring, fluff the soil and replant. The modular design lets you adjust layers as needed—move a struggling plant up or down, or swap entire layers if one area gets overcrowded. This flexibility keeps your garden productive all year.
Tips & tricks for perfect raised garden layers
These practical strategies will help you build a sturdy, functional modular garden that grows bigger and better than ever.
The Frame Stability Secret: In Step 2, when assembling your 12-inch by 16-inch frames, use a level to ensure each layer sits perfectly square. I've seen wobbly frames collapse under heavy soil loads—pre-drilling those 2.5-inch deck screws and using a level makes all the difference. The 6-inch spacing between layers you're creating isn't just for aesthetics; it's what keeps air circulating and prevents rot.
Soil Layering Hack: For Step 3, instead of mixing all your compost into each layer, I recommend keeping it separate at first. Spread compost in a 1-inch layer at the bottom of each frame before adding soil. This creates a nutrient-rich base that roots will naturally seek out as they grow downward. The 20 gallons of garden soil in your bottom layer will stay looser this way too.
Watering Wisdom: When you're watering in Step 4, focus on the bottom layer first and let the water fully drain through before moving up. I've learned this the hard way—waterlogging the top layers can suffocate shallow roots. That 1-inch deep moisture check you're doing is perfect, but remember: sandy soils dry faster than clay. Adjust your watering frequency based on what your finger tells you about the soil's texture.
Seasonal Adjustment Tip: In Step 5, when refreshing your soil with that 5-gallon compost top-up, consider adding a handful of worm castings to each layer. They're packed with nutrients and help break down organic matter faster. For winter protection, I've found that straw mulch works better than leaves—it breaks down more slowly and provides better insulation against freezing temperatures.
Pro Tips for Raised Garden Layers
- These practical strategies will help you build a sturdy, functional modular garden that grows bigger and better than ever.
- The Frame Stability Secret: In Step 2, when assembling your 12-inch by 16-inch frames, use a level to ensure each layer sits perfectly square.
- Soil Layering Hack: For Step 3, instead of mixing all your compost into each layer, I recommend keeping it separate at first.
Frequently asked questions
Got questions about raised garden layers?
You’re not alone! Here are answers to the most common concerns—from setup to troubleshooting—to help you grow with confidence.
What’s the best depth for each layer in a modular raised garden?
For deep-rooted plants (like tomatoes or carrots), aim for 12–18 inches total depth, with layers like:
- Top layer (6–8"): Potting mix for annuals/veggies.
- Middle layer (6–8"): Compost + sand for drainage.
- Bottom layer (4–6"): Coarse mulch (straw, wood chips) for aeration.
When is the best time to start building raised garden layers?
Spring is ideal (after last frost), but you can prep layers 6–8 weeks early indoors or in a greenhouse. For year-round growth, build layers in fall for winter crops (kale, spinach) or early spring for warm-season plants (peppers, cucumbers).
Are raised garden layers more expensive than traditional beds?
Upfront costs may be higher ($50–$200 for materials), but they pay off with:
- Longer plant life (deep roots = fewer replants).
- No tilling or soil prep (saves time/money yearly).
- Modularity = repurpose layers for different crops.
How do I troubleshoot poor drainage in layered raised beds?
If water pools:
- Check the bottom layer—add gravel or broken pottery for drainage.
- Ensure layers have 10–15% slope toward drainage holes.
- Avoid compacting soil; fluff the middle layer with perlite.
Can I use raised garden layers for container gardening alternatives?
Stack layers vertically in small spaces (balconies, patios) or use them as:
- Portable planters for renters (move with you!).
- Hanging systems (attach to walls/fences).
- Cold frames in winter (add a clear lid).
Wrapping up and next steps
Raised garden layers are your ticket to effortless, high-yield gardening—whether you’re a space-challenged urban gardener or a seasoned homesteader. By stacking layers, you maximize root depth, extend growing seasons, and create a customizable, low-maintenance system that adapts to your plants’ needs. The best part? You can start small, scale up, and watch your harvests thrive year-round.
Ready to transform your garden? Gather your materials, sketch your design, and build with confidence. Begin with one layer, test it out, and expand as you gain experience. Your future self (and your plants!) will thank you. 🌱✨