
Vegetables
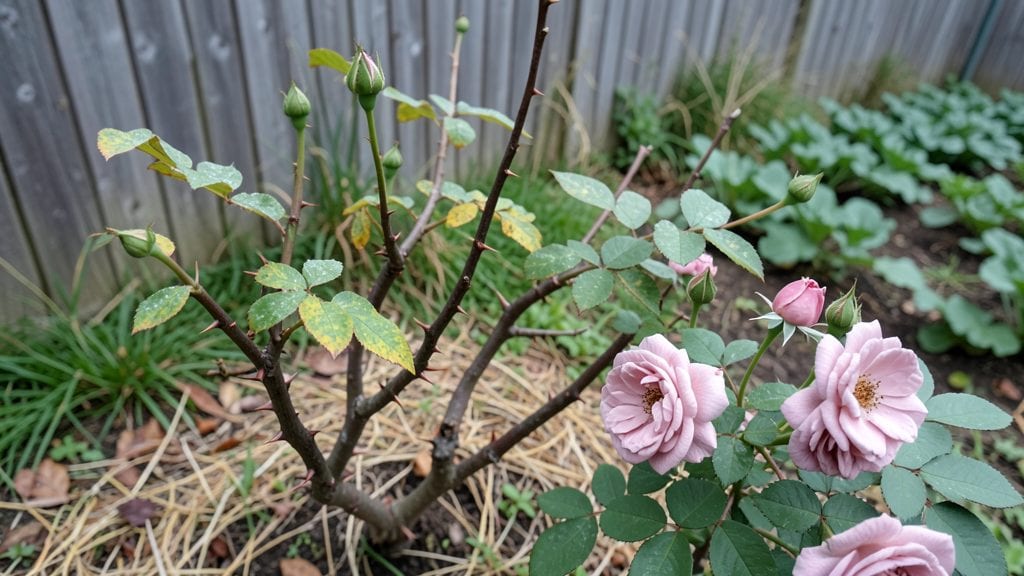
Transforming a small yard into a rose garden inspired by Kew’s iconic displays starts with vertical layers that maximize every inch. 🌿 I’ve recreated their signature lushness in my own backyard by stacking roses on trellises, pairing them with climbing companions, and using space-saving techniques that make even tight spots look grand.
The secret isn’t just the roses—it’s how they’re framed with foliage and structure.
Kew Gardens blends dwarf roses along borders with climbing varieties on arches, creating drama without sprawl. You’ll need sturdy trellises or obelisks (I use powder-coated metal for durability), plus seasonal fillers like clematis or jasmine to soften the lines.
The key is repetition—plant roses in odd-numbered groupings for natural rhythm, and let them spill over edges for that effortless, layered look.
By summer, your garden will burst with velvet blooms in every shade, from pale blush to deep burgundy, all arranged like a living tapestry. The scent alone—rose, honey, and green—will draw neighbors to your gate, and the vertical structure keeps maintenance simple.
No more wrestling with sprawling canes or hidden dead spots.
This works for urban patios, courtyard walls, or even balcony railings. The same principles apply whether you’re working with 5-gallon pots or in-ground beds—just scale the trellis size. Let’s bring that Kew magic home, one vertical layer at a time.
📚 In This Guide
- What you need
- Instructions
- Tips and common mistakes
- Wrapping up and next steps
What you need
- ● Vertical Garden Structure: 1–3 wall-mounted planters (e.g., 12"–18" deep, with drainage holes)
- ● OR 1 freestanding trellis (4'–6' tall, with sturdy lattice or netting)
- ● OR 6–12 hanging pockets (for cascading varieties)
- ● Growing Medium: 2–3 5-gallon bags of high-quality potting mix (lightweight, well-draining; e.g., FoxFarm Ocean Forest)
- ● 1 5-lb bag of perlite or vermiculite (for aeration, 10–20% mix ratio)
- ● Rosa Varieties: 3–5 compact rose bushes (dwarf or patio types like 'Rosa 'Flower Carpet' or 'Knock Out® Roses')
- ● 1–2 climbing roses (e.g., 'New Dawn' or 'Blaze', for trellises)
- ● Tools: 1 hand trowel (for planting)
- ● 1 pruning shears (sterilized)
- ● 1 watering can (with a fine rose)
- ○ 1 pH testing kit (optional but helpful for soil health)
- ● 1 slow-release fertilizer (e.g., Osmocote Smart-Release)
- ● 1 mulch fabric (to retain moisture in hanging pockets)
- ● LED grow lights (for low-light spaces)
- ● Decorative pebbles or moss (for a polished Kew Gardens look!)
Step-by-Step instructions for creating a Rosa Kew Gardens vertical display
This design transforms tight spaces into lush, fragrant gardens using climbing roses and layered plantings.
🌱 Step 1: Select and Prepare Your Trellis Structure
Choose a sturdy vertical trellis system that can support climbing roses—think powder-coated metal or cedar lattice for durability. For a 4-plant arrangement, use a 6-foot tall trellis with horizontal slats spaced 12 inches apart to train stems. I always pre-drill holes for mounting brackets to avoid damaging walls or fences later.
Position the trellis where it receives at least 6 hours of direct sunlight daily—roses are sun-worshippers. If your space only gets partial sun, opt for disease-resistant varieties like 'New Dawn' or 'Blaze', which tolerate lighter conditions better. Secure the base with concrete anchors if wind is a concern in your area.
🪴 Step 2: Layer Soil and Install Drainage
Fill a large container (at least 18 inches deep) with a mix of 50% high-quality potting mix and 50% compost to create a nutrient-rich base. Add a 2-inch layer of gravel at the bottom for drainage—roses despise soggy roots. I like to add a slow-release rose fertilizer (like Osmocote) mixed into the soil to give plants a steady nutrient supply.
For a multi-level display, use stackable planters with cascading edges to create natural tiers. Place the heaviest planter at the bottom and secure each level with plastic plant ties to prevent shifting. The top planter should sit 12 inches below the trellis apex to allow stems to climb without stretching.
☀️ Step 3: Plant Roses and Companion Plants
Dig a hole twice as wide as the root ball but only as deep as the top of the graft union—planting too deep suffocates the rose. Gently tease out roots if they're circling, then position the plant so the graft union sits 1-2 inches above soil level. Backfill with the potting mix, pressing lightly to eliminate air pockets.
Interplant dwarf shrubs (like spirea or hebe) at the base and spiller plants (like fuchsia or lobelia) in the cascading planters. These companions soften the structure and attract pollinators. Water deeply after planting to settle the soil, then mulch with 2 inches of shredded bark to retain moisture and suppress weeds.
✂️ Step 4: Train and Prune for Vertical Growth
When new growth reaches 6 inches, tie the strongest stems to the trellis with soft plant ties to encourage upward growth. Prune back any leggy stems to just above a leaf node—this redirects energy into bushier, more compact growth. I like to do a light pruning every 4-6 weeks during the growing season to maintain shape.
Watch for suckers (shoots growing below the graft union)—remove these immediately to preserve the parent plant's vigor. After the first flush of blooms, cut back spent flowers to the first 5-leaflet leaf to promote continuous flowering. This keeps your vertical display looking fresh all season.
💧 Step 5: Maintain Water and Nutrients
Water deeply 2-3 times per week until the top 2 inches of soil feel dry—roses need consistent moisture but hate soggy roots. I use a soaker hose to water at the base, which reduces fungal risks from overhead moisture. During heatwaves, increase to daily watering to prevent wilting.
Fertilize every 6-8 weeks with a balanced rose fertilizer (like 10-10-10) to support blooming. I also add Epsom salt (1 tablespoon per gallon of water) monthly to boost magnesium levels—this prevents yellowing leaves and improves flower quality. Monitor for pests like aphids and treat with neem oil if needed.
Tips & tricks for perfect Rosa Kew Gardens vertical display
A few strategic moves will help your vertical rose garden thrive like a Kew Gardens masterpiece. The secret lies in the details—from soil prep to pruning precision—that transform good into spectacular.
Soil Science Matters: In Step 2, that 50-50 mix of potting soil and compost isn't just arbitrary—it creates the perfect air-to-moisture balance roses crave. I've found adding 1 cup of perlite to every 5 gallons of mix improves drainage even more. And here's the thing: roses hate soggy roots, so if you're using containers, make sure they have drainage holes. No exceptions.
Trellis Training Technique: When your roses reach that 6-inch mark in Step 4, don't just tie them randomly. Use the "zigzag method"—alternate which side of the trellis you attach stems to as they grow. This creates a natural, balanced look while preventing stems from crowding one side. I also recommend using soft fabric ties instead of wire—they won't damage stems as they thicken.
Pruning Precision: That first 5-leaflet leaf reference in Step 4 is crucial. When deadheading, count those leaflets—it ensures you're cutting back to a strong growth point, not just guessing. And for continuous blooms, I've found pruning every 3-4 weeks (instead of 4-6) during peak summer months gives me more flowers. Just don't cut into old wood—always look for fresh green growth when pruning.
Sunlight Strategy: The 6 hours of direct sunlight mentioned in Step 1 is the absolute minimum. In my experience, roses in partial shade need even more vigilant care—watering daily instead of 2-3 times a week, and using disease-resistant varieties like 'New Dawn' as suggested. If your space gets less than 6 hours, consider placing a mirror nearby to reflect extra light onto the plants.
Pro Tips for Rosa Kew Gardens
- A few strategic moves will help your vertical rose garden thrive like a Kew Gardens masterpiece.
- Soil Science Matters: In Step 2, that 50-50 mix of potting soil and compost isn't just arbitrary—it creates the perfect air-to-moisture balance roses crave.
- Trellis Training Technique: When your roses reach that 6-inch mark in Step 4, don't just tie them randomly.
Frequently asked questions
Got questions about growing Rosa Kew Gardens in compact spaces? Here are some answers to help you get started—whether you're a beginner or a seasoned gardener!
How much sunlight does Rosa Kew Gardens need?
Rosa Kew Gardens thrives in full sun to partial shade (6–8 hours of sunlight daily). In hot climates, afternoon shade helps prevent stress. If growing in containers, rotate pots weekly for even light exposure. Pro tip: Watch for yellowing leaves—this could signal too much shade!
Can Rosa Kew Gardens grow in containers?
This climbing rose adapts well to 10–15 gallon containers with proper drainage. Use a well-draining potting mix and a trellis or obelisk for support. Ensure the pot has drainage holes to prevent root rot. Bonus: Containers make it easy to move the plant for seasonal sunlight adjustments!
How long does it take for Rosa Kew Gardens to bloom?
With proper care, expect first blooms in 1–2 years from planting. Young plants focus on root and vine growth before flowering. Prune spent blooms to encourage repeat flowering throughout the season. Patience pays off—these roses reward dedication with stunning, fragrant blooms!
What pests should I watch for with Rosa Kew Gardens?
Common pests include aphids, spider mites, and rose slugs. Inspect leaves regularly for sticky residue or tiny webs. Use neem oil or insecticidal soap for mild infestations. For severe cases, introduce ladybugs or lacewings (natural predators). Prevention tip: Keep the area around the plant free of debris to deter pests!
How do I overwinter Rosa Kew Gardens in cold climates?
In USDA Zones 5–7, protect the plant with mulch (3–4 inches) around the base and wrap the container (if potted) in burlap or frost cloth. For in-ground plants, mound soil around the base for insulation. In Zones 8+, minimal protection is needed—just reduce watering slightly in winter.
Wrapping up and next steps
Transforming compact spaces into thriving vertical gardens with Rosa Kew Gardens isn’t just possible—it’s a rewarding way to grow lush, productive greens year-round! 🌱 With the right materials, patience, and a dash of creativity, you’ll soon enjoy fresh herbs, leafy greens, and even strawberries right outside your door.
Whether you’re a seasoned gardener or just starting out, this method proves that small spaces can yield big harvests.
Ready to take the next step? Start small—pick one layer to build this weekend, then expand as your confidence (and garden!) grows. Share your progress with fellow green thumbs, and don’t forget to tag #RosaKewGardens for inspiration! 🌿✨