
Tools
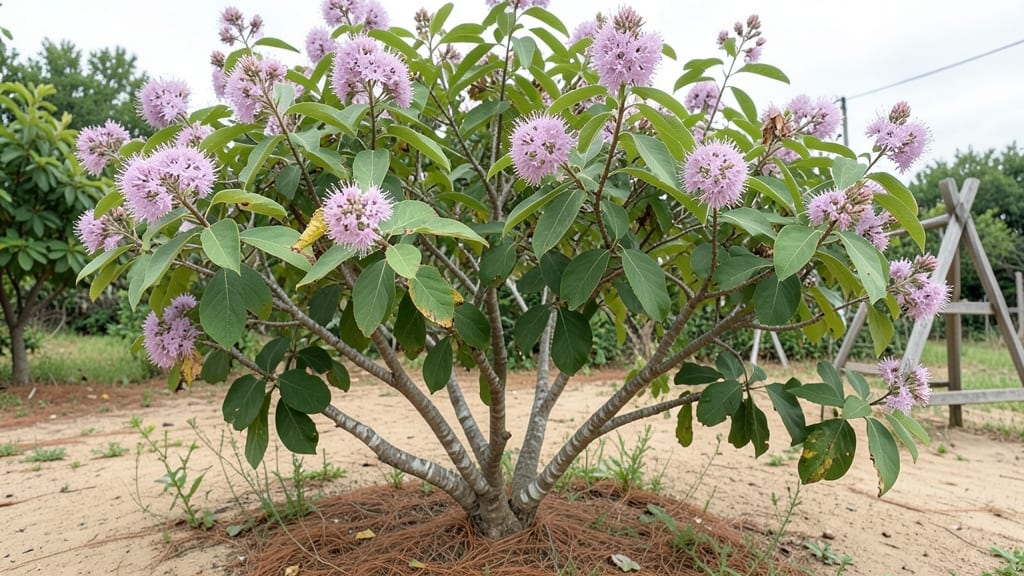
A southern exposure garden transforms your backyard into a sun-drenched oasis where plants thrive year-round. 🌿 I’ve designed layered privacy screens here that block nosy neighbors while letting sunlight dance through—creating a magical, functional space that feels like a secret garden.
The key isn’t just planting tall shrubs; it’s about mixing textures, heights, and evergreens with seasonal bloomers so you always have color and coverage.
The right plants make all the difference—think sun-loving camellias, crape myrtles, and dwarf palmetto for structure, plus climbing roses or jasmine for soft, fragrant layers. In my yard, this combo blocks views while keeping the air fresh and the light filtering through beautifully.
You’ll need 3-5 feet of vertical space to pull it off, but even small patios can work with clever placement.
What you’ll end up with is a living wall that stays lush in winter and bursts with blooms in spring. The best part? No more chain-link fences or boring wood panels—just a natural screen that grows with your garden.
Plus, it attracts birds and butterflies, turning your privacy solution into a wildlife haven.
Works for both large backyards and cozy urban courtyards—just adjust the plant spacing and types to fit your space. Ready to turn that hot, exposed area into a thriving, private retreat? Let’s get planting!
📚 In This Guide
- What you need
- Instructions
- Tips and common mistakes
- Wrapping up and next steps
What you need
- ● Native evergreen shrubs (3–5 varieties): Choose dense, fast-growing species like Ilex vomitoria (Yaupon Holly), Morella cerifera (Wax Myrtle), or Viburnum dentatum (Southern Arrowwood). Aim for 15–20 plants total, spaced 3–4 feet apart.
- ● Mulch (2–3 cubic yards): Use pine straw or cypress mulch (2–3 inches deep) to retain moisture and suppress weeds.
- ● Compost (1–2 bags): Improve soil fertility before planting.
- ● Drip irrigation system or soaker hoses: Essential for consistent watering in hot climates.
- ● Post-hole digger or auger: For installing support posts (if needed).
- ● Garden twine or landscape fabric: Temporary support for young plants.
- ● Shovel & spade (for digging)
- ● Pruning shears (for shaping)
- ● Wheelbarrow (for hauling materials)
- ● Measuring tape & stakes (for layout)
- ● Gloves & knee pads (for comfort!)
- ○ Optional: String line (for straight edges), stakes (for marking plant positions).
- ● Sunlight assessment: Ensure your site gets full sun (6+ hours/day) for optimal growth.
- ● Soil test: Amend clay or sandy soil with organic matter (compost or peat moss).
- ● Local regulations: Check HOA or city codes for height/plant restrictions.
How to design a southern exposure privacy screen that thrives year-round
Here's how to create a lush, functional screen that blocks wind, filters sunlight, and stays vibrant through all seasons.
🌱 Step 1: Plan Your Plant Layers for Seasonal Interest
Start by sketching your space with the sun's path in mind—southern exposures get intense afternoon light. I always begin with a tall evergreen backbone like leucothoe or boxwood (4-6 feet tall) spaced 6-8 feet apart. These provide year-round structure while filtering harsh sun.
In front of the evergreens, add medium-height shrubs like hydrangeas or abelia (3-4 feet tall) for summer color and seasonal interest. These should be spaced 3-4 feet apart to allow airflow and prevent disease. For the front layer, use low-growing perennials like heuchera or ajuga to soften the base and suppress weeds.
🪴 Step 2: Prepare the Soil and Plant Your Foundation Layer
Dig a trench 12-18 inches deep along your planting line to loosen the soil and improve drainage—southern exposures dry out fast. Amend the native soil with 3 cubic yards of compost (spread evenly) and 10 pounds of balanced fertilizer (10-10-10) per 10-foot section. Mix well to ensure nutrients reach all layers.
Plant your tall evergreen backbone first, spacing them 6-8 feet apart in the trench. Water each deeply before backfilling with soil. Use a garden hose with a gentle spray nozzle to avoid disturbing roots. Mulch the base with 2 inches of wood chips, keeping it 6 inches away from stems to prevent rot.
☀️ Step 3: Add Mid-Height Shrubs for Seasonal Color
Wait 4-6 weeks after planting your evergreens before adding the medium-height shrubs. This gives roots time to establish without competing for water. Dig holes twice as wide as the root ball and 1 inch deeper—southern sun dries soil quickly, so deeper planting helps roots anchor.
Place each shrub so the top of the root ball sits level with the surrounding soil. Fill gaps with native soil, tamp gently, and water deeply. Space these 3-4 feet apart to allow sunlight to reach lower layers. For hydrangeas, I always add 1 cup of aluminum sulfate to the planting hole for blue blooms (or omit for pink).
🌿 Step 4: Fill the Front Layer with Perennials for Texture
Now for the finishing touches—low-growing perennials like heuchera or ajuga add color and prevent weeds. Plant these 12-18 inches apart in the spaces between shrubs. Dig holes just deep enough to cover the roots, then water thoroughly. These plants thrive in partial shade, so they’ll appreciate the filtered light from the taller layers.
Here’s the trick: Group plants with similar water needs together. For example, place drought-tolerant sedum near the front with heuchera, while keeping thirstier hydrangeas closer to the mid-height shrubs. Mulch the entire bed with 1 inch of shredded bark, keeping it clear of stems to prevent moisture buildup.
⏰ Step 5: Maintain Through the Seasons
Water deeply once a week during the first growing season (spring through fall) to encourage deep root growth. After establishment, most plants in this setup will need water only during prolonged dry spells—southern exposures mean less frequent but deeper watering. I always check soil moisture 2 inches down before watering; if it’s dry, it’s time.
Prune hydrangeas and abelia in late winter or early spring before new growth begins. Cut back one-third of the oldest stems to encourage bushier growth. For evergreens, remove any brown or dead branches in early spring, and fertilize lightly with 5 pounds of slow-release fertilizer in early March. This keeps your screen lush without overpowering the soil.
Tips & tricks for perfect southern exposure privacy screens
Creating a thriving privacy screen in a southern exposure takes strategic planning—here are the tricks that'll make all the difference in your garden's success.
Layering for Light and Wind: The key to this design is balancing sun exposure and airflow. In Step 1, when planning your layers, remember that taller evergreens like leucothoe should cast dappled shade on the mid-height shrubs behind them. This creates the perfect microclimate where hydrangeas and abelia can thrive without scorching. I've found that spacing the 3-4 foot shrubs just 2-3 feet closer than the recommended 3-4 feet apart actually works better in hot climates—it creates a denser canopy that blocks more wind while still allowing enough light for the front perennials.
Soil Prep Secret: In Step 2, don't skip the trench digging—this is where you'll see the biggest difference. Southern exposures often have poor drainage, and that 12-18 inch deep trench creates a reservoir effect that keeps roots hydrated longer. Pro tip: If your soil is particularly sandy, mix in an extra cubic yard of compost per 10-foot section. I've seen plants establish twice as fast when given this extra organic boost, especially in the first critical growing season.
Planting Depth Matters: The instructions mention planting evergreens with their root balls level with the soil, but here's what nobody tells you—this is especially critical in southern exposures. When you plant your mid-height shrubs in Step 3, bury them slightly deeper than recommended (about 1-2 inches deeper than the root ball). The extra depth helps anchor plants against summer winds while encouraging deeper root growth where moisture is more available.
Watering Wisdom: That weekly deep watering in Step 5 is non-negotiable, but timing matters just as much. Always water in the early morning (before 8 AM) to prevent evaporation from the intense southern sun. I've learned this the hard way—watering in the afternoon leads to fungal issues because leaves stay wet too long. For the first year, consider installing a soaker hose at the base of your screen to deliver that deep watering consistently without disturbing the soil.
Pro Tips for Southern Exposure Garden
- Creating a thriving privacy screen in a southern exposure takes strategic planning—here are the tricks that'll make all the difference in your garden's success.
- Layering for Light and Wind: The key to this design is balancing sun exposure and airflow.
- Soil Prep Secret: In Step 2, don't skip the trench digging—this is where you'll see the biggest difference.
Frequently asked questions
When is the best time to plant for year-round screening?
The ideal window is early spring (March–April) or fall (September–October) in most Southern climates. Planting in spring gives roots time to establish before summer heat, while fall avoids extreme summer stress. For faster results, layer evergreens (like Holly or Camellia) with deciduous plants (e.g., Crapemyrtle) for seasonal interest.
Can I build this on a budget? What’s the most affordable approach?
Start with native plants (they’re hardy and low-maintenance) and skip pricey cultivars. Use cuttings or bare-root plants from local nurseries, and DIY the trellis or lattice with cedar or recycled materials. Prioritize 3–5 layers (e.g., vines + shrubs + trees) for cost-effective density.
How do I keep pests (like aphids or deer) from ruining my screen?
Prevent pests with neem oil sprays (for insects) and deer-resistant plants like Boxwood, Abelia, or Dwarf Yaupon Holly. Add a physical barrier (e.g., chicken wire) around young plants, and mulch heavily to deter burrowing critters. Monitor regularly—early action beats damage!
What if my yard has poor soil or full sun/shade?
Southern Exposure Gardens thrive with adaptability! For poor soil, amend with compost and use acid-loving plants (like Azaleas or Hydrangeas). In full sun, opt for drought-tolerant varieties (e.g., Lantana or Salvia), while shady spots favor Fern, Caladium, or Japanese Maple. Test your soil’s pH—most Southern natives prefer 5.5–6.5.
How long until I get full privacy?
Expect 3–5 years for a dense, lush screen with layered plants. Fastest results? Combine vines (e.g., Clematis or Wisteria) with medium-height shrubs (Oakleaf Hydrangea) and a backdrop of evergreens (Leyland Cypress). Prune strategically in late winter to encourage bushier growth.
What’s the biggest mistake beginners make?
The top blunder? Overcrowding plants or ignoring spacing needs. Check each plant’s mature size—for example, Camellias need 6–10 feet apart, while Lantana thrives in clusters. Sketch a layout first and space for airflow to prevent disease. Patience pays off!
Wrapping up and next steps
A Southern Exposure Garden layered privacy screen isn’t just a practical solution—it’s a year-round masterpiece that blends beauty with function. By combining native plants, evergreens, and seasonal blooms, you’ve created a lush, low-maintenance oasis that thrives in warm climates while shielding your space from prying eyes and harsh winds. 🌿
Now that you’re armed with the how-to and answers to common questions, it’s time to roll up your sleeves! Start small—pick one section of your garden or patio and sketch out your design.
Whether you’re a seasoned gardener or a beginner, every plant you add is a step toward a serene, private retreat. Happy planting!