
Tools
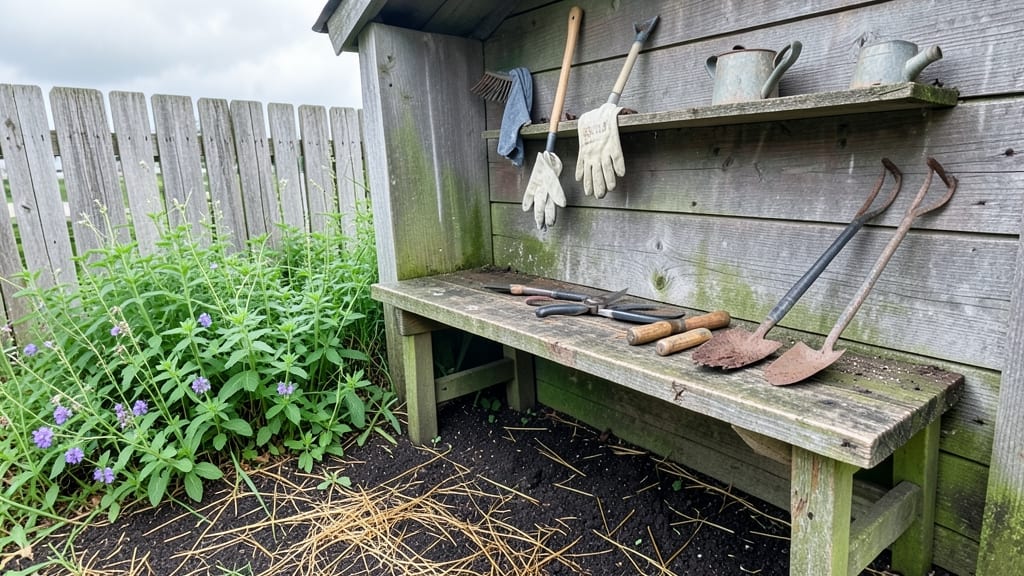
My garden workshop started with a single stack of modular planters that changed how I organize my entire yard. 🌱 These interlocking containers aren't just for pretty displays—they're the secret to keeping tools, seeds, and supplies within arm's reach while maximizing limited space.
The best part? You can rearrange them like puzzle pieces whenever your gardening needs shift from seed starting to pruning season.
I use mine for everything from seedling trays in early spring to tool storage in summer. The stackable design turns cluttered corners into functional workstations, and the built-in drainage prevents soggy tools or moldy seed packets.
Most systems cost under $150 for a complete setup, and you can mix and match sizes to fit everything from small pruners to 5-gallon watering cans.
By mid-season, you'll have a mobile workstation that moves with you—whether you're potting up seedlings, cleaning tools after rain, or organizing harvested veggies. The modular design means no more digging through sheds or losing gloves in the back of a toolbox.
Plus, the vertical space keeps everything visible and accessible, even in tight garden corners.
Works equally well for urban balconies or rural homesteads—just adjust the size of your base unit. The key is starting small with what you need most, then expanding as your gardening ambitions grow. Here's how to set up your first stack without overcomplicating it.
📚 In This Guide
- What you need
- Instructions
- Tips and common mistakes
- Wrapping up and next steps
What you need
- ● Wood: 1x 4x4 post (8 ft) – for corner supports
- ● 2x 2x4 boards (8 ft each) – for framing
- ● 4x 1x6 boards (8 ft each) – for planter bases and sides
- ● 1 sheet of ½” plywood (4x8 ft) – for bottoms and dividers
- ● Hardware: 3” exterior wood screws (1 lb box)
- ● 2” deck screws (1 lb box)
- ● Heavy-duty corner brackets (4-pack)
- ● Wood glue (small bottle)
- ● Tools: Circular saw or miter saw
- ● Drill + drill bits
- ● Measuring tape + square
- ● Sandpaper (80 & 120 grit)
- ● Paintbrush or roller (if staining/painting)
- ● Extras: Landscape fabric (to line planters)
- ● Drainage holes (pre-drilled or drilled)
- ● Self-watering reservoir kit (for built-in irrigation)
- ● Non-toxic wood stain or paint (for weatherproofing)
- ● Herb planter inserts (for modular herb gardens)
- ● Wheel kit (for mobility)
Instructions: build your stackable modular planter system
Here's how to assemble a customizable, space-saving planter system that adapts to any patio or balcony.
🪴 Step 1: Cut and Assemble Planter Box Frames
Start by cutting the 2x4 lumber to create identical rectangular frames—each should measure 12x18 inches for the base and 11x17 inches for the top edges. Use the 1¼-inch deck screws to attach the side pieces to the base, forming sturdy rectangular boxes. I like to pre-drill holes to prevent wood splitting, especially near the corners.
Build four identical frames. The key here is precision—measure twice before cutting. If the sides aren't perfectly square, your planters won't stack evenly later. Test-fit two frames together to ensure they interlock properly before moving on.
🪴 Step 2: Attach Stacking Interlocks
Cut four 2x2 lumber pieces to 11-inch lengths—these become the interlocking tabs. Position one tab vertically at each corner of the inside of the frame's top edge, using 1-inch wood screws. The tabs should extend upward about 1 inch above the frame's top edge.
For the bottom frame, cut four 2x2 lumber pieces to 12-inch lengths and attach them horizontally to the inside of the bottom edge. These create the slots that lock with the top frame's tabs. Sand all edges smooth—rough spots will snag fabric later.
🌿 Step 3: Line Frames with Landscape Fabric
Cut the landscape fabric to 14x20-inch rectangles (slightly larger than the frame). Staple the fabric to the inside of each frame using the staple gun, pulling it taut to prevent sagging. Overlap the edges by 1 inch and secure them with extra staples.
Here's the thing—I fold the fabric up the sides about 2 inches and staple it to the inside edges of the top frame. This creates a clean barrier between planters when stacked, preventing soil from mixing between levels.
⏰ Step 4: Add Drainage and Fill with Soil
Place a plastic nursery pot saucer (cut to fit) in the bottom of each frame. These double as drainage layers and prevent soil from falling through gaps. Fill each frame with 1 cubic foot of potting mix, leaving 1 inch of space at the top for watering.
Don't pack the soil too tightly—you want it loose enough for roots to spread. I like to fluff the soil with my hands after filling, creating small air pockets. This prevents compaction over time, which can suffocate roots.
💧 Step 5: Stack and Arrange Your System
Start with the bottom frame and place your plants directly into the soil. Stack the next frame on top, aligning the tabs with the slots. Press gently until you hear a click—the frames should lock securely. Repeat until you reach your desired height.
Arrange the stacked units in any configuration—side by side, in an L-shape, or even stacked vertically in a corner. The beauty of this system is its flexibility. You can mix heights, create tiers, or even build a free-standing wall. Just be mindful of weight—four stacked frames can get heavy!
Tips & tricks for perfect modular planters
These simple tricks will help you build a sturdy, stackable planter system that lasts seasons and adapts to any space.
Precision Cutting: Use a carpenter's square to verify your 12x18-inch frames are perfectly rectangular before assembling. I mark my cuts with a pencil first, then double-check measurements with a tape measure. The 11x17-inch top edges must be exactly 1 inch smaller than the base to ensure proper stacking alignment later.
Screw Placement Strategy: In Step 1, space your 1¼-inch deck screws no more than 6 inches apart along the frame edges. For extra stability, add corner screws at a 45-degree angle through both pieces. This creates a hidden locking mechanism that prevents frames from shifting when stacked.
Fabric Installation: When stapling the landscape fabric in Step 3, pull it taut but not so tight it resists when you insert plants. The 2-inch fold up the sides is key—this creates a moisture barrier between stacked planters. I use a heavy-duty staple gun to prevent staples from popping out when wet.
Soil Preparation: For the 1 cubic foot of potting mix, I always mix in 1 part perlite to 3 parts soil to improve drainage. After filling, gently press the soil down just enough to eliminate large air pockets, but don't compact it. This balance prevents both root suffocation and soil erosion when watering.
Pro Tips for The Garden Workshop
- These simple tricks will help you build a sturdy, stackable planter system that lasts seasons and adapts to any space.
- Precision Cutting: Use a carpenter's square to verify your 12x18-inch frames are perfectly rectangular before assembling.
- Screw Placement Strategy: In Step 1, space your 1¼-inch deck screws no more than 6 inches apart along the frame edges.
Frequently asked questions
Got questions about transforming your garden with modular planters? Here are some of the most common ones—and their answers—to help you get started with confidence!
What’s the best time of year to assemble and use modular planters?
Modular planters are year-round flexible, but timing depends on your climate and plants. Spring or early fall is ideal for assembly—mild weather makes it easier to move and stack units. For cold climates, winterize by emptying pots or covering them. Pro tip: Start with lightweight materials if you’re working solo!
Can I customize the size or shape of my modular planter setup?
Most modular systems are designed for easy expansion or rearrangement. Mix and match units to create custom heights, widths, or even spiral designs. Just ensure your base is stable—uneven terrain or wind can shift lighter setups. Pro tip: Use a level to check alignment before securing components.
Are there budget-friendly alternatives to high-end modular planters?
Yes! DIY options like repurposed wooden crates, cinder blocks with planter liners, or stacked concrete blocks with drainage holes work well. For a polished look, try pallet wood or PVC pipes (with holes drilled for drainage). Pro tip: Check local hardware stores for discounted materials or upcycle old furniture!
How do I prevent water damage or mold in stacked planters?
Ensure each unit has proper drainage holes and use saucers or trays to catch excess water. Elevate planters slightly off the ground to improve airflow. For wooden or fabric planters, apply a waterproof sealant or line them with plastic liners. Pro tip: Avoid overwatering—modular setups can trap moisture between layers.
What plants thrive in modular planters, and how do I rotate them?
Modular planters work great for herbs, succulents, veggies (like lettuce or strawberries), and trailing plants (e.g., petunias). Rotate plants seasonally to optimize space and sunlight. Heavy rooters (like tomatoes) need deeper units, while shallow-rooted plants (like basil) fit in smaller stacks. Pro tip: Label units to track plant care needs!
Wrapping up and next steps
Transforming your garden into a modular masterpiece is easier—and more creative—than you think! With a few basic materials and a little ingenuity, you can build stackable planters that adapt to any space, season, or style.
Whether you’re a DIY beginner or a seasoned builder, the garden workshop is your playground for endless greenery possibilities.
Ready to get started? Grab your tools, sketch your vision, and let your garden grow—one stack at a time! 🌱✨
Next step: Pick a design, gather your supplies, and dive into your first project today!