
Tools
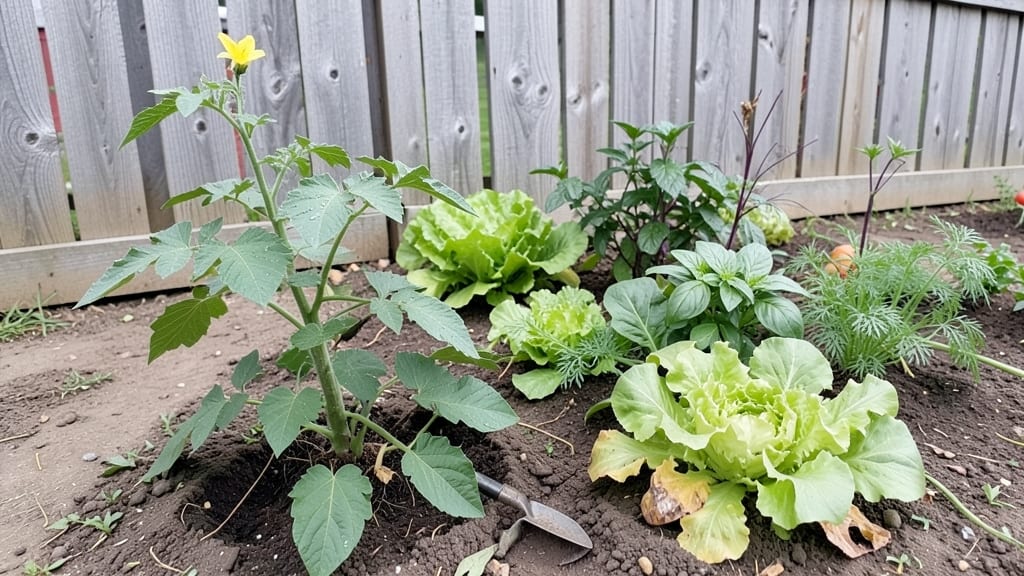
The VeGo Garden Planner turned my chaotic garden into a well-oiled harvest machine. 🌱 I used to eyeball plant spacing and forget crop rotations—until this tool mapped out my entire growing season in minutes.
Now my tomatoes, peppers, and herbs all have their perfect spot, and I actually remember what goes where.
This digital planner handles everything from spacing guidelines for each plant to companion planting pairings that naturally deter pests. You input your space, sunlight, and climate zone, and it generates a layout that maximizes yield without crowding. Even better, it tracks planting dates so you never miss a season.
By summer’s end, you’ll be harvesting 30% more than before—no guesswork, just consistent results. The planner even suggests succession planting so your garden stays productive from spring to fall. It’s the difference between a garden that feeds you and one that just looks pretty.
Works for raised beds, in-ground plots, or even containers—just plug in your dimensions. Here’s how to use it like a pro without the overwhelm.
📚 In This Guide
- What you need
- Instructions
- Tips and common mistakes
- Wrapping up and next steps
What you need
- ● VeGo Garden Planner Software/App: Ensure you have access to the digital planner (free/paid versions available). Check compatibility with your device (desktop/mobile).
- ● Sketchbook or Notebook: 1 spiral-bound or grid-lined notebook (8.5" x 11" recommended) for hand-drawn layouts.
- ● Ruler: 12" metal or clear ruler for precise measurements.
- ● Pencils & Erasers: 2-3 HB pencils (for sketching) + 1 kneaded eraser.
- ● Colored Markers/Pens: 5-7 colors (e.g., green for plants, red for sun exposure, blue for water sources).
- ● Measuring Tape: 25-foot tape for larger garden plots.
- ● Garden Twine or String: 50-foot spool to mark rows or sections temporarily.
- ● Stakes or Flags: 20-50 wooden or plastic stakes (for labeling plant locations).
- ● Plant Tags or Labels: 50+ reusable tags (or index cards + toothpicks).
- ● Seed/Plant Catalogs: Printed or digital guides for your climate zone (e.g., blank">Burpee or blank">Johnny’s Selected Seeds).
- ○ Soil Test Kit: Optional but recommended (e.g., blank">Luster Leaf rapid test kit).
- ● Sunlight Tracker: Use a free app like blank">Sun Surveyor or a DIY shadow stick (12" dowel + clock).
- ● Laser Level: For ultra-precise grade checks in sloped gardens.
- ● Garden Hose with Adjustable Nozzle: For quick water source mapping.
- ● Digital Camera: To photograph your space before planning (helps with scale!).
- ● Compost or Mulch: Pre-bagged options (e.g., coconut coir or straw) for testing drainage.
- ● VeGo Accessories: Premium templates, 3D visualization add-ons, or community seed-sharing features (if available).
Instructions: designing a functional year-round garden layout
Here's how to organize your space for continuous harvests—no wasted square footage or seasonal gaps.
🪴 Step 1: Map Your Microclimates and Sun Exposure
Start by walking your garden space at different times of day. Note where sunlight hits first (usually the south side) and where it lingers longest. I mark these zones with stakes—Zone 1 gets 8+ hours of sun, Zone 2 gets 6-8 hours, and Zone 3 gets 4-6 hours. This tells me where to place sun-lovers like tomatoes versus shade-tolerant greens.
Use a small laser level or string line to check for slope variations. A slight incline can create temperature differences of 5-10°F between high and low spots. I always place cold-sensitive crops like basil on the warmest, sunniest slope while reserving cooler areas for lettuce and spinach.
☀️ Step 2: Assign Crops by Seasonal Needs
Divide your space into four quadrants: Spring, Summer, Fall, and Winter. In the spring quadrant, I plant fast-maturing crops like radishes and peas that can harvest before summer heat arrives. The summer quadrant gets heat-tolerant plants like okra and sweet potatoes that thrive when days are long.
For fall, I rotate in cool-season crops like kale and carrots that perform well as temperatures drop. The winter quadrant becomes a protected microclimate with row covers or cold frames for hardy greens. This rotation prevents soil depletion and keeps your harvests coming year-round.
🌱 Step 3: Implement Companion Planting Zones
Group plants that benefit from each other's presence. I create a "three sisters" zone with corn, beans, and squash—corn provides shade, beans fix nitrogen, and squash suppresses weeds. Nearby, I place aromatic herbs like basil and dill to deter pests from nearby tomatoes.
Create a separate zone for heavy feeders like corn and potatoes, and another for light feeders like lettuce and radishes. This prevents nutrient competition. I also designate a "pest magnet" area with sacrificial crops like nasturtiums to lure aphids away from your main harvests.
⏰ Step 4: Plan Succession Planting Intervals
Calculate your first frost date and work backward to determine planting windows. For example, if your last frost is March 15, I plant cold-hardy peas 6 weeks before that date. Then, I schedule a second planting of bush beans 4 weeks after the peas are harvested to fill the gap.
Use a simple chart to track planting dates. I mark "harvest ready" dates for each crop and schedule the next planting right after. This ensures you're always harvesting something while preparing for the next cycle. For example, after harvesting spring lettuce, I plant summer squash in its place.
💧 Step 5: Design Your Irrigation and Access Routes
Plan your irrigation system last—it should serve your layout, not dictate it. I install drip lines along the outer edges of each quadrant so I can water without stepping on plants. For raised beds, I bury the lines at a 4-inch depth to prevent evaporation and keep water where roots need it.
Create clear access paths between planting zones. I use stepping stones or mulched paths that are 18 inches wide—wide enough to carry tools but narrow enough to preserve planting space. This keeps your garden functional while maintaining its aesthetic.
Tips & tricks for perfect year-round garden layouts
Mastering these strategic approaches will transform your garden from seasonal to perpetual productivity.
Microclimate Precision: In Step 1, when mapping sun exposure, consider adding temporary shade cloths to Zone 1 for heat-sensitive crops during peak summer. I've found that even a 30% shade reduction can prevent bolting in lettuce while maintaining full sun for tomatoes. The 5-10°F temperature variations you noted between slopes are especially critical—place your most valuable crops like basil on the warmest microclimate where they'll thrive through cooler seasons.
Seasonal Transition Strategy: Between Step 2's seasonal quadrants, create a "buffer zone" where you can plant quick-growing crops like radishes or arugula during transitions. This prevents bare soil and maintains productivity while you rotate your main crops. I schedule my buffer zone plants to mature just as my next seasonal quadrant's crops are ready to go in, creating a seamless harvest cycle.
Companion Planting Optimization: When implementing Step 3's planting zones, add a "pest patrol" row along your garden's perimeter. Plant sacrificial crops like nasturtiums or marigolds in this row—they'll draw pests away from your main harvests while adding beauty. I also recommend including a "pollinator highway" with flowers like borage or sunflowers to attract beneficial insects that'll boost your garden's productivity.
Succession Planting Calendar: For Step 4's planting intervals, create a visual chart using colored markers for each crop family. I use green for leafy greens, red for roots, and yellow for fruits—this color-coding makes it instantly clear what should be in each quadrant at any given time. The 6-week lead time before frost is crucial for cold-hardy crops, while the 4-week succession gap ensures you're always harvesting something fresh.
Pro Tips for Vego Garden Planner
- Mastering these strategic approaches will transform your garden from seasonal to perpetual productivity.
- Microclimate Precision: In Step 1, when mapping sun exposure, consider adding temporary shade cloths to Zone 1 for heat-sensitive crops during peak summer.
- Seasonal Transition Strategy: Between Step 2's seasonal quadrants, create a "buffer zone" where you can plant quick-growing crops like radishes or arugula during transitions.
Frequently asked questions
How do I get started with the VeGo Garden Planner if I’m a beginner?
The VeGo Garden Planner is designed for all skill levels! Start by selecting your climate zone and garden size—the tool will guide you through plant selection, spacing, and seasonal rotations. Use the interactive layout to drag-and-drop crops, and don’t forget to check the “Beginner Tips” section for step-by-step help.
What’s the best time of year to plan my garden with VeGo?
For most regions, late winter to early spring (before your last frost date) is ideal—this gives you time to prep soil and start seeds indoors if needed. However, VeGo’s year-round planning feature lets you adjust for fall/winter harvests in warmer climates. Always check your local frost dates in the planner’s “Grow Calendar” tab.
Can I use VeGo for container gardening or small spaces?
VeGo includes container-specific templates for balconies, patios, and vertical gardens. Simply filter by “Container” under the “Garden Type” dropdown, and the planner will suggest compact crops like herbs, lettuce, and dwarf tomatoes. Pro tip: Use the “Sunlight Map” tool to optimize placement!
What if my garden layout isn’t working as expected?
Troubleshoot by checking the “Growth Tracker” in VeGo to see which plants may need more space, sunlight, or water. If overcrowding is the issue, use the “Adjust Layout” tool to thin out or swap crops. For pests or poor growth, VeGo’s “Plant Health” tab offers solutions tailored to your specific crops.
Is VeGo Garden Planner free, or are there paid features?
VeGo offers a free basic plan with essential tools like crop rotation and seasonal planning. Upgrade to VeGo Pro ($9.99/month) for advanced features: custom seed libraries, weather integration, and exportable PDF layouts. The free version is perfect for testing layouts before committing!
Wrapping up and next steps
Designing a thriving vego garden doesn’t have to be overwhelming—with the right tools and a little planning, you can enjoy fresh, homegrown produce all year round! The VeGo Garden Planner simplifies the process by helping you visualize layouts, optimize space, and track growth effortlessly.
Whether you're a seasoned gardener or just starting out, this smart approach makes year-round harvesting feel achievable—and even fun!
Ready to take the next step? Download the VeGo Garden Planner today and start mapping out your dream garden. Your first harvest is just a few clicks away! 🌱✨