
Tools
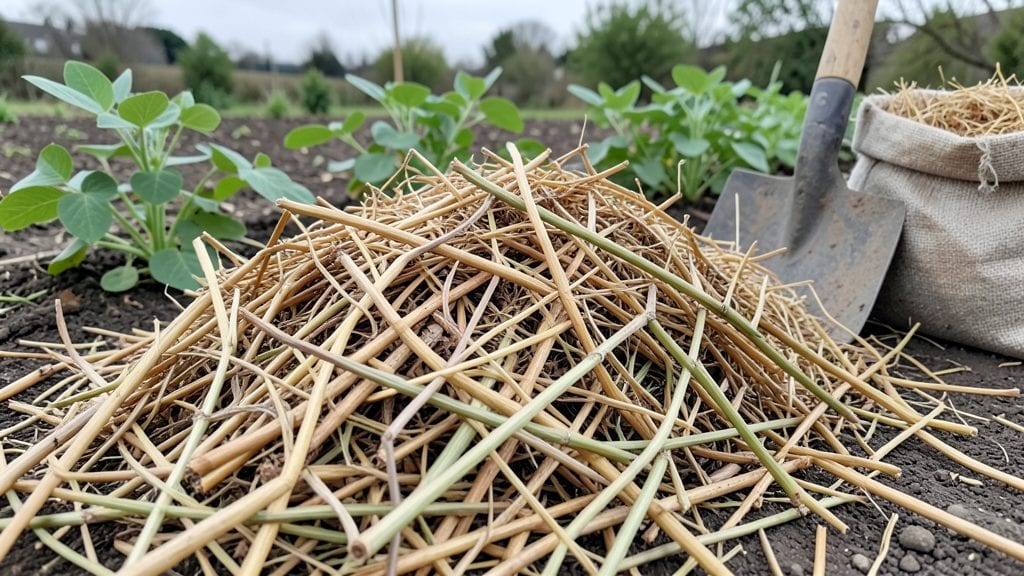
My wheat straw garden transformed my cramped backyard into a thriving vertical oasis—no wasted space, no digging, just layers of straw holding moisture and suppressing weeds.
The first time I saw how straw kept soil cool in summer and insulated roots in winter, I knew I’d never go back to mulch again. It’s the unsung hero of small-space gardening, and I’m here to show you exactly how to use it.
You’ll need wheat straw (not hay—it’s seed-free and breaks down slower), a sharp spade or rake, and about 2-3 inches per layer. The beauty of straw is its versatility: use it as mulch around plants, as a base for raised beds, or even to fill gaps in vertical planters.
It improves soil structure over time, adding organic matter without smothering roots like some mulches do. Just avoid clumps—fluff it up before applying for even coverage.
By spring, you’ll notice richer soil, fewer weeds, and plants that stay hydrated longer between waterings. Straw also deters pests like slugs and keeps berries clean off the ground. The key is reapplying as it breaks down—usually once or twice a season—and keeping it dry to prevent mold.
I’ve grown tomatoes, herbs, and even strawberries in straw-heavy beds with zero issues.
Works for containers, raised beds, or in-ground gardens, and adapts to any climate. Whether you’re fighting drought or just tired of weeding, straw is the low-effort upgrade your garden needs. Let’s get those layers down!
📚 In This Guide
- What you need
- Instructions
- Tips and common mistakes
- Wrapping up and next steps
What you need
- ● Wheat straw: 10–15 lbs (dry, clean, and free of seeds/chemicals). Aim for straw, not hay (no seeds!). Garden container or vertical planter: 1–2 units (12"–18" deep, with drainage holes). Options: Fabric grow bags (breathable, $10–$20 each) Wooden pallets or crates (upcycled, $5–$15) Plastic bins with holes drilled (DIY-friendly)
Step-by-step instructions for building a wheat straw garden
Transform your small yard into a thriving vertical garden using wheat straw—this method maximizes space while keeping costs low.
Gather and Prepare the Wheat Straw
Start by collecting wheat straw—it should be clean, dry, and free of seeds or weeds. If buying, look for baled wheat straw (about 2-3 bales for a 4-foot-tall structure). Break the straw into 6-8 inch lengths by hand or with a sharp knife. This size creates the right balance of air pockets and support for plants.
Spread the straw pieces on a tarp or clean ground to remove any debris or remaining seed heads. You’ll need roughly 10-12 pounds of prepared straw for a 4-foot-tall, 2-foot-wide garden. The straw will act as both a growing medium and a structural framework, so don’t skip this prep step—it ensures stability and drainage.
Build the Vertical Frame
Construct a wooden frame using 2x4 lumber to create a rectangular or square base. For a 4-foot-tall garden, assemble two vertical sides (4 feet high x 2 feet wide) with horizontal supports every 12 inches. Secure the frame with screws or sturdy staples—this will hold the straw in place while allowing roots to grow through.
Place the frame in a location with at least 6 hours of sunlight daily. If your yard is shady, choose slow-growing plants like lettuce or herbs. Avoid placing it where rain will constantly soak the straw—elevate the base slightly with bricks or cinder blocks to prevent rot. The frame should feel sturdy when pushed; if it wobbles, add diagonal braces for extra support.
Layer the Straw for Planting
Begin layering the straw vertically between the frame’s supports, packing it tightly but not compressing it. Leave 2-3 inch gaps between layers to allow roots to penetrate. Moisten the straw lightly with water—it should feel damp like a wrung-out sponge, not soggy. This step is critical: too dry, and roots won’t establish; too wet, and the straw will mold.
Create planting pockets by tucking small handfuls of potting mix into the straw layers, about 4-6 inches deep. Mix the potting mix with a slow-release fertilizer (follow package rates) to give plants a nutrient boost. Space pockets 6-8 inches apart to avoid overcrowding. You’ll fit about 4-6 plants per layer, depending on their size.
Plant and Water Your Vertical Garden
Gently place seedlings or small plants into the potting mix pockets, pressing lightly to secure them. For herbs or shallow-rooted veggies, 1-2 inches of soil coverage is enough. Avoid burying stems too deep—this can cause rot. If using seeds, plant them directly into the pockets, covering with a thin layer of potting mix and misting with water.
Water thoroughly until moisture runs out the bottom of the frame. After that, water every 2-3 days, checking the straw’s moisture level by squeezing a handful—it should feel damp but not dripping. Overwatering is the biggest mistake here; straw gardens drain poorly if saturated. Mulch the top layer with straw mulch to retain moisture and suppress weeds.
Maintain and Harvest Your Vertical Garden
Monitor the garden weekly for signs of pests or disease. Straw gardens attract fewer bugs than soil, but aphids or spider mites may appear. Spray with neem oil or a soapy water solution if needed. Prune leggy growth to encourage bushier plants, and pinch back flowers on herbs to prolong leaf production.
Harvest leaves or produce as needed, but avoid taking more than one-third of the plant at once. After the first harvest, top-dress the straw layers with compost or fresh potting mix to replenish nutrients. This garden will last 1-2 seasons before needing a full rebuild—straw breaks down over time, so plan to refresh it in spring. With care, you’ll enjoy fresh greens, herbs, or flowers in minimal space!
Tips & tricks for perfect wheat straw garden
Building a successful wheat straw garden takes more than just stacking straw—it's about creating the right balance between structure and growth. Here are my go-to tips to help you avoid common pitfalls and maximize your harvest.
Straw Selection and Preparation: When gathering wheat straw, look for pieces that are uniform in size—around 6-8 inches is ideal. I’ve found that straw with a slight bend holds its shape better in the frame. After breaking the straw, spread it out on a tarp and give it a good shake to remove any hidden debris. This step might seem tedious, but it prevents clogged drainage and ensures your plants have room to grow. Too much debris can also attract pests, so don’t rush this part.
Frame Stability is Non-Negotiable: In Step 2, when building your frame, I cannot stress enough how important it is to secure those horizontal supports every 12 inches. I’ve seen frames collapse under the weight of wet straw—trust me, it’s not pretty. Use at least three screws per joint and consider adding diagonal braces if your yard gets windy. A wobbly frame won’t just look bad; it can crush your plants. Test it by pushing gently before you add the straw layers.
Moisture Management is Critical: The damp-but-not-soggy rule in Step 3 is where most people go wrong. I’ve learned the hard way that straw gardens are particularly vulnerable to mold when overwatered. After moistening your straw layers, squeeze a handful—if water drips out, you’ve gone too far. For the first week, check moisture levels daily, especially if you’re in a hot climate. Mulching the top layer with straw mulch helps retain just the right amount of moisture without creating a swampy environment.
Plant Selection Matters More Than You Think: Not all plants thrive in straw gardens. In Step 4, when choosing what to plant, stick to shallow-rooted varieties like lettuce, herbs, or small flowering plants. Deep-rooted veggies like tomatoes or carrots will struggle to establish in the limited depth. If you’re determined to grow something heartier, like peppers, plant them in the lower layers where the straw is more compact. Also, avoid planting anything that requires heavy feeding—this system relies on slow-release fertilizer, not nutrient overload.
Pro Tips for Wheat Straw Garden
- Building a successful wheat straw garden takes more than just stacking straw—it's about creating the right balance between structure and growth.
- Straw Selection and Preparation: When gathering wheat straw, look for pieces that are uniform in size—around 6-8 inches is ideal.
- Frame Stability is Non-Negotiable: In Step 2, when building your frame, I cannot stress enough how important it is to secure those horizontal supports every 12 inches.
Frequently asked questions
Got questions about creating your own wheat straw garden? You’re not alone—this space-saving method is innovative but can feel tricky at first. Here are answers to the most common queries to help you get started with confidence!
How do I prepare wheat straw for a vertical garden?
Start by soaking the wheat straw in water for 24–48 hours to soften it and reduce decomposition time. Drain excess water, then layer it in your vertical planter, alternating with soil or compost. This ensures proper aeration and moisture retention for your plants.
How long does it take for wheat straw to break down in a garden?
Wheat straw typically decomposes in 3–6 months, depending on moisture, temperature, and aeration. To speed it up, mix in compost or worm castings. If decomposition is too fast, reduce watering or add more soil layers to stabilize the structure.
Can I use wheat straw in a vertical garden year-round?
Wheat straw works best in warm to temperate climates during growing seasons (spring–fall). In cold winters, the straw may slow down decomposition or freeze. For year-round use, consider combining it with other organic materials like coconut coir or peat moss.
What plants should I avoid growing in a wheat straw garden?
Avoid heavy feeders like corn, pumpkins, or squash, which may deplete nutrients too quickly. Instead, opt for lightweight plants like herbs (basil, thyme), leafy greens (lettuce, spinach), or strawberries. These thrive in the airy, nutrient-rich environment wheat straw provides.
What do I do if my wheat straw garden smells bad?
A foul odor usually means over-moisture or anaerobic conditions. Improve airflow by fluffing the straw gently, reduce watering, and mix in dry compost or perlite to balance moisture. If the smell persists, replace the affected layer and adjust your watering routine.
Are there alternatives to wheat straw for vertical gardens?
Yes! Try coconut coir, peat moss, or shredded newspaper as organic fillers. For a faster setup, use hydroponic growing media or even recycled plastic bottles (for non-organic options). Each has pros and cons—pick based on your plants’ needs and sustainability goals!
Wrapping up and next steps
Transforming your compact yard into a thriving wheat straw garden isn’t just practical—it’s a game-changer for small-space growers! By repurposing straw into a vertical, space-saving layout, you’ve unlocked a world of possibilities for herbs, veggies, and flowers without sacrificing precious square footage. 🌱
Ready to take the next step? Start small—build your first vertical planter this weekend, or share your progress with fellow gardeners online. Your green thumb (and wallet!) will thank you.