
Tools
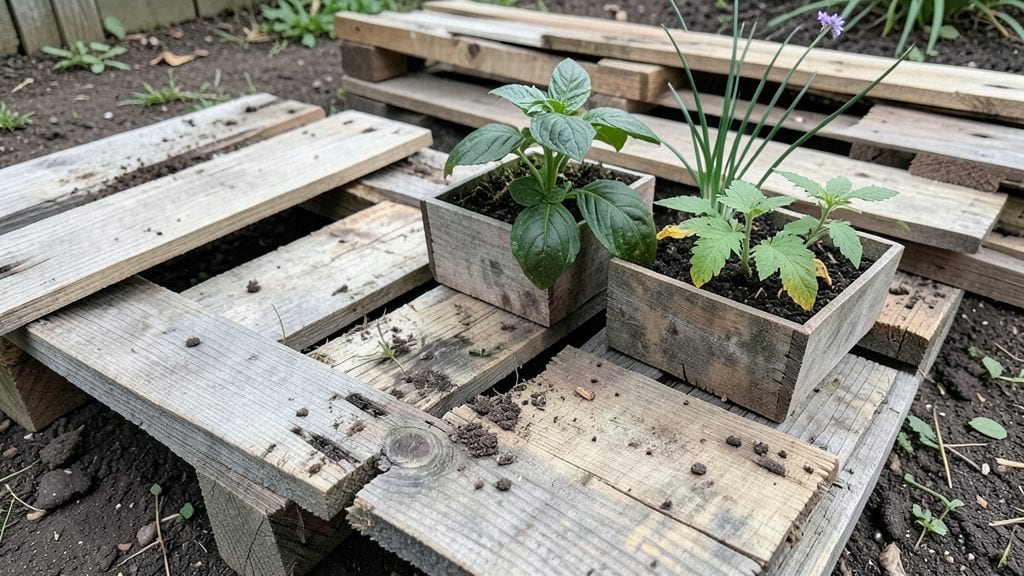
Transforming discarded pallets into a thriving garden is one of the most satisfying upcycling projects you’ll ever try. 🌿 I’ve turned rough-hewn wood into vertical gardens that produce herbs, salad greens, and even strawberries—all in spaces where traditional planters wouldn’t fit.
The best part? It costs almost nothing, and the rustic charm makes your garden feel like an extension of the earth itself.
The key to success starts with sourcing the right pallets—look for HT-stamped ones (heat-treated, safe for food plants) and avoid chemically treated ones. You’ll need basic tools: a saw (or handsaw for DIY cuts), sandpaper, drill, screws or nails, and a waterproof sealant to protect the wood.
Most pallets come apart easily, giving you clean planks for building your planter frames. My first project used just two pallets and a weekend afternoon.
Once assembled, your pallet garden becomes a vertical powerhouse. Imagine cherry tomatoes trailing down the sides, basil leaves within arm’s reach, or vibrant marigolds deterring pests—all in a footprint smaller than a standard raised bed.
The design works equally well against a fence, on a balcony, or even stacked for extra growing space. You’ll harvest fresh produce while reducing waste, and your neighbors will ask how you did it.
Here’s the secret weapon: drip irrigation or self-watering inserts make maintenance effortless, even if you travel. A little planning upfront—like adding landscape fabric to prevent soil loss—saves headaches later.
Whether you’re growing for beauty, bounty, or both, this project proves that sustainability and style go hand in hand. Let’s build yours!
📚 In This Guide
- What you need
- Instructions
- Tips and common mistakes
- Wrapping up and next steps
What you need
- ● Wooden pallets: 2–4 standard-sized pallets (40" x 48" is ideal). Look for heat-treated (HT) pallets—avoid chemically treated ones (marked "MB" for methyl bromide).
- ● Screws or nails: 2–2.5" deck screws (galvanized or stainless steel, 10–15 per pallet) to secure pallets together.
- ● Drill/driver: Cordless or electric for efficiency.
- ● Sandpaper or electric sander: 80–120 grit to smooth rough edges (especially important if kids or pets will interact with it).
- ○ Wood stain or paint (optional): Non-toxic, weather-resistant sealant (e.g., beeswax or linseed oil for a natural look).
- ● Potting soil: 1–2 cubic feet per pallet, depending on depth. Use a lightweight, well-draining mix for containers.
- ○ Drainage material (optional but recommended): Small gravel, perlite, or broken pottery pieces (1–2 inches) to prevent root rot.
- ● Plants: Choose compact varieties like herbs (basil, thyme), succulents, or trailing flowers (petunias, nasturtiums). Avoid heavy rooters like tomatoes.
- ● Pallet feet or casters: For mobility or elevation (prevents rot from ground contact).
- ● Landscape fabric: Line the bottom to reduce soil loss.
- ● Self-watering kit: A reservoir bag or drip irrigation system for low-maintenance gardening.
- ● Decorative elements: Twine, moss, or painted designs to personalize your planter.
Step-by-Step instructions for building a wood pallet garden
Turn a simple pallet into a functional, space-saving garden that adds rustic charm to any outdoor space.
🪴 Step 1: Inspect and Prep the Pallet
Start by checking your pallet for any nails or staples—these can be hazardous and may harm plant roots. Use pliers to carefully remove any protruding fasteners. I like to sand down any rough edges or splinters with medium-grit sandpaper to make the pallet safe to handle and visually appealing.
If your pallet has visible stains or dirt, wipe it down with a damp cloth and mild soap. Let it dry completely before proceeding. This ensures your garden will look clean and professional. Avoid using chemical cleaners, as they can leave residues harmful to plants.
🌱 Step 2: Assemble the Garden Structure
Stand the pallet vertically against a wall, fence, or in a corner of your garden. If you're using it horizontally, place it on a flat surface like a deck or patio. For added stability, especially if you're growing heavier plants, secure the pallet to the ground or wall with screws or brackets.
I often add a layer of landscape fabric or burlap to the bottom of the pallet to prevent weeds from growing through the gaps. This also helps keep the soil contained and makes cleanup easier. Cut the fabric to fit snugly, leaving a small border around the edges.
💧 Step 3: Fill and Layer the Soil
Fill the pallet with a mix of topsoil and compost to create a nutrient-rich growing medium. I like to use a ratio of two parts topsoil to one part compost for balanced drainage and fertility. Fill the pallet to about 1 inch below the top to allow room for watering and prevent spillage.
Gently press down the soil to remove air pockets, but don’t compact it too tightly—roots need room to grow. If you’re planting directly into the pallet, create small holes or pockets in the soil for each plant. For a more structured look, you can also line the pallet with landscape fabric before adding soil.
☀️ Step 4: Plant and Arrange Your Garden
Choose plants that thrive in containers and suit your climate. Herbs like basil, thyme, and rosemary do well in pallet gardens, as do vegetables like lettuce, radishes, and cherry tomatoes. Place taller plants at the back or center of the pallet and shorter ones toward the front for a balanced look.
Dig small holes in the soil, place your plants gently, and cover the roots with soil. Water each plant thoroughly to help settle the soil and remove any air bubbles around the roots. Space plants according to their mature size to ensure they have enough room to grow without competing for nutrients.
✂️ Step 5: Water, Mulch, and Maintain
Water your pallet garden deeply right after planting to help the soil settle and encourage root growth. I like to water in the morning so the plants have plenty of moisture for the day ahead. Check the soil daily during the first week, and water whenever the top 1 inch feels dry to the touch.
Once your plants are established, spread a 1-inch layer of mulch over the soil to retain moisture, suppress weeds, and regulate soil temperature. Use organic mulch like straw or shredded bark. Avoid mulching too close to the stems of your plants to prevent rot. Regularly check for pests and diseases, and remove any affected leaves or plants immediately to keep your garden healthy.
Tips & tricks for perfect wood pallet gardens
A few clever tricks will help you create a thriving, long-lasting pallet garden that looks as good as it grows.
Safety First: In Step 1, when removing nails or staples, I use pliers with rubber grips to avoid slipping and injuring my fingers. After removing fasteners, I give the pallet a quick once-over with a flashlight to check for any hidden nails I might have missed. Trust me, you'll thank yourself later when your plants aren't struggling with hidden hazards!
Stability Matters: When assembling your garden in Step 2, I recommend securing the pallet with at least two screws or brackets—one at the top and one at the bottom. This prevents wobbling, especially if you're growing heavier plants like tomatoes. For extra security, place a small brick or concrete block in the bottom corners to weigh it down if you're using it horizontally.
Soil Science: In Step 3, don't skip the landscape fabric lining if your pallet has large gaps. I've found that even with the two parts topsoil to one part compost mix, weeds can still grow through the gaps. The fabric also helps maintain moisture and prevents soil from spilling out. Pro tip: Poke a few small holes in the fabric where you'll plant to allow roots to grow through while still blocking weeds.
Plant Placement: When arranging your garden in Step 4, think vertically! Use the back of the pallet for taller plants like sunflowers or tomatoes, and the front for shorter plants like lettuce or herbs. This creates a natural tiered effect and makes harvesting easier. I also like to add a few trailing plants like nasturtiums to cascade over the sides for extra visual appeal.
Pro Tips for Wood Pallet Garden
- A few clever tricks will help you create a thriving, long-lasting pallet garden that looks as good as it grows.
- Safety First: In Step 1, when removing nails or staples, I use pliers with rubber grips to avoid slipping and injuring my fingers.
- Stability Matters: When assembling your garden in Step 2, I recommend securing the pallet with at least two screws or brackets—one at the top and one at the bottom.
Frequently asked questions
Got questions about turning wood pallets into a stylish, space-saving garden? You're not alone! Here are answers to the most common queries—from setup to troubleshooting—to help you grow with confidence.
Can I use any wood pallet for a garden?
Not all pallets are safe! Only use heat-treated (HT) or chemically untreated pallets marked with "HT" or no markings. Avoid pallets stamped "MB" (methyl bromide) or painted with toxic chemicals. When in doubt, sand them thoroughly and line with landscape fabric to protect plants.
How long does it take to assemble a wood pallet garden?
For a basic 2-pallet vertical garden, plan 1–2 hours for prep (cleaning, sanding, and drilling) and 30–60 minutes for assembly. If you’re adding irrigation or extra planters, add another 30–45 minutes. Pro tip: Gather tools first—a drill, screws, and a level—to save time!
What’s the best way to water a pallet garden?
Use a drip irrigation system or a DIY spray nozzle attached to a hose for even watering. Place a tray or saucer under each pallet to catch runoff and prevent soil erosion. Water early in the morning to reduce evaporation, and check soil moisture daily—pallet gardens dry out faster than ground-level beds.
How do I keep pests away from my pallet garden?
Prevent pests with copper tape around edges (deters slugs/snails) and neem oil spray for aphids. Elevate pallets off the ground to avoid ants and rodents. Avoid overwatering, which attracts fungus gnats. Companion planting (e.g., marigolds near veggies) also helps naturally!
What if my pallet garden looks uneven or wobbly?
Use leveling brackets or cinder blocks to stabilize pallets. If gaps appear between boards, add landscape fabric or burlap strips to hold soil in place. For extra support, screw pallets to a wooden frame or wall. Rearrange plants if needed—unevenness won’t harm roots!
Wrapping up and next steps
A wood pallet garden isn’t just a creative way to upcycle—it’s a practical, space-saving solution that brings rustic charm to any outdoor (or indoor!) space. Whether you’re a seasoned gardener or just starting out, this project proves that sustainability and style can grow together. 🌱
Ready to turn your pallets into a thriving garden? Start small—pick a single pallet, gather your tools, and let your green thumb shine! Your future plants (and neighbors) will thank you.