
Tools
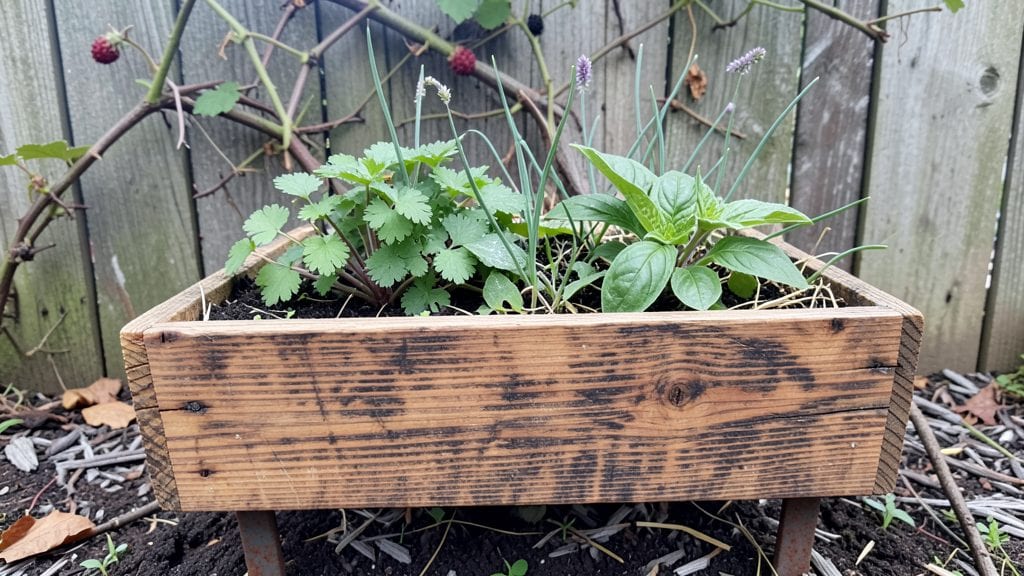
"Elevated garden planters turned my tiny backyard into a thriving oasis—no more wasted ground space or struggling plants. These vertical multipliers solve the biggest problems of small yards: poor soil, drainage issues, and cramped growing areas.
The right setup can double your harvest in the same footprint, and I’ve tested enough materials to know which last through seasons without warping or rusting.
You don’t need fancy tools to start—just a drill, some sturdy lumber or metal, and a few hours on a weekend. My favorite designs combine 12-inch-deep planters for root crops with wall-mounted pockets for herbs and lettuce.
Wood cedar resists rot, while powder-coated metal handles heat better, so choose based on your climate and style. The key is elevating soil quality—mix in compost and perlite to keep roots happy, and add trellises for vining plants to climb.
What you’ll love most? No more bending over to weed or harvest, and pests have a harder time reaching your plants. My tomato vines now sprawl up a 6-foot-tall frame, while strawberries spill over the edges of a wall-mounted tiered planter.
The best part? You can move everything closer to sunlight if your yard shifts—flexibility like that changes how you garden forever.
Perfect for balconies, patios, or even urban fire escapes. Whether you go for wooden crates, fabric grow bags, or modular metal grids, the right planter turns limitations into opportunities. Let’s build something that works for your space—and your schedule.
📚 In This Guide
- What you need
- Instructions
- Tips and common mistakes
- Wrapping up and next steps
What you need
- ● Elevated Planter Boxes: 2–4 wooden crates (12"–18" deep, 2'–4' long, 1'–2' wide)
- ● OR pre-made elevated planters (check local garden centers)
- ● Wood: Untreated cedar or redwood (resistant to rot; 1x8 or 1x10 boards, 8' long)
- ● Hardware: Galvanized screws (2"–3", 50–100 count)
- ● Corrosion-resistant corner brackets (4–8, depending on size)
- ● Drainage: Drill bits (¼"–½" for drainage holes)
- ● Landscape fabric (to prevent soil clogging)
- ● Soil & Plants: High-quality potting mix (1–2 bags, 2–3 cubic feet per planter)
- ● Container-friendly plants (herbs, veggies, or flowers—check sunlight needs!)
- ● Waterproof sealant (for extra durability)
- ● Casters or feet (for mobility)
- ● Decorative paint/stain (to match your space)
- ● Self-watering reservoir kit (for low-maintenance greens)
Step-by-Step guide to building elevated garden planters
Transforming tight spaces into lush gardens starts with smart planning and sturdy construction.
Choose and Prepare Your Planter Materials
Start by selecting a base structure that matches your yard’s style and weight capacity. Wooden crates, cinder blocks, or repurposed pallets work well for DIY planters. I like cedar or redwood because they resist rot and last years without treatment. Measure your space first—each planter should be 12-18 inches deep for most vegetables and herbs, with at least 2 square feet of surface area per plant to allow proper root spread.
If using untreated wood, apply a non-toxic wood sealant to protect against moisture. For pre-made planters, check the manufacturer’s weight limit—some lightweight plastic models can’t hold mature plants like tomatoes or peppers. Skipping this step leads to sagging or collapsed planters once plants take off.
Add Drainage and Fill with Quality Soil
Drainage is non-negotiable—without it, roots drown and plants wilt overnight. Drill ¼-inch holes in the bottom of your planter if it doesn’t already have them, then cover with landscape fabric to keep soil from washing out. I place a 2-inch layer of gravel or broken pottery next to help excess water drain away from roots.
Fill the remaining space with a lightweight potting mix—never garden soil, which compacts and suffocates roots in containers. Mix in compost or slow-release fertilizer to give plants a nutrient boost right from the start. Leave 2 inches of space at the top for watering without spilling.
Plant Strategically for Vertical Growth
Arrange plants based on their mature size and sunlight needs. Tall plants like sunflowers or basil go in the back, while shallow-rooted herbs like thyme or chives fill the front. Space seedlings 6-12 inches apart, depending on the variety—crowding leads to competition for water and nutrients.
Dig holes just deep enough to bury the roots without covering the stem. Press soil gently around each plant to remove air pockets, then water deeply to settle everything. Here’s the thing—if your planter feels unstable after planting, add concrete blocks or sandbags to the base for extra weight and balance.
Position for Sunlight and Watering Access
Most vegetables and herbs need 6-8 hours of direct sunlight daily, so place planters where they’ll get morning sun at minimum. If your yard is shady, opt for leafy greens like lettuce or herbs like parsley instead of sun-lovers like tomatoes. Rotate planters quarter-turn weekly to encourage even growth and prevent leaning.
Watering elevated planters requires consistency—check soil moisture daily during hot weather and every other day when cooler. The top inch of soil should feel dry before watering again. I use a soaker hose to deliver moisture slowly and evenly, avoiding runoff that can erode soil over time.
Maintain and Expand Your Vertical Garden
Fertilize every 4-6 weeks with a balanced, water-soluble formula to replenish nutrients lost during growth. Watch for pests like aphids or spider mites—elevated planters can dry out faster, making them more vulnerable. A neem oil spray applied weekly keeps most pests at bay without harming plants.
As plants mature, prune regularly to encourage bushier growth and prevent overcrowding. You’ll know it’s time to thin when leaves start touching—this restricts airflow and invites disease. For perennials like herbs, harvest leaves in the morning for the strongest flavor and trim back one-third of the plant after flowering to promote new growth.
Tips & tricks for perfect elevated garden planters
Building elevated garden planters that thrive requires attention to detail—here are my go-to strategies for avoiding common pitfalls and maximizing your vertical space.
Material Stability: When selecting your base structure in Step 1, prioritize weight distribution over aesthetics. For wooden crates, reinforce corners with metal brackets if you're using them for heavy plants like tomatoes. I've seen planters collapse under mature plants because the base wasn't properly secured—this simple reinforcement prevents costly mistakes. The 12-18 inch depth recommendation isn't just about aesthetics; it ensures proper root development for most vegetables and herbs.
Drainage System Upgrade: In Step 2, while the ¼-inch holes and 2-inch gravel layer work well, consider adding a removable false bottom made from hardware cloth. This makes cleaning out debris and refreshing the drainage layer much easier without disturbing your plants. I've found that adding a thin layer of coarse sand above the gravel helps prevent soil from clogging the drainage holes over time.
Soil Mix Secrets: The lightweight potting mix in Step 2 should contain at least 20% perlite or vermiculite to improve aeration. I like to mix in a handful of worm castings along with the compost—this gives plants an immediate nutrient boost and helps retain moisture better than regular compost alone. The 2-inch top space isn't just for watering; it also prevents soil from spilling when you water from above.
Plant Rotation Strategy: The quarter-turn weekly rotation in Step 4 is brilliant for even growth, but I've found that marking the planter's position with a small flag or paint mark helps track progress. For particularly tall plants like sunflowers, consider adding a small trellis or stake during planting in Step 3—this prevents them from toppling as they grow, which is especially important in elevated planters where wind can be more of a factor.
Pro Tips for Elevated Garden Planters
- Building elevated garden planters that thrive requires attention to detail—here are my go-to strategies for avoiding common pitfalls and maximizing your vertical space.
- Material Stability: When selecting your base structure in Step 1, prioritize weight distribution over aesthetics.
- Drainage System Upgrade: In Step 2, while the ¼-inch holes and 2-inch gravel layer work well, consider adding a removable false bottom made from hardware cloth.
Frequently asked questions
Got questions about elevated garden planters?
You’re not alone! Here are answers to the most common queries to help you make the best choice for your space.
What are the best materials for elevated garden planters?
Durability and drainage matter most! Opt for cedar or redwood (naturally rot-resistant), plastic (lightweight and affordable), or metal (long-lasting but heavier). Avoid untreated wood—it warps over time. For DIYers, pressure-treated lumber is a budget-friendly pick, but line it with landscape fabric to prevent soil leaching.
When is the best time to plant in elevated garden planters?
Timing depends on your climate! In spring (after the last frost) or early fall (6-8 weeks before first frost) are ideal for most plants. Warm-season veggies (like tomatoes or peppers) need soil temps above 60°F (15°C). Cool-season crops (spinach, kale) thrive in cooler weather. Pro tip: Use a soil thermometer to check readiness!
Are elevated planters worth the investment over in-ground gardening?
Absolutely—if you prioritize accessibility, soil control, or small spaces. They’re perfect for poor soil, back problems, or urban balconies. Plus, you avoid weeds and pests. Cost-wise, DIY kits start at $50–$100, while pre-made planters range from $100–$500+. Weigh your needs: elevated planters save time but may require more frequent watering.
How do I prevent my elevated planter from drying out too quickly?
Elevated planters dry faster due to exposure. Solution: Use moisture-retentive soil (mix in coconut coir or compost), mulch the top, and water deeply 2–3 times a week (adjust for heat). Self-watering planters or drip irrigation are game-changers. Avoid letting soil dry completely—most plants (especially herbs/veggies) need consistent moisture.
Can I convert an old wooden pallet or crate into an elevated planter?
Yes! Just follow these steps:
- Sand rough edges to prevent splinters.
- Line the bottom with hardware cloth (to block pests) and landscape fabric (to prevent soil loss).
- Drill drainage holes if none exist.
- Stain or seal the wood (if untreated) to extend its life.
Wrapping up and next steps
Elevated garden planters are a game-changer for small spaces, turning limited yards into lush, functional green havens. Whether you're a seasoned gardener or just starting out, these vertical solutions help you grow more with less—without sacrificing style or accessibility. 🌱
Ready to transform your space? Start small with a single planter or go big with a full vertical garden—your future plants (and your back!) will thank you. Grab your tools, get creative, and watch your compact yard bloom!
- Next step: Sketch your design, gather supplies, and plant with confidence!