
Landscaping
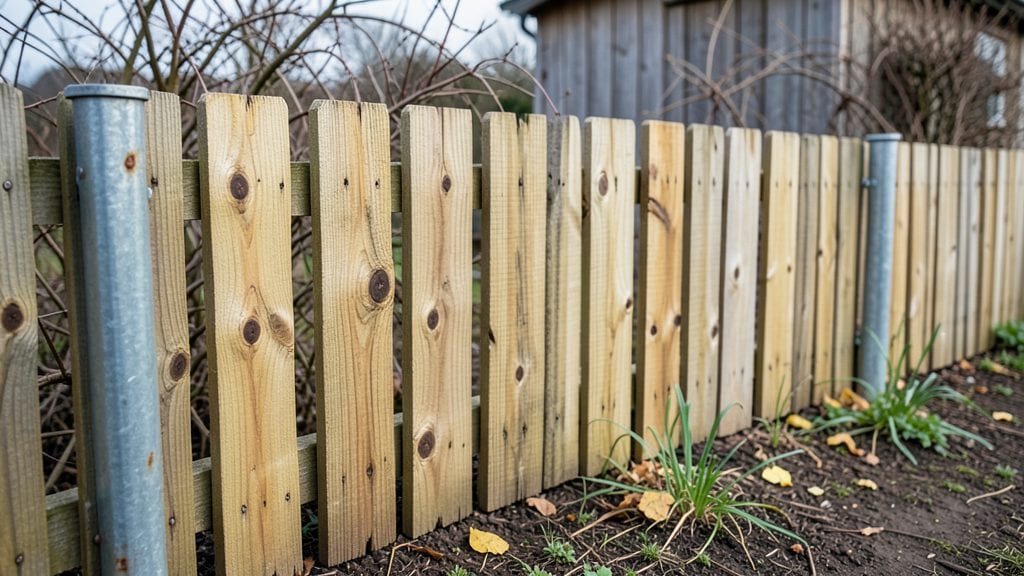
A homemade garden fence transforms your yard from overlooked to inviting with just a few weekends and some scrap wood. I built my first fence after years of watching neighbors admire my garden—only to peek through their fences and wish it were mine.
The charm isn’t just in the wood grain; it’s in the way sunlight filters through uneven planks, casting shifting shadows that make even a simple screen feel intentional.
You don’t need fancy tools or expensive materials—just 2x4s, screws, and a level to create a sturdy, rustic barrier that costs a fraction of store-bought options. My first attempt used reclaimed pallets, but cedar or pine work just as well for a cleaner look.
The best part? You can customize the height, spacing, and even add lattice for climbing roses or clematis to soften the lines over time.
By the time you’re done, you’ll have a privacy screen that’s uniquely yours—no two will look the same. The wood smells like summer after the first coat of stain, and the way it blends into your landscape makes your garden feel like a secret hideaway.
Plus, it’s a project that actually adds value, whether you’re prepping for resale or just enjoying your own backyard oasis.
Works for small urban gardens, sprawling rural plots, or anything in between. The only limit is your imagination—and maybe your neighbor’s green thumb envy.
📚 In This Guide
- What you need
- Instructions
- Tips and common mistakes
- Wrapping up and next steps
What you need
- ● Wooden posts: 4x4 or 6x6 pressure-treated lumber (quantity depends on fence length; ~1 post per 6–8 feet).
- ● Fence pickets or slats: 1x4 or 1x6 boards (cedar or pine for durability; ~10–12 boards per 8-foot section).
- ● Concrete: Quick-setting mix (for post anchors; ~5–10 lbs per post).
- ● Galvanized screws: 2.5–3 inch deck screws (for pickets) and 3–4 inch exterior screws (for posts; ~50–100 screws total).
- ○ Post caps (optional): Decorative or functional caps to protect post tops.
- ○ Landscape fabric (optional): For weed suppression at the base.
- ● Measuring tape and pencil.
- ● Circular saw or miter saw (for cutting wood).
- ● Drill/driver with screw bits.
- ● Level (2–4 foot) for straight installation.
- ● Post hole digger or auger (manual or powered).
- ● Wheelbarrow (for mixing concrete).
- ● Safety gear: gloves, goggles, and ear protection.
- ● Check local building codes for fence height/permit requirements.
- ● Mark fence layout with stakes and string for precision.
- ● Clear the area of rocks, debris, and overgrowth.
- ● Gather help for heavy lifting (or use a post setter tool).
Step-by-Step instructions for building a rustic wood privacy screen
Here’s how to create a sturdy, natural-looking fence using basic tools and locally sourced wood.
Measure and Mark Your Fence Layout
Start by measuring the area where your fence will go. Use a tape measure to mark the exact length along the ground with wooden stakes and string—this ensures straight lines even if your yard isn’t perfectly level. For a 4-foot-tall fence, mark the height at each stake so you’ll know where to cut your vertical posts. Double-check your measurements before driving stakes into the ground; mistakes here will throw off the entire project.
If you’re working with uneven terrain, adjust the post depth so the top of the fence stays level. I like to use a 4-foot level to verify height consistency every 6 feet along the line. This prevents a wobbly or uneven finish. Once your layout is marked, transfer the measurements to your wood pieces—cutting posts to 48 inches (4 feet) ensures uniformity.
Prepare and Install the Posts
Dig holes for your posts using a post hole digger or auger—aim for 12 inches deep for stability, especially if your fence will bear weight (like climbing plants). Place the first post in the hole and check for plumb (vertical alignment) with a level. If it’s crooked, adjust the hole or shim it with gravel until it stands straight. Once aligned, backfill the hole with dirt, tamping it down firmly to eliminate air pockets.
Repeat this process for all posts, spacing them 4 feet apart for a sturdy structure. For extra strength, I recommend using 4x4 pressure-treated lumber for posts—it resists rot and lasts longer. If you’re adding diagonal braces later, mark their placement now so you can pre-drill holes for screws. This step is critical; rushing here leads to a fence that sags over time.
Attach the Horizontal Rails
Cut your horizontal rails to fit between posts—36 inches for a 4-foot-tall fence (allowing for a 6-inch gap at the bottom for drainage and airflow). Use a circular saw to make clean cuts, and sand any rough edges to prevent splinters. Start at one end, aligning the rail 12 inches from the top of the post. Pre-drill holes to prevent wood from splitting, then secure with 3-inch exterior-grade deck screws.
Add a second rail 12 inches from the bottom of the top rail for extra stability. For a rustic look, leave small gaps between rails—this allows light and air to pass through while still providing privacy. If you’re using cedar or redwood, skip the pressure treatment; these woods naturally resist rot. Double-check that all rails are level before tightening screws—uneven rails create a wobbly fence.
Add Vertical Slats or Panels for Privacy
For a solid privacy screen, attach 1x6 vertical slats (spaced ½ inch apart) or pre-made 4x8-foot fence panels to the rails. If using slats, space them evenly and secure them with 2-inch screws into the rails. For a more rustic look, stagger the ends of the slats—this hides gaps and adds visual interest. If you’re using panels, pre-assemble them on the ground with screws or nails, then lift them into place between posts.
Leave a 6-inch gap between the bottom of the fence and the ground to prevent moisture buildup and allow airflow. This also makes it easier to mow underneath. If you’re adding lattice or trellis for climbing plants, attach it now to the vertical slats or panels. This step is where your fence’s character comes alive—whether you go for a tight, solid look or an open, airy design.
Reinforce and Finish for Longevity
Add 2x4 diagonal braces between posts for extra stability, especially if your fence will face wind or heavy snow. Cut braces to fit snugly and secure them with 3-inch screws into the posts and rails. If you’re using untreated wood, apply a wood sealant or stain to protect it from weather damage. For a natural finish, I recommend a clear polyurethane—it lets the wood’s grain show while shielding it from rain and sun.
Finally, add corner braces at each intersection to reinforce the structure. If your fence will support weight (like a trellis with heavy vines), consider adding a third horizontal rail midway up for extra support. Step back and inspect your work—adjust any uneven sections now before the finish dries. With proper reinforcement, your fence will last for years with minimal maintenance.
Tips & tricks for building a rustic wood privacy screen
A few key strategies will help you avoid common mistakes and create a fence that looks beautiful and stands the test of time.
Precision in Step 1 Pays Off: Those 6-foot checks with your 4-foot level aren't just about appearance—they're structural insurance. I've seen fences that looked straight at first glance but had subtle dips that caused sagging over time. Mark your layout with spray paint first, then double-check with your level before driving stakes. This small extra step prevents hours of rework later.
Post Installation Secrets: The 12-inch deep holes and 4-foot spacing in Step 2 might seem like overkill, but they're what keeps your fence from leaning or shifting. I learned this the hard way when a storm blew over a fence I'd installed with shallower holes. For extra stability, especially in windy areas, consider adding a third post at each corner. The extra reinforcement costs little but prevents major headaches.
Rail Alignment Matters: When attaching your 36-inch rails in Step 3, use a speed square to verify they're perfectly horizontal before securing. I've seen fences where rails were slightly off, creating a wavy appearance. For a truly rustic look, leave those small gaps between rails—they allow air circulation while maintaining privacy. Just be consistent with your spacing so it doesn't look haphazard.
Finishing Touches for Longevity: That clear polyurethane in Step 5 isn't just about looks—it's your fence's first line of defense against weather damage. Apply it in thin coats, letting each dry completely before adding another. I've seen people rush this step and end up with a sticky, uneven finish that traps moisture against the wood. Two thin coats will protect better than one thick one and give you that beautiful natural wood appearance.
Pro Tips for Homemade Garden Fence
- A few key strategies will help you avoid common mistakes and create a fence that looks beautiful and stands the test of time.
- Precision in Step 1 Pays Off: Those 6-foot checks with your 4-foot level aren't just about appearance—they're structural insurance.
- Post Installation Secrets: The 12-inch deep holes and 4-foot spacing in Step 2 might seem like overkill, but they're what keeps your fence from leaning or shifting.
Frequently asked questions
Got questions about building your own garden fence? You’re not alone! Here are some of the most common concerns—and their practical solutions—to help you get started with confidence.
What’s the best wood to use for a rustic garden fence?
For a natural, long-lasting fence, cedar or redwood are top picks—they resist rot and insects. If you’re on a budget, pine works too, but treat it with a wood preservative. Avoid pressure-treated wood near veggie gardens (chemicals can leach).
How long does it take to build a homemade garden fence?
That depends! A simple 6-foot fence for a small yard (20–30 feet long) can take 1–2 weekends with two people. Larger projects or intricate designs (like lattice tops) may need 3–4 weekends. Plan for drying time if staining/painting.
Do I need special tools, or can I use basic ones?
You can DIY with basics like a circular saw, drill, hammer, and level. Rent a post hole digger if digging manually isn’t your thing. For cleaner cuts, a miter saw helps with angles. Pro tip: Borrow tools from neighbors or rent them to save cash!
Can I build a fence without digging post holes?
Yes! Use concrete footings (pre-mixed bags) or gravel bases for stability. For temporary fences, T-posts or metal stakes work—just secure them tightly. Just know these methods may not last as long as deep-set posts in windy areas.
How do I prevent my wood fence from rotting or getting bugs?
Start with dry, untreated wood (or pre-treated lumber). Seal cuts with wood glue or caulk, then apply a waterproof stain or linseed oil annually. Space boards 1/4-inch apart for airflow. For extra defense, add borate treatments to deter termites.
Is a homemade fence cheaper than buying one?
A DIY fence costs $5–$15 per linear foot (materials + labor), while pre-built fences can run $20–$50+ per foot. You’ll save on installation fees, but factor in time and tools. Pro tip: Buy wood in bulk or during sales to cut costs further!
Wrapping up and next steps
Building a homemade garden fence from natural wood isn’t just a practical project—it’s a chance to add rustic charm and privacy to your outdoor space with your own hands. 🌿 Whether you’re using cedar, pine, or reclaimed wood, the key is patience, precision, and a little creativity.
You’ve got everything you need to craft a fence that blends seamlessly with your garden’s natural beauty.
Now that you’re armed with tips, tools, and answers to common questions, it’s time to roll up those sleeves and get building! Start small—maybe a section for a cozy corner or a border for your flower beds—and let your project grow as your confidence does. Happy crafting!