
Tools
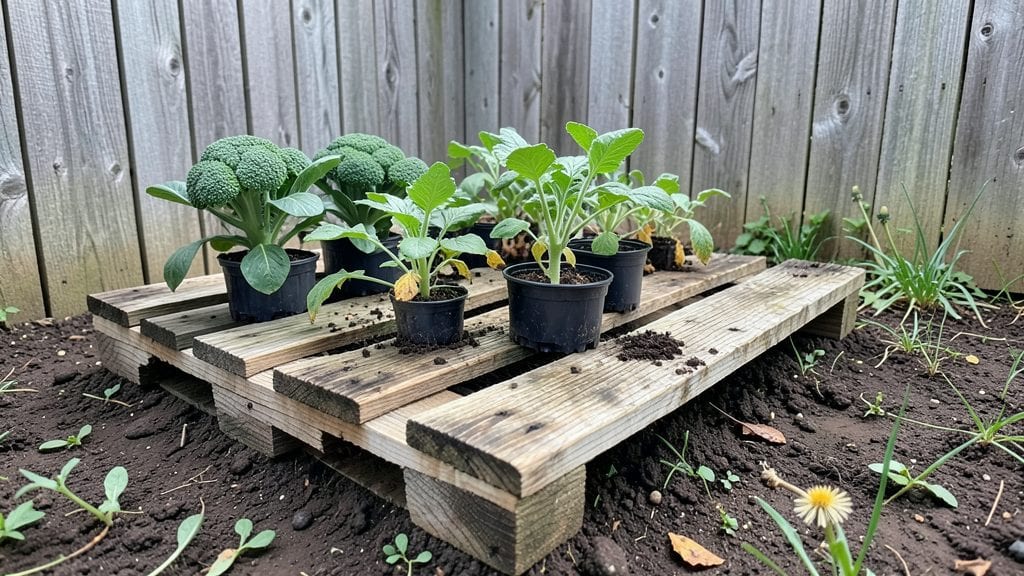
A pallet veg garden turns scrap wood into a thriving food source that fits anywhere. I built mine after realizing my tiny balcony couldn’t handle traditional raised beds—now I grow enough tomatoes and greens for summer salads without taking up yard space.
The best part? You’re not just gardening; you’re upcycling materials that would otherwise end up in a landfill.
Start with clean, heat-treated pallets—no chemicals, no fuss. Cut them into manageable sections (2’x4’ works great), line the bottom with hardware cloth to keep critters out, and fill with a mix of compost and garden soil.
My setup costs about $20 for materials, and I’ve grown everything from bush beans to dwarf peppers in the same space. The key is stacking vertically: three pallets side-by-side give you the growing area of a 6’x2’ bed without the footprint.
By midsummer, you’ll be harvesting crisp lettuce, sweet radishes, and enough cherry tomatoes to share with neighbors. The plants stay healthy because pallets drain well, and you avoid the soil compaction problems of in-ground gardens.
Plus, the rustic look adds charm—my garden doubles as a conversation piece. Ready to turn trash into treasure? Let’s get those pallets prepped.
This works for apartments, patios, or even urban backyards. Add a drip irrigation system to save time, and choose fast-growing crops for quick wins. The only limit is your imagination—and how many pallets you can scavenge. Happy growing!
📚 In This Guide
- What you need
- Instructions
- Tips and common mistakes
- Wrapping up and next steps
What you need
- ● Wooden pallets (2–4, depending on garden size): Untreated or heat-treated (avoid chemically treated pallets—safety first!)
- ● Check for cracks or splinters; sand rough edges if needed.
- ● Drill (cordless or hand drill) + bits (1/4" for drainage, 3/8" for planting holes).
- ● Screwdriver (for assembling pallets if needed).
- ○ Staple gun (optional, for securing landscape fabric).
- ● Landscape fabric (1–2 ft wide, 5–10 ft long) to block weeds.
- ● Potting soil (1–2 cubic feet per pallet, depending on depth).
- ● Compost (1–2 bags, for nutrient-rich soil).
- ● Garden twine or zip ties (to secure fabric or pallets together).
- ● Watering can or hose with spray nozzle (gentle watering = happy plants!).
- ● Wood stain or paint (non-toxic, to extend pallet life).
- ● Plant markers (popsicle sticks or labels to track veggies).
- ● Drip irrigation kit (for hands-free watering).
- ● Pallet feet or casters (if you want a mobile garden!).
- ● Seedlings or seeds (herbs, lettuce, tomatoes, or peppers—fast-growing picks for beginners!).
Step-by-Step instructions for building your pallet veg garden
Here's how to transform a simple wooden pallet into a productive growing space with minimal effort.
Prep the Pallet for Planting
Start by cleaning the pallet thoroughly with a stiff brush and mild soap to remove dust, debris, or chemical residues. If the wood has splinters or rough edges, sand them down lightly—this prevents injuries and makes handling easier. I always check for nails or staples first; remove any protruding hardware with pliers to avoid damaging hands or garden tools.
Once clean, line the bottom of each pallet section with landscape fabric to prevent weeds from creeping up through the gaps. Secure it with small staples or rocks to keep it in place. This step is crucial because weeds compete with your veggies for nutrients and water, especially in shallow containers like pallet gardens.
Fill with Quality Growing Medium
Fill each pallet section with a mix of 40% potting soil, 30% compost, and 30% perlite or vermiculite to ensure proper drainage while retaining moisture. I like to mix these in a wheelbarrow first so the components are evenly distributed. Avoid garden soil—it compacts too easily and can harbor pests.
Leave about 1 inch of space at the top of each section to prevent overflow when watering. Tap the sides of the pallet gently to settle the mix, but don’t pack it down too firmly. The goal is a light, airy texture that roots can easily penetrate. This also prevents water from pooling at the bottom, which can lead to root rot.
Plant Vegetables for Maximum Yield
Choose fast-growing, shallow-rooted vegetables like lettuce, radishes, green onions, or bush beans for your pallet garden. Space them according to their mature size—typically 3-6 inches apart for leafy greens and 4-8 inches apart for root crops. I like to plant in a staggered pattern to maximize space and airflow between plants.
Water the seeds or seedlings immediately after planting to help settle the soil around the roots. Keep the growing medium consistently moist but not soggy for the first 2 weeks, checking daily. If the top inch feels dry, it’s time to water again. Overwatering here can lead to fungal issues, so let excess water drain completely between sessions.
Maintain Water and Nutrients
Water your pallet garden in the early morning to reduce evaporation and prevent fungal diseases. Use a watering can with a gentle spray nozzle to avoid disturbing the soil or washing seeds away. Since pallet gardens dry out faster than in-ground beds, I water every 2-3 days during hot weather, adjusting for rain.
Feed your plants with a balanced, water-soluble fertilizer every 2-3 weeks once they’re established. I mix 1 tablespoon of fertilizer per gallon of water and apply it directly to the soil. Avoid over-fertilizing—pallets have limited space, and excess salts can harm roots. Watch for yellowing leaves or stunted growth, which often signal nutrient deficiencies or overfeeding.
Protect and Harvest for Success
Shield your pallet garden from strong winds or heavy rain by placing it in a sheltered spot, like against a fence or under a small awning. If pests like aphids or slugs appear, treat them with neem oil or diatomaceous earth—both are safe for edible plants when used correctly. I check for pests weekly, especially in the evenings when they’re most active.
Harvest your vegetables as soon as they’re ready to encourage continuous production. For leafy greens, snip outer leaves when they reach 3-4 inches tall. For radishes or green onions, pull them when they reach their mature size. This keeps the plants productive and prevents overcrowding. With proper care, a single pallet can yield enough veggies for 4 servings throughout the growing season.
Tips & tricks for building your pallet veg garden
Transforming a wooden pallet into a thriving garden is easier than you think—here’s how to avoid common pitfalls and maximize your harvest.
Prep Like a Pro: When cleaning your pallet in Step 1, pay special attention to the gaps between slats. Use a wire brush to scrub out stubborn dirt, and don’t skip the sanding step—rough edges can tear landscape fabric during installation. I’ve found that treating pallets with a food-safe sealant after cleaning prevents moisture absorption, which can lead to rot over time. This extra step ensures your garden stays sturdy and safe for edibles.
Mixing Secrets for Step 2: The 40-30-30 ratio of potting soil, compost, and perlite is perfect, but don’t just eyeball it. Use separate containers to measure each component by volume—this prevents uneven distribution that could lead to drainage issues. For added fertility, I like to fold in a handful of worm castings into the compost portion. This boosts microbial activity without requiring extra fertilizer later.
Planting Strategy for Step 3: When arranging your seedlings, think vertically as well as horizontally. For leafy greens like lettuce, plant taller varieties in the back and shorter ones in front to maximize sunlight exposure. The staggered pattern mentioned in the instructions works best when you offset rows by 3-4 inches—this creates a natural trellis effect for vining plants like bush beans, giving them something to climb without needing additional support.
Watering Wisdom for Steps 3 and 4: The early morning watering routine in Step 4 is ideal, but timing matters just as much as technique. Use a moisture meter to check soil depth—aim for consistent moisture at 1-2 inches down, not just at the surface. During extreme heat, I’ve found that adding a 1-inch layer of straw mulch on top of the soil helps retain moisture and reduces watering frequency by nearly half. Just be sure to keep the mulch an inch away from plant stems to prevent rot.
Pro Tips for Pallet Veg Garden
- Transforming a wooden pallet into a thriving garden is easier than you think—here’s how to avoid common pitfalls and maximize your harvest.
- Prep Like a Pro: When cleaning your pallet in Step 1, pay special attention to the gaps between slats.
- Mixing Secrets for Step 2: The 40-30-30 ratio of potting soil, compost, and perlite is perfect, but don’t just eyeball it.
Frequently asked questions
Got questions about transforming pallets into a thriving veg garden? Here are some of the most common ones—and their answers!
How do I prevent my pallet garden from rotting?
Pallets can degrade quickly if exposed to moisture. Line the bottom with landscape fabric to block soil loss and improve drainage, and paint or seal the wood with a non-toxic, waterproof sealant (like milk paint) before planting. Avoid placing pallets directly on bare soil—elevate them with bricks or cinder blocks for airflow.
When is the best time to start a pallet veg garden?
Timing depends on your climate! In cool regions, start in early spring (after the last frost) or late summer for a fall harvest. In warmer zones, plant in late winter or early spring. Fast-growing crops like lettuce and radishes can go in as soon as the soil is workable—just protect them from frost with row covers.
Can I use any pallet, or are there safety risks?
Not all pallets are garden-safe! Avoid chemically treated pallets (marked "MB" for methyl bromide) or those stamped "HT" (heat-treated). Opt for HT-stamped, untreated wood pallets (like those from local farms or sawmills). Sand rough edges to prevent splinters, and remove nails/screws or cover them with wire mesh.
What if my pallet garden doesn’t have good drainage?
Poor drainage can drown roots and invite pests. Drill holes in the bottom of the pallet slats (or skip the bottom board entirely) to let excess water escape. Add a 1–2 inch layer of gravel or broken pottery at the base, then top with a mix of potting soil and compost (60/40 ratio) for better aeration.
Are there veggies that grow better in pallet gardens than others?
Pallet gardens excel with shallow-rooted, fast-growing crops like lettuce, spinach, radishes, green onions, and bush beans. Avoid heavy feeders (e.g., tomatoes, squash) unless you’re committed to frequent fertilizing. Herbs like basil and thyme also thrive in the limited space—just ensure the pallet gets 6+ hours of sunlight daily.
Wrapping up and next steps
Creating a pallet veg garden is a brilliant way to grow fresh, organic produce without breaking the bank or taking up much space! 🌱 Whether you're a seasoned gardener or just starting out, this upcycled project proves that sustainability and productivity go hand in hand.
With minimal effort and creativity, you can transform old pallets into a thriving mini-farm right in your backyard—or even on a balcony!
Ready to dive in? Start small—pick one or two easy-to-grow veggies like lettuce, herbs, or cherry tomatoes—and let your green thumb shine. Happy planting, and may your harvest be plentiful! 🌿