
Tools
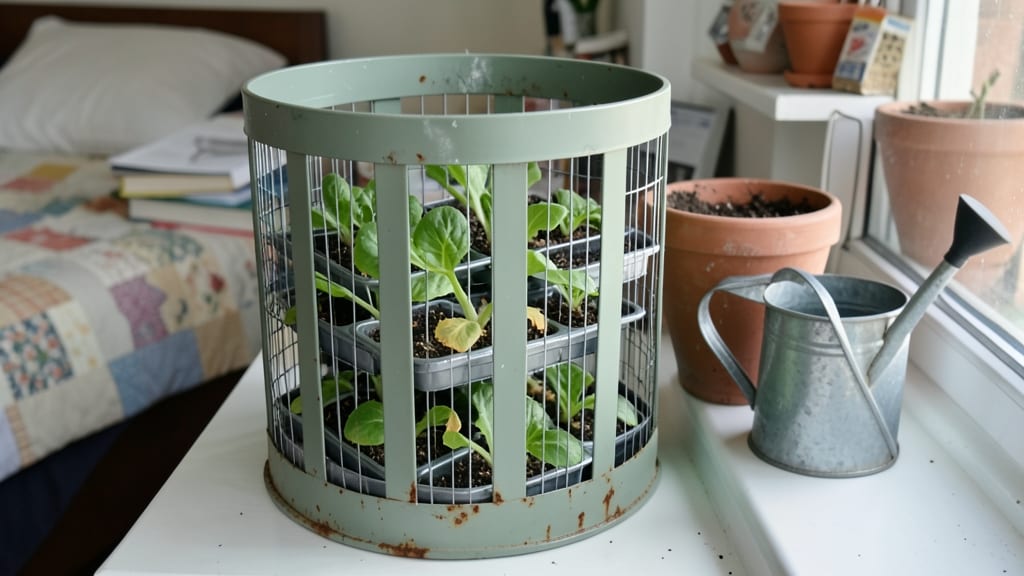
A revolving garden tower turns tight spaces into productive growing zones without sacrificing sunlight or access. I first spotted one in a Brooklyn rooftop garden where tomatoes, peppers, and herbs thrived in just 3 square feet—something impossible in my old raised beds.
The tower’s rotating design means you reach every plant without bending, and the vertical space multiplies your harvest potential.
The real game-changer is how it solves common gardening headaches. No more struggling to reach back plants or watching soil compact under weight. Most towers use lightweight, weather-resistant materials like powder-coated steel or recycled plastic, and the rotation mechanism (often a simple crank or motor) lasts years.
You’ll also save water—plants in towers dry out slower because they’re sheltered from wind.
Imagine snipping fresh basil for dinner from a tower beside your patio or harvesting cherry tomatoes that ripen in full view. The best part? You can grow everything from leafy greens to compact fruit bushes, and the tower’s mobility lets you move it for seasonal sunlight needs.
Perfect for balconies, urban yards, or even indoor sunrooms with grow lights.
Here’s the kicker: maintenance is minimal. Just rotate weekly to keep plants even, water from the top (a drip system works best), and fertilize through the soil. My tower’s herbs stay lush all summer with just 10 minutes of care a week—far less than my old in-ground garden.
Ready to reclaim your space and grow more?
📚 In This Guide
- What you need
- Instructions
- Tips and common mistakes
- Wrapping up and next steps
What you need
- ● PVC pipes or wooden dowels: 10–12 pieces, 4–6 feet long (depending on tower height). Diameter: 2–4 inches for stability.
- ● PVC connectors or wooden joints: 10–12 pieces (slip-fit or screw-type for durability).
- ● Garden fabric or burlap: 1–2 yards (for planting pockets or lining).
- ● Potting soil: 5–10 bags (lightweight, well-draining mix).
- ● Plants: Herbs, leafy greens, or small veggies (succulents or strawberries work great!).
- ○ Waterproof sealant (optional but recommended for outdoor use).
- ● Measuring tape & pencil (for precise cuts).
- ● Hacksaw or miter box (to cut pipes/dowels cleanly).
- ● Drill & screws (if using wooden joints).
- ● Level (to ensure your tower stands straight!).
- ● Spray bottle or drip irrigation kit (for watering convenience).
- ○ Paint or stain (optional, for a polished look).
Instructions for building your space-saving vertical harvest tower
This tower transforms cramped spaces into a thriving garden—no green thumb required!
Assemble the Tower Structure
Start by connecting the base ring to the first tier using the provided bolts and washers. I always tighten them just enough to hold the pieces together—too snug and you’ll crack the plastic later when expanding. Place the tower on a stable, level surface, like a patio or balcony. The base should sit flat, so check for wobbling before moving forward.
Next, attach each additional tier one by one, following the manufacturer’s diagram. I like to work clockwise for consistency, but the order doesn’t matter as long as you align the slots properly. Once all tiers are stacked, give the structure a gentle shake—if it feels unstable, double-check the bolts. A wobbly tower will stress your plants and make harvesting difficult.
Prepare the Growing Medium
Fill each tier with the 4 cubic feet of potting mix you’ve mixed with 1 cup of slow-release fertilizer. I recommend blending the fertilizer into the top 2 inches of soil in each tier—this ensures roots get an immediate nutrient boost without burning. Press the mix lightly with your hands to eliminate air pockets, but don’t compact it too tightly. Roots need room to breathe!
For the 1 gallon of coconut coir, soak it in water for 10 minutes before adding it to the top of each tier. This helps retain moisture while allowing excess water to drain. The coir acts like a natural mulch, keeping the soil evenly damp without waterlogging. If your climate is particularly dry, add an extra ½ inch of coir to the top tiers—they dry out fastest.
Plant Your Seeds or Starters
For seeds, follow the packet’s depth guidelines—usually twice the seed’s diameter. I like to use the 1 packet of lettuce seeds and 1 packet of basil seeds first, as they germinate quickly and give visible progress. Space seeds 1 inch apart in each pocket, then cover lightly with additional potting mix. Mist the surface with water until it’s evenly moist but not soggy.
If using transplants, gently remove them from their containers and place them in the pockets, ensuring the soil line sits ½ inch below the tier’s edge. Water immediately after planting to settle the roots. I’ve found that herbs like thyme and parsley thrive in the tower’s compact space, while leafy greens like spinach and kale grow best in the lower tiers where they get slightly more shade from upper plants.
☀️ Step 4: Position for Optimal Light and Water
Place your tower in a spot with at least 6 hours of direct sunlight daily. South- or west-facing balconies are ideal, but if you’re limited to shade, supplement with a grow light placed 6 inches above the top tier. Rotate the tower ¼ turn every 2-3 days so all plants get even exposure—you’ll notice leaves leaning toward the light if they’re not getting balanced growth.
Water from the top tier downward, using 1 gallon of water every 2-3 days during dry spells. The revolving feature helps distribute moisture evenly, but check the bottom tiers first—they often stay damp longer. If water runs straight through without soaking in, your potting mix may be too dense. Add a little more coconut coir to improve absorption.
⏰ Step 5: Maintain and Harvest for Continuous Yields
Rotate the tower once weekly to keep plants growing upright and prevent them from shading each other. Harvest leafy greens like lettuce by cutting outer leaves when they reach 3-4 inches tall, leaving the inner growth to keep producing. For herbs, snip stems just above a set of leaves to encourage bushier growth.
After each harvest, add a ¼ cup of compost to the top tier and mix it into the soil. This replenishes nutrients and keeps your tower productive for months. If you notice pests like aphids, spray with neem oil mixed with water (1 tablespoon per quart) and reapply every 3-4 days until they’re gone. A healthy tower means fewer pest problems!
Tips & tricks for perfect revolving garden tower assembly
Building your vertical harvest tower is easier than you think—these game-changing tips will help you avoid common pitfalls and create a thriving garden system that actually works!
Assembly Stability: When attaching the base ring to the first tier in Step 1, use a small level to ensure it’s perfectly flat before adding more tiers. I’ve found that even a slight tilt can cause water drainage issues later, especially in the bottom tiers where moisture collects. Take your time with the bolts—finger-tight is enough to hold everything together without over-torquing.
Soil Preparation Secret: In Step 2, after mixing your 4 cubic feet of potting mix with 1 cup of slow-release fertilizer, I recommend adding a handful of perlite to each tier. This improves drainage while maintaining moisture retention—critical for the compact growing space. The perlite also prevents that dreaded "soggy bottom" effect that can rot roots in dense planting systems.
Light Rotation Strategy: For Step 4’s 6-hour sunlight requirement, I’ve discovered that rotating your tower every 2-3 days isn’t just about even growth—it also helps prevent fungal issues. The slight movement disrupts potential mold spores that might settle on one side. Plus, you’ll notice your plants develop a natural "zigzag" growth pattern that actually makes them stronger against wind.
Harvesting Hack: When harvesting leafy greens in Step 5, use clean, sharp scissors instead of your hands. This prevents crushing stems and spreading disease between plants. I also recommend harvesting in the morning when plants are fully hydrated—you’ll get cleaner cuts and less stress on the remaining foliage.
Pro Tips for Revolving Garden Tower
- Building your vertical harvest tower is easier than you think—these game-changing tips will help you avoid common pitfalls and create a thriving garden system that actually works!
- Assembly Stability: When attaching the base ring to the first tier in Step 1, use a small level to ensure it’s perfectly flat before adding more tiers.
- Soil Preparation Secret: In Step 2, after mixing your 4 cubic feet of potting mix with 1 cup of slow-release fertilizer, I recommend adding a handful of perlite to each tier.
Frequently asked questions
Got questions about revolving garden towers? You’re not alone! Here are some of the most common queries—and answers—to help you get started with confidence.
How much space does a revolving garden tower actually save?
A standard tower (like the 4’ x 4’ models) replaces up to 10 square feet of garden space while growing the same yield vertically. Perfect for balconies, patios, or small yards! For example, a tower can fit where a single raised bed would struggle—ideal for herbs, greens, and strawberries.
How long does it take for plants to grow in a revolving tower?
Growth timelines mirror traditional gardening, but rotation helps speed things up by ensuring even sunlight exposure. Leafy greens (like lettuce or spinach) mature in 3–4 weeks, while herbs (basil, parsley) take 6–8 weeks. Tomatoes and peppers thrive too—just expect 8–12 weeks to harvest!
Are revolving towers worth the investment compared to regular planters?
Yes—if you prioritize space efficiency and yield. A tower costs $150–$300 (vs. $50–$150 for a basic planter), but it grows 3–5x more plants in the same footprint. Plus, the rotating feature reduces pest issues and improves air circulation. Pro tip: Start with a small tower for herbs or greens to test the concept before committing to larger models!
What’s the easiest way to troubleshoot common issues like wilting or mold?
Most problems stem from overwatering or poor drainage. Here’s a quick fix guide:
Wilting leaves? Check the reservoir—overwatering suffocates roots. Let the top inch dry between waterings.
Mold or mildew? Improve airflow by rotating the tower daily and pruning crowded plants. A splash of hydrogen peroxide (1 tsp/gallon) can also help.
Pests? Introduce beneficial insects (like ladybugs) or spray neem oil. The tower’s rotation deters many bugs naturally!
Can I grow vegetables and flowers in the same tower?
Companion planting works great in towers—just pair wisely. For example:
Vegetables
Best Flower Companions
Tomatoes
Marigolds (repel pests) or nasturtiums (trap aphids)
Peppers
Basil (improves flavor) or sunflowers (shade for roots)
Leafy greens
Alyssum (attracts pollinators) or calendula (deters pests)
Pro tip: Avoid overcrowding—stick to 1–2 types of veggies per level to maximize airflow and sunlight.
Wrapping up and next steps
The revolving garden tower is a game-changer for urban gardeners and small-space enthusiasts—turning limited real estate into a thriving, low-maintenance harvest system. 🌱 With its vertical design, you’ll enjoy fresh herbs, veggies, and flowers year-round while saving water, space, and effort.
Whether you’re a beginner or a seasoned green thumb, this innovative tool makes gardening accessible and rewarding.
Ready to grow your own food? Start by sketching your design, gathering supplies, and assembling your tower—then watch your garden spin into success! 🌿